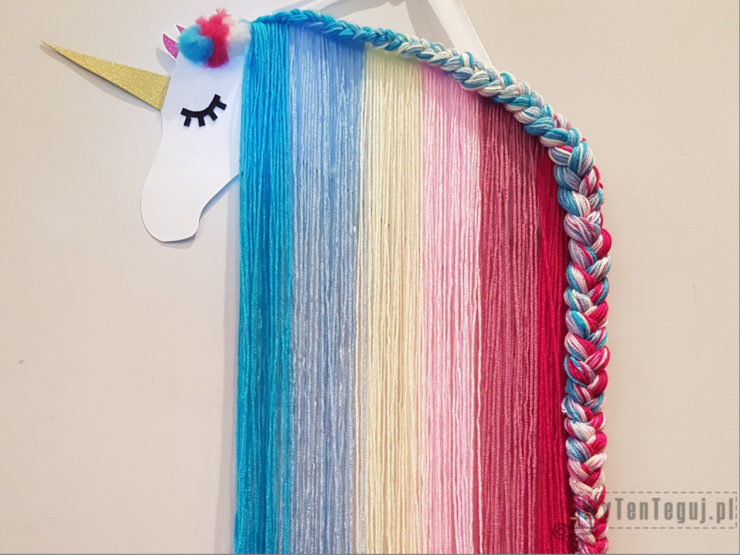
Unicorn bow holder not only looks wonderful but can also have practical function as hair clip holder.
At the beginning I have to warn you that the making this unicorn is multi-stage and labor-intensive. However, the effect is worth every minute of work.
Supplies
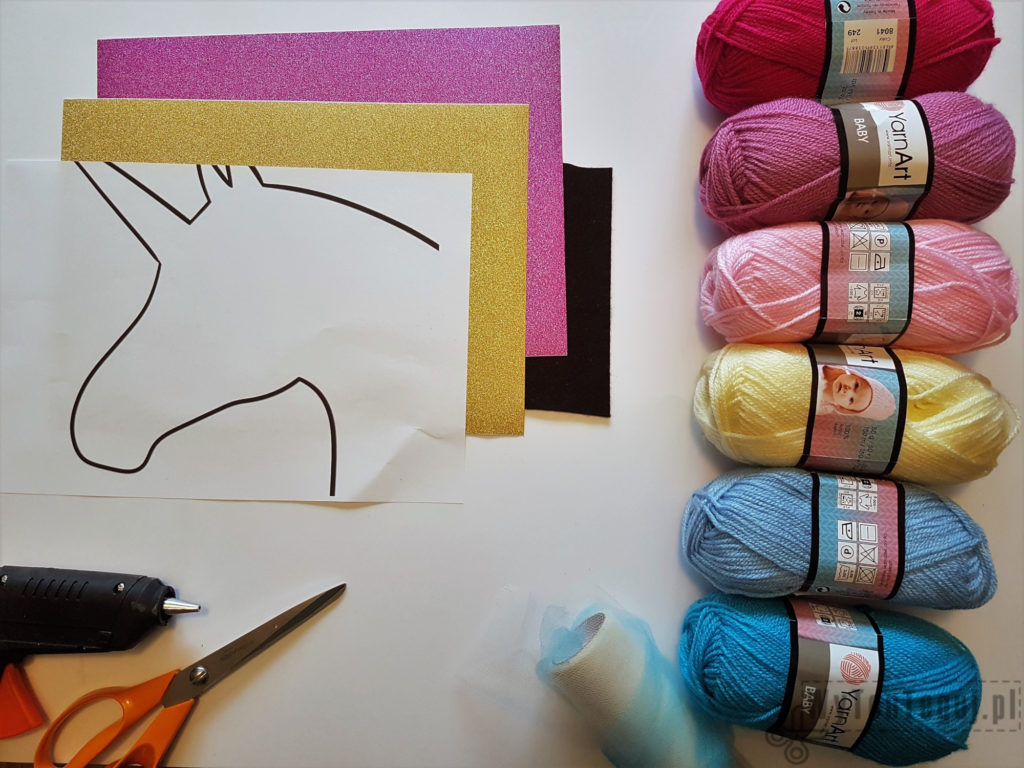
- White cardboard
- Glitter paper gold and pink – for the horn and ears
- Black felt – for the eye
- Yarn in several colors
- Tulle for pompoms (optional, because instead of pompoms you can use a bow, flower or other decoration that will suite your unicorn)
- Template of a unicorn’s head
- Glue, hot glue, scissors, pencil, scoop
Making unicorn’s head
I downloaded the unicorn’s head template from here and created a printable template available for download below.
The unicorn on the template has incomplete horn and ears, but I wanted the maximum head size out of A4 format.
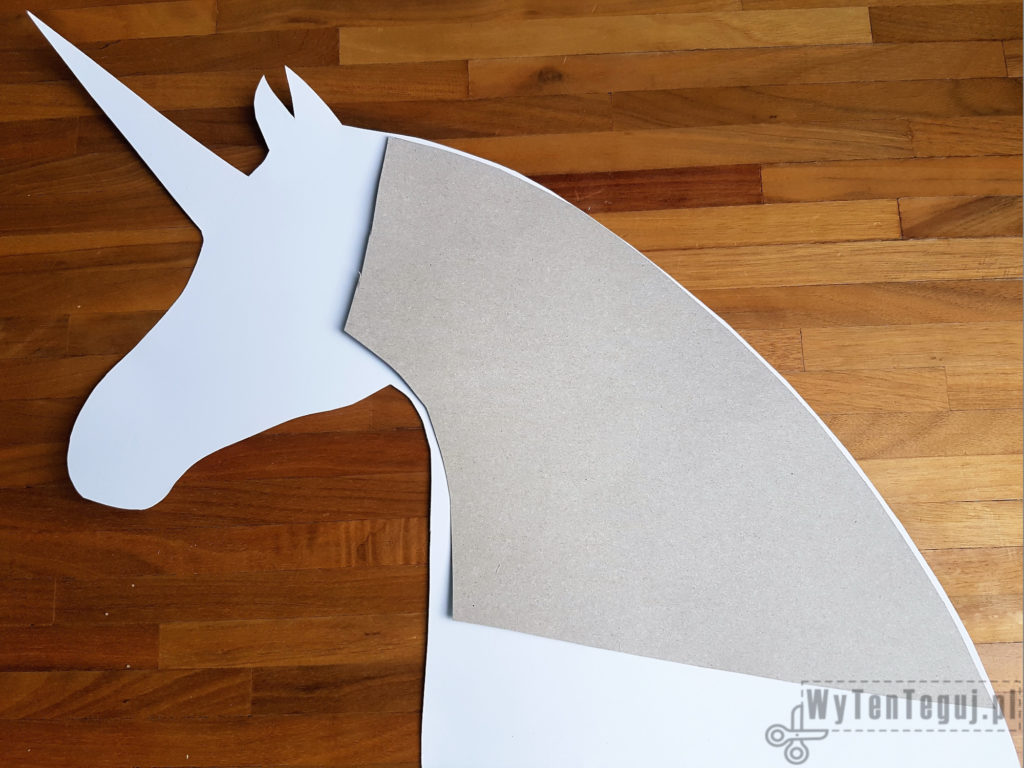
Fold the carton so that the head is stiffer and draw a pattern on it, completing the horn and ears.
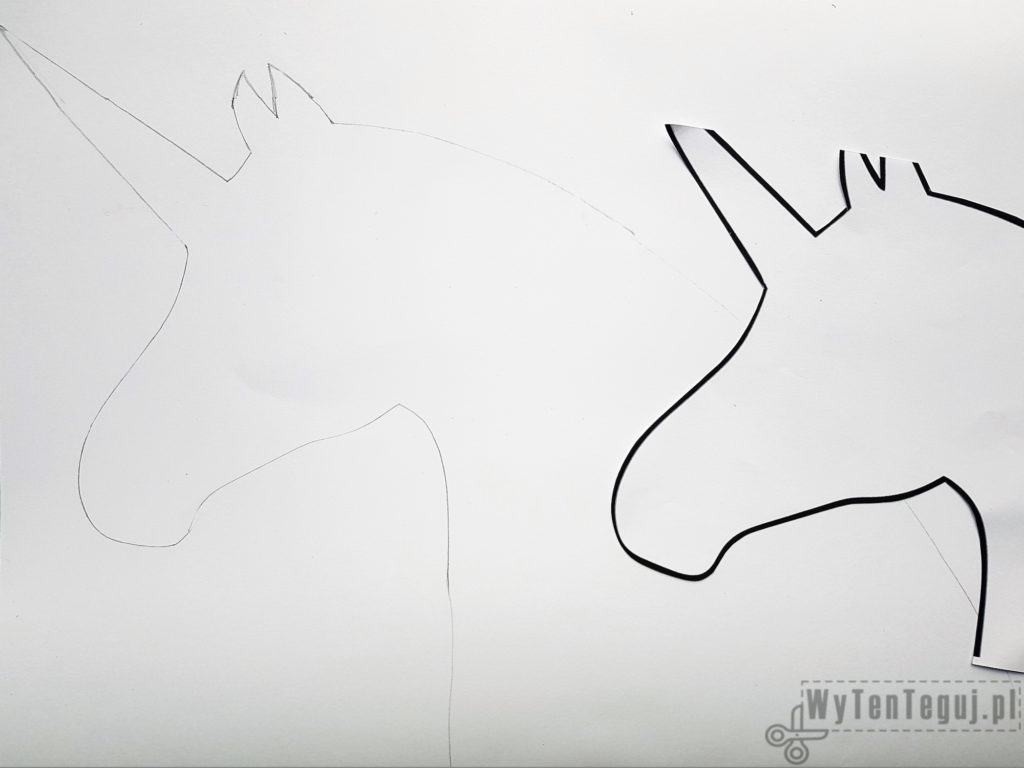
Then cut out the head paying attention that both parts are even.
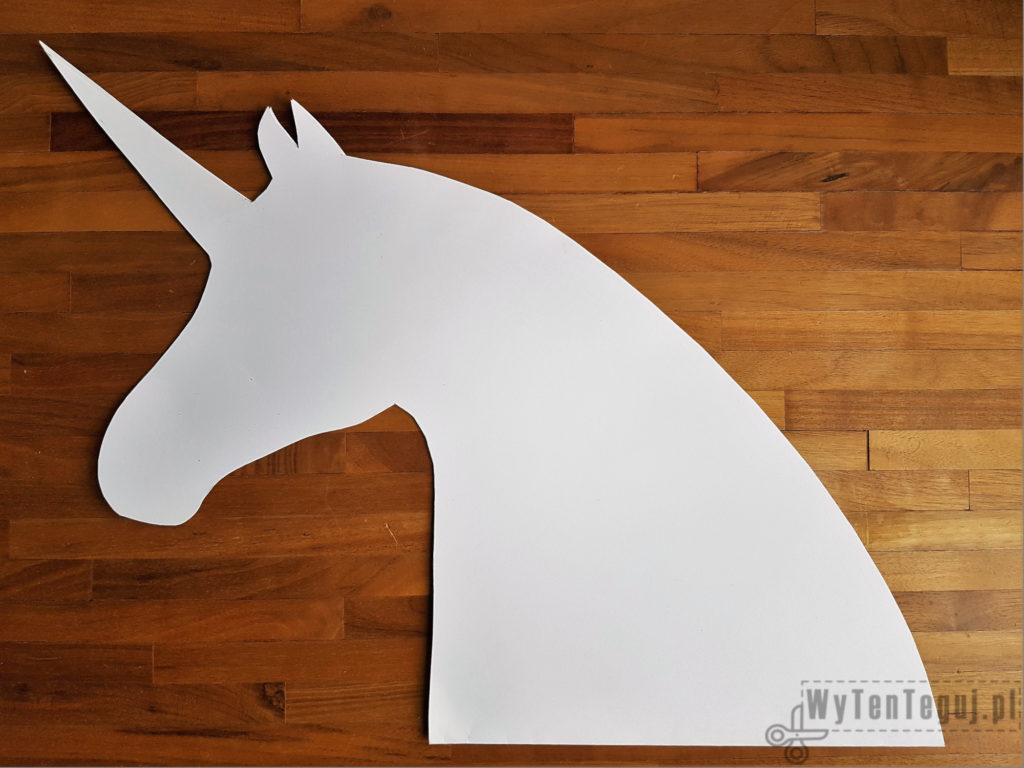
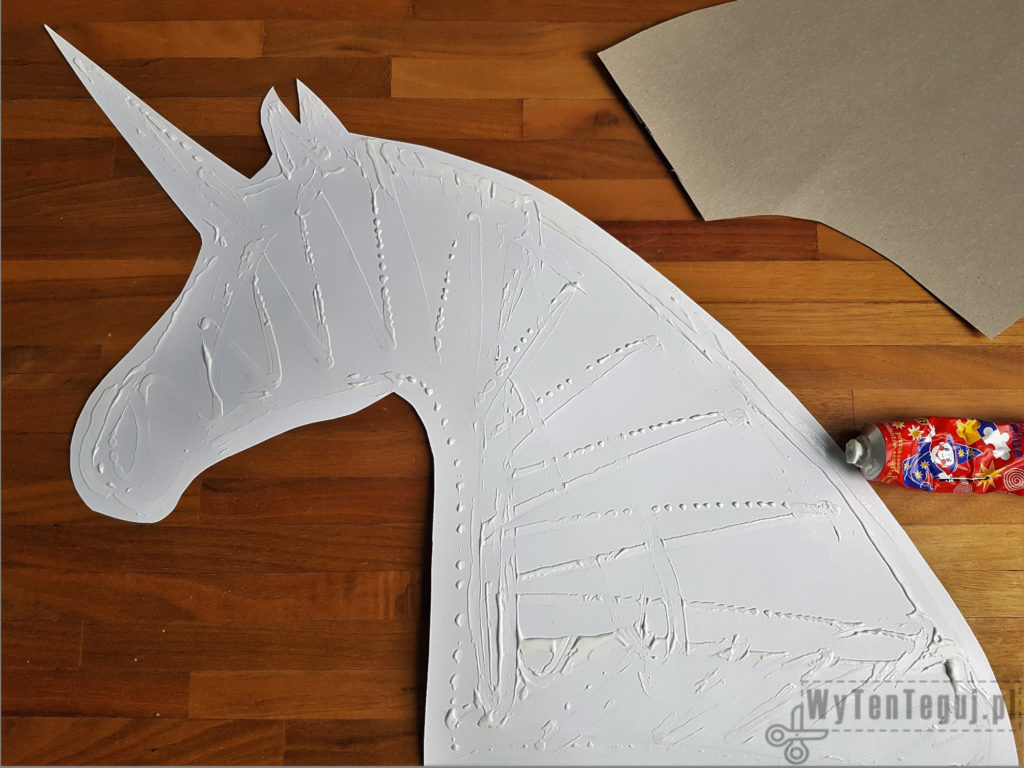
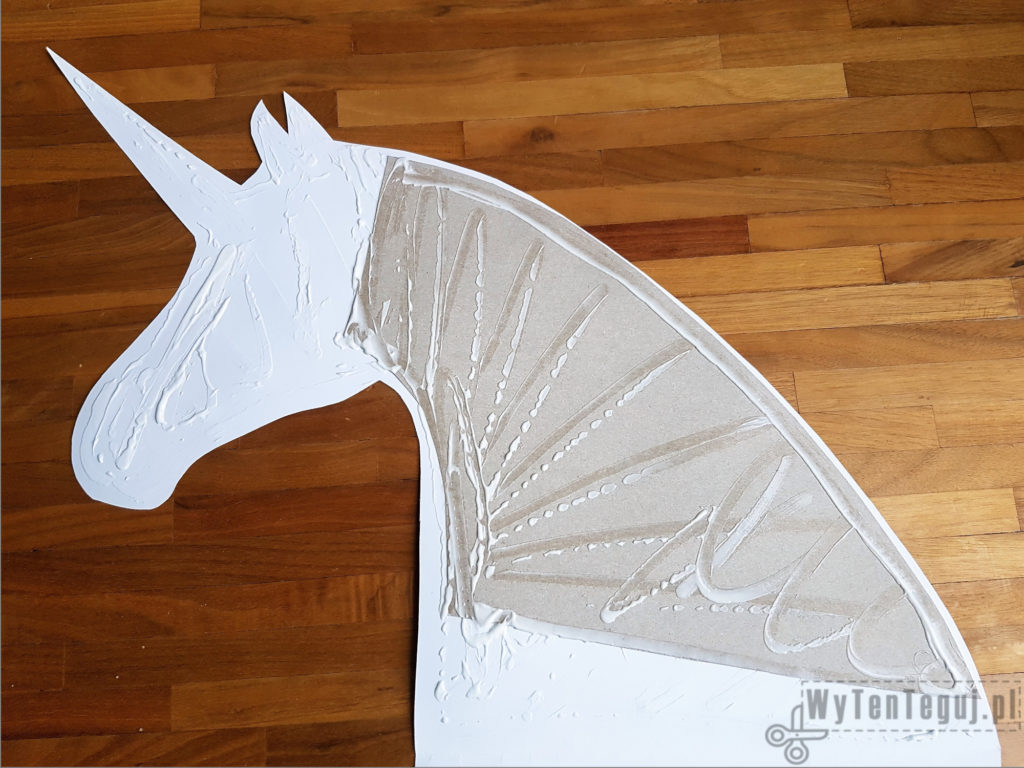
The next phase is gluing and stiffening the head. To do so cut additional piece of neck from stiff cardboard and glue all parts together. Then leasve to dry.
Making unicorn’s mane
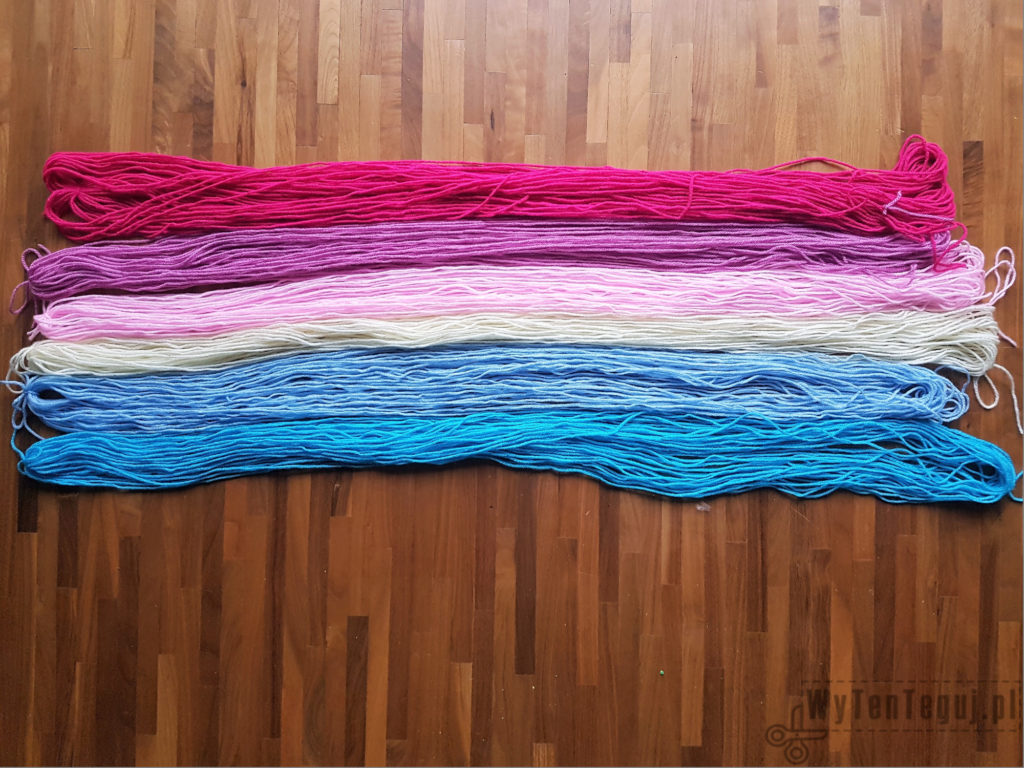
Making the unicorn’s mane you should start with the preparation of the hair/yarn. Instead of measuring each thread separately, it’s worth using something that you can wind your hair on. I used 2 stools and spaced them at a distance of 90 cm.
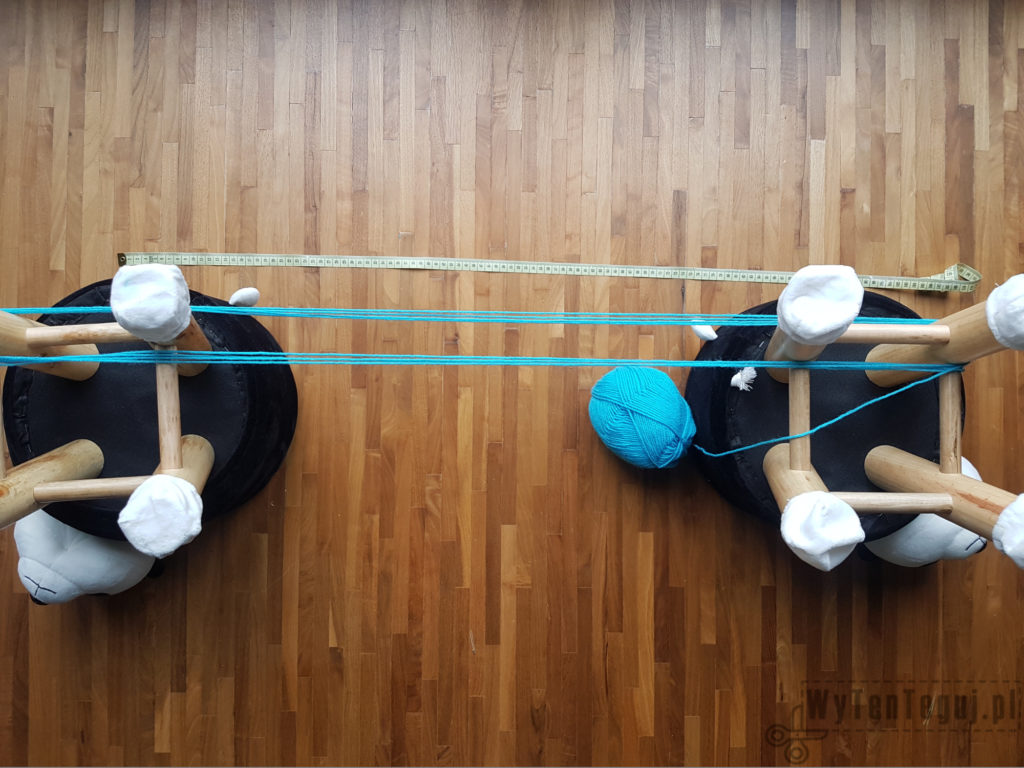
For each color, create a hairline of equal length. I had 25 loops, which means 50 individual threads. This amount is suitable for unbraided mane. If the unicorn is to have a braid, you should prepare more yarn for the first color from the ears and gradually reduce the amount for further colors. Thanks to that the braid will be thicker at the very beginning. As you can see, my unicorn has a thin braid at the top.
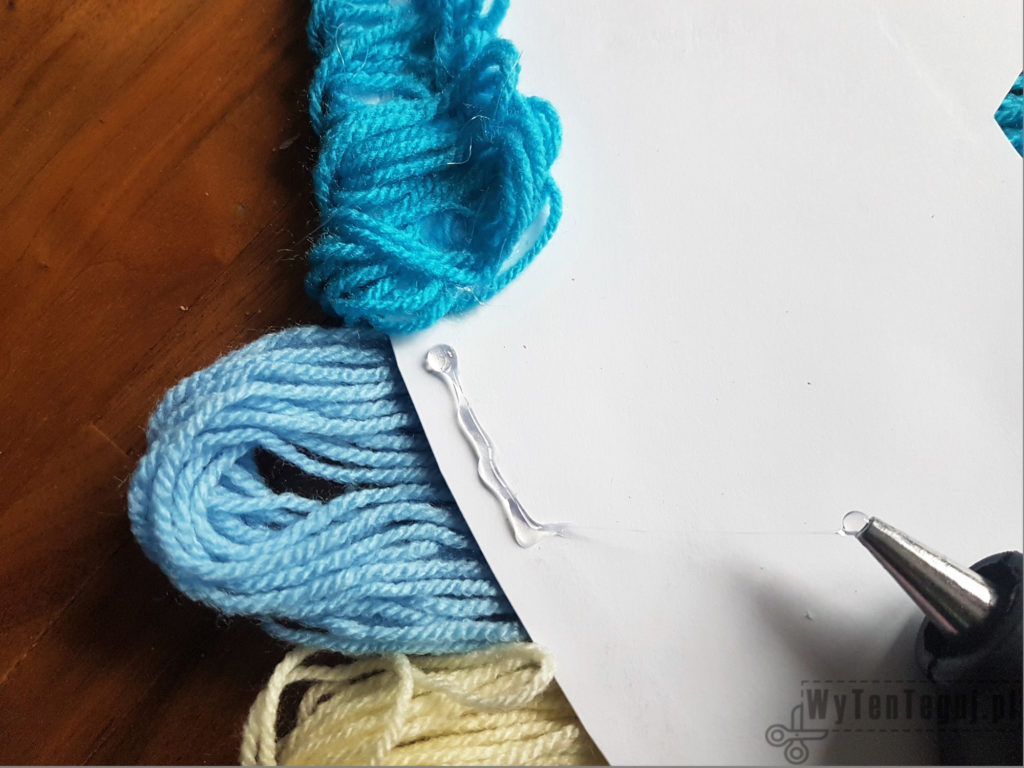
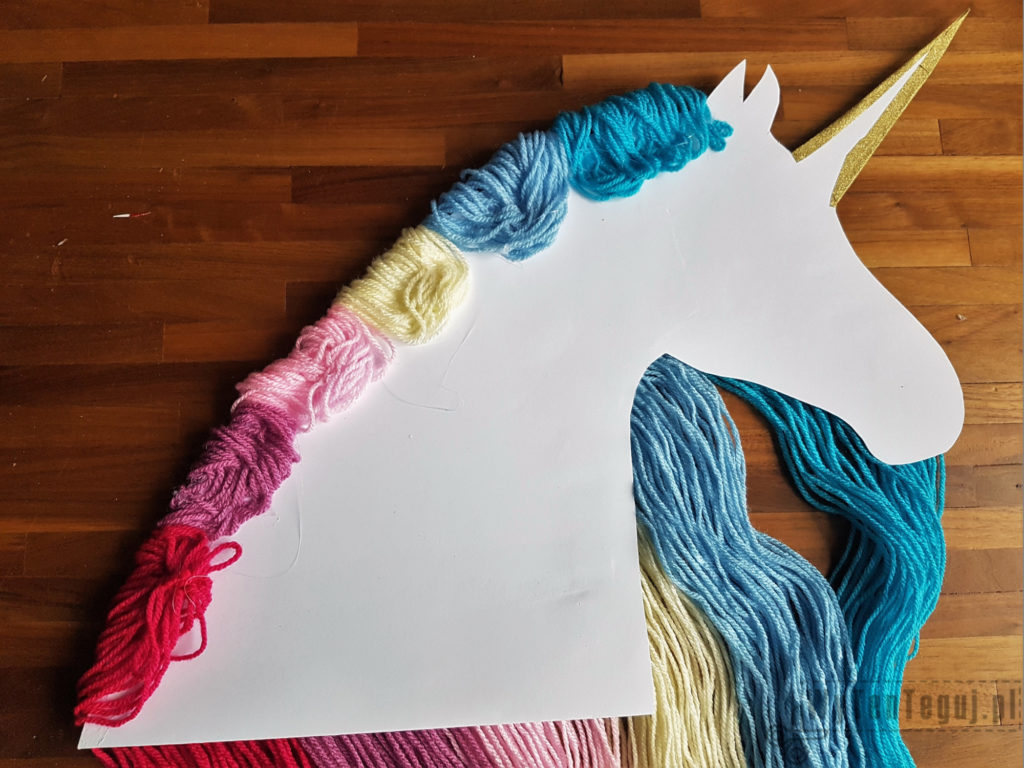
The final part is to glue yarn to the cardboard head. To do this, spread your mane and put unicorn’s head on it upside down.
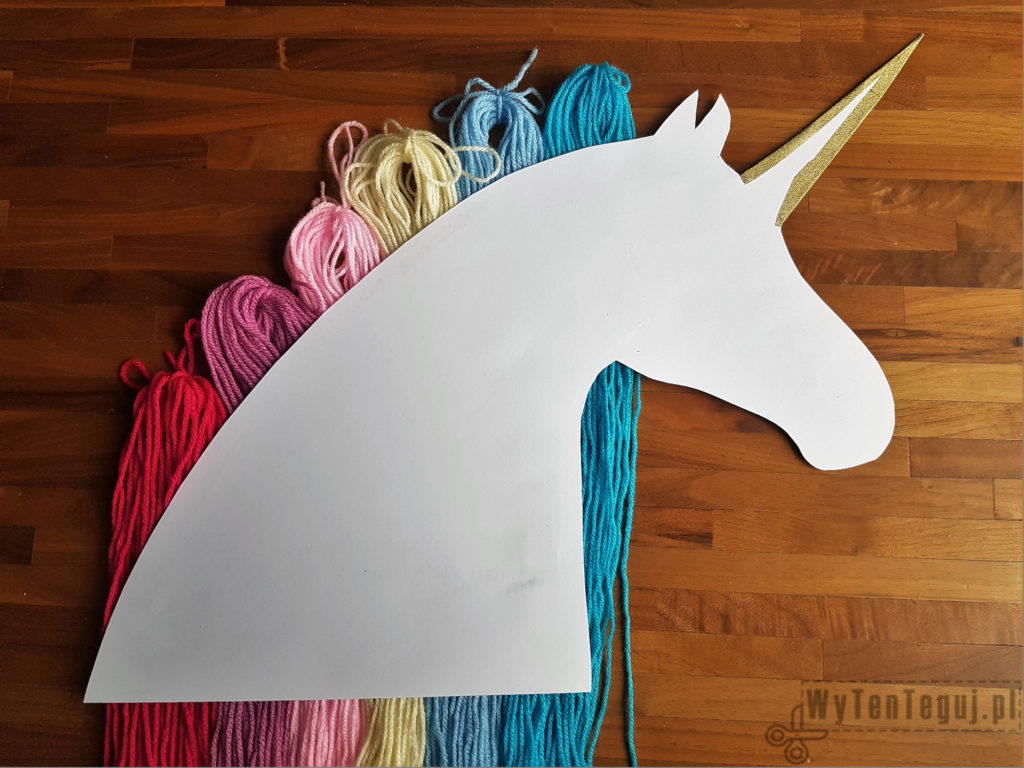
Starting from the top, glue the color by color making sure that all yarn threads touch the glue and stick strongly. The mane is ready!
Making details
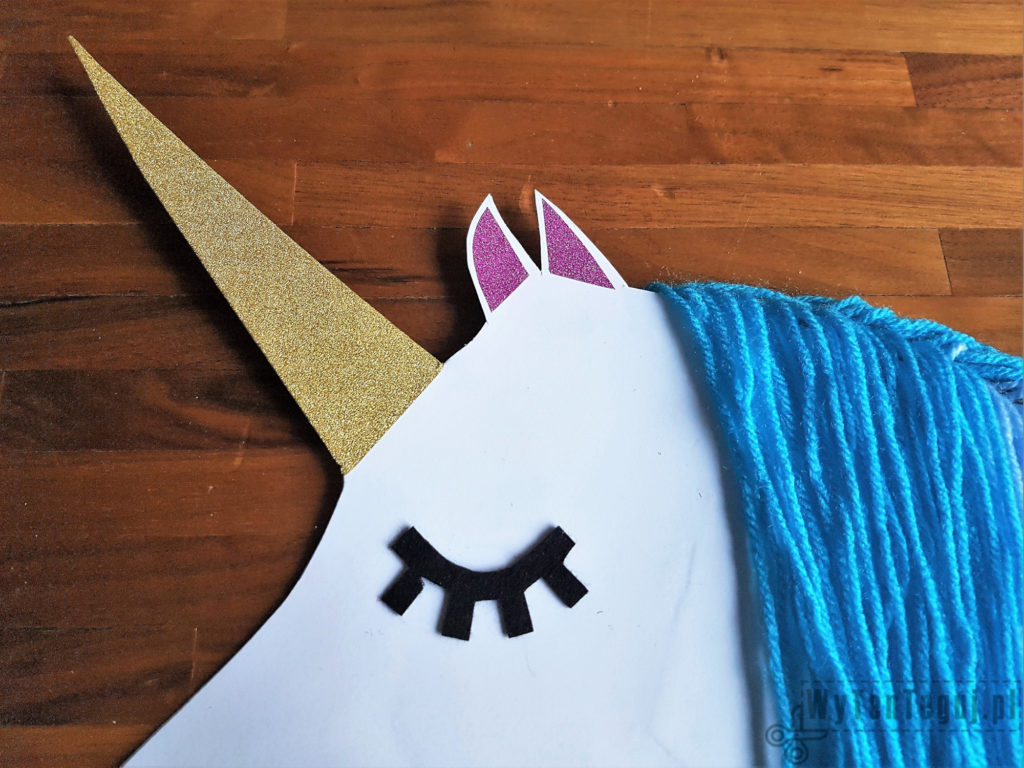
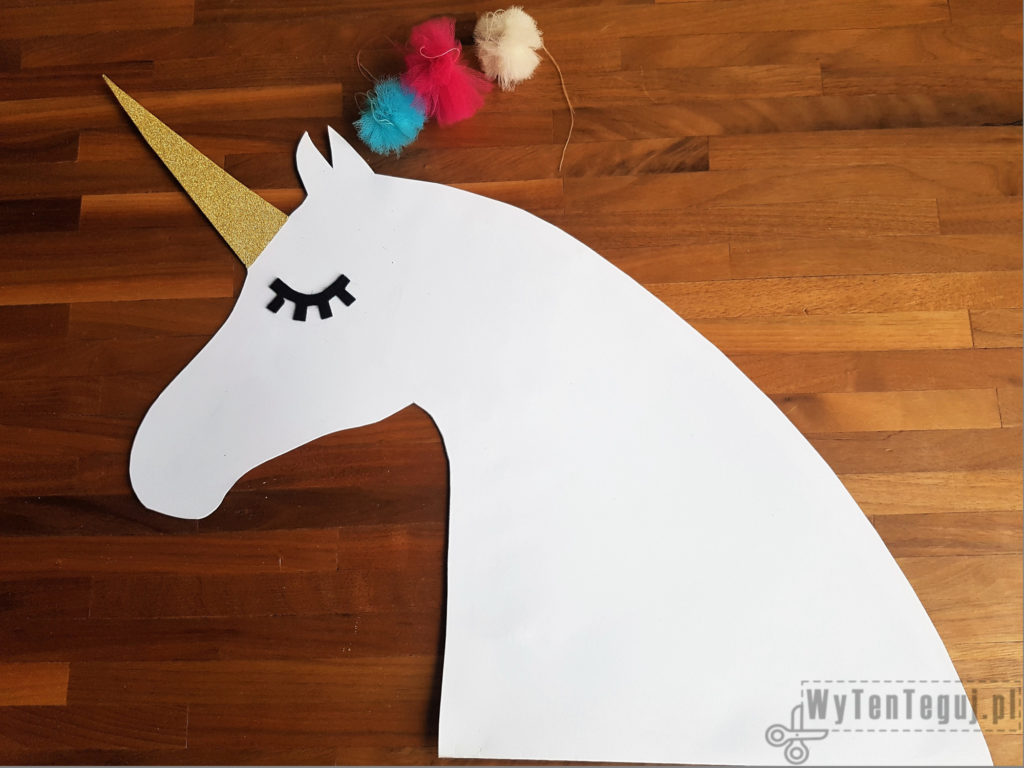
There are some decorating elements left: horn, eye, ears and decor on the top of the head.
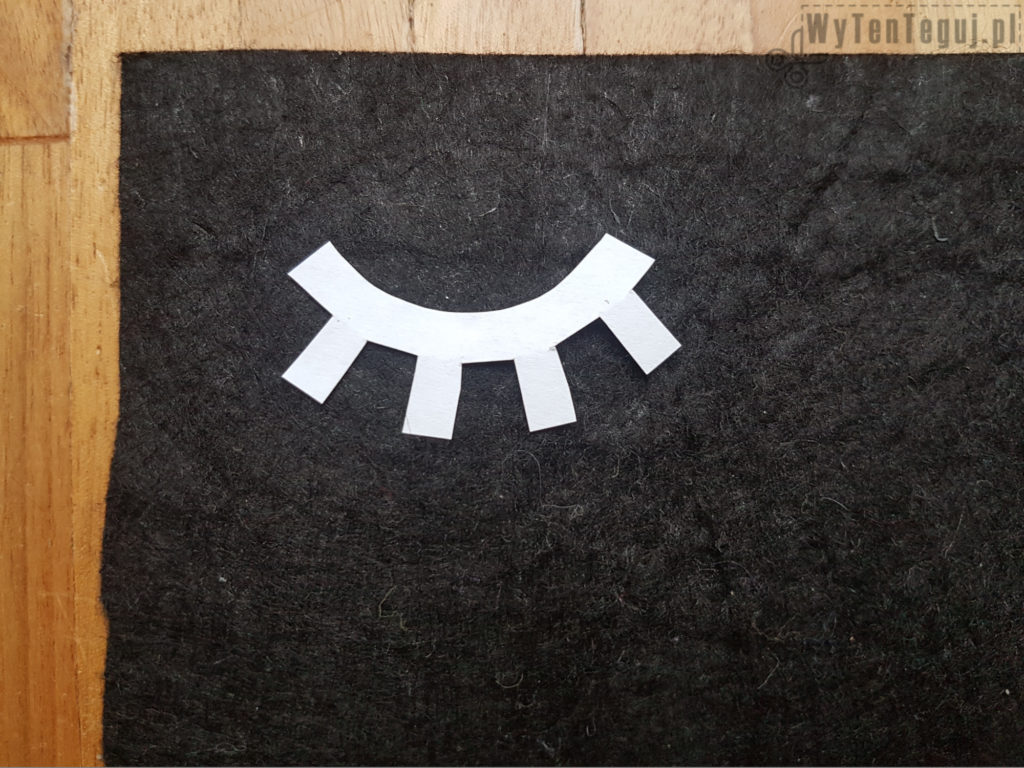
Cut the eye out of black felt and stick to the cardboard head. Alternatively, you can draw the eye with a black marker, but the felt will give a light 3D effect.
Cut the horn and ears out of the brocade paper and glue it to the cardboard head.

The decoration on the top of unicorn’s head can be done in many ways. It can be a rosette, a ribbon, a bow, pompoms or any other decoration. I decided to use tulle pompoms. You can find the tutorial on how to produce then here.
An optional step is to braid the main. In my opinion, it looks much better with a braid, so it is worth another small effort.
The last step is to attach a ribbon on which you can hang the unicorn. The mane is heavy, so one end of the tape should be glued to the very end of the head and the other end to the ears.
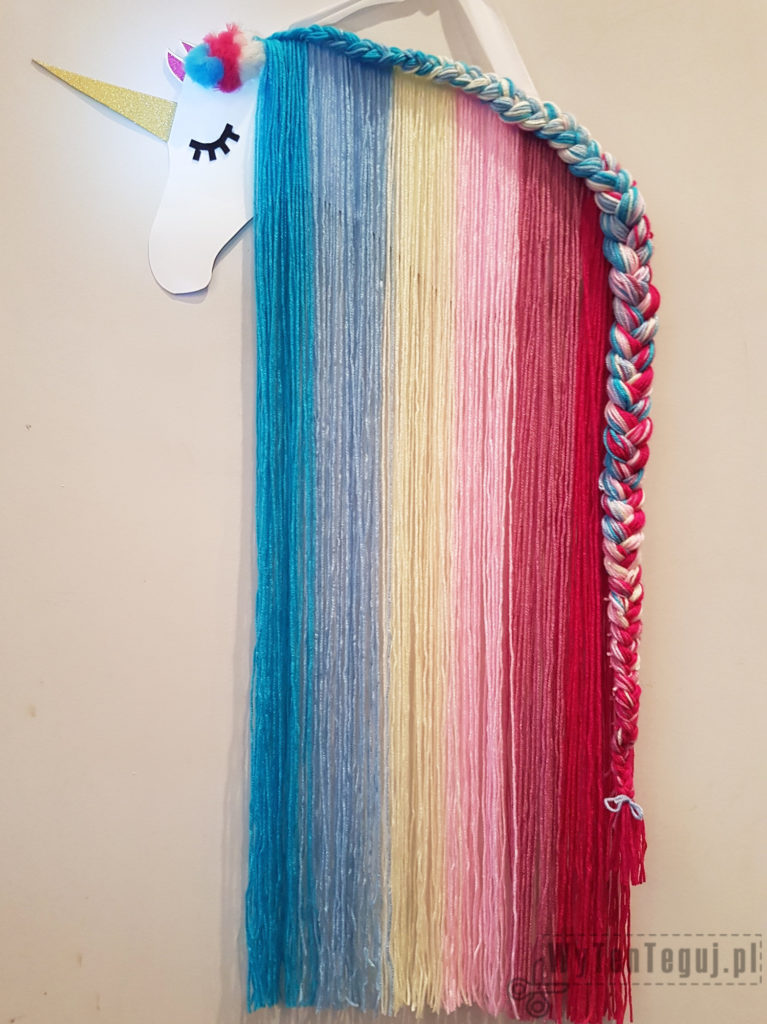
Congratulations! Your unicorn bow holder is ready!
Related posts
Nothing gives more satisfaction than doing something yourself. I haven’t even thought about DIY as my hobby, I’ve just done different “projects” when it was needed. Sometimes it’s a disguise for the Masquerade Party in kindergarten. Another time, cutting out the pumpkin and baking the witch’s fingers for Haloween. Or simply organizing holiday souvenirs. Now I decided to share my realizations with you. Let’s go it together!
