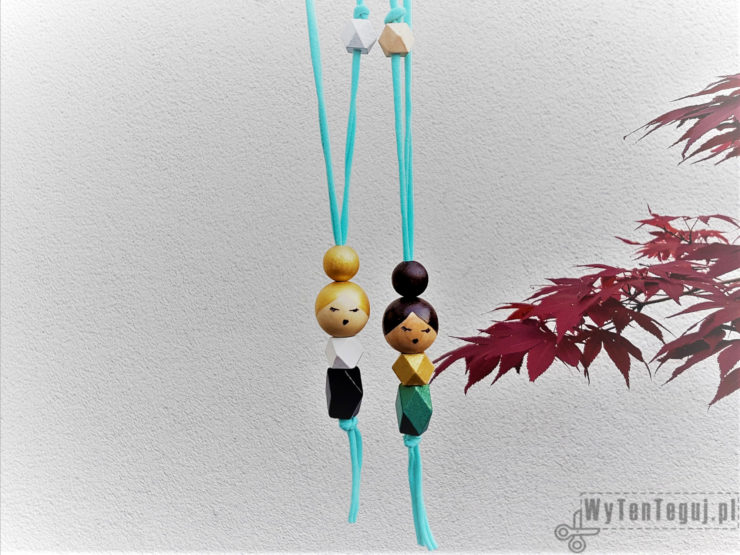
I put the next step in my adventure with painted wooden beads. After the ballerinas’ key chains, I moved to the doll necklace. The wooden doll necklace can be an interesting bijou or a cool DIY gift. In addition, you can personalize the doll a little, for example, by hair color or some characteristic accessories. The execution is easier than you think. I invite you to the step by step instruction.
If you want to be up-to-date with our newest posts about DIY, like our Facebook fanpage.
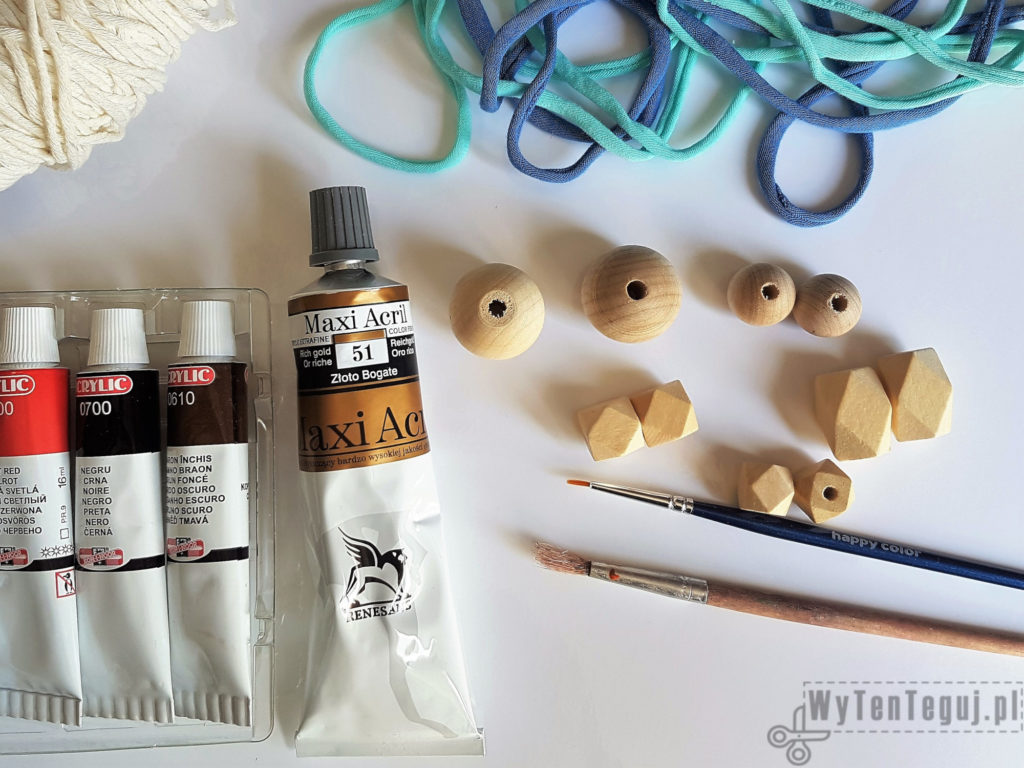
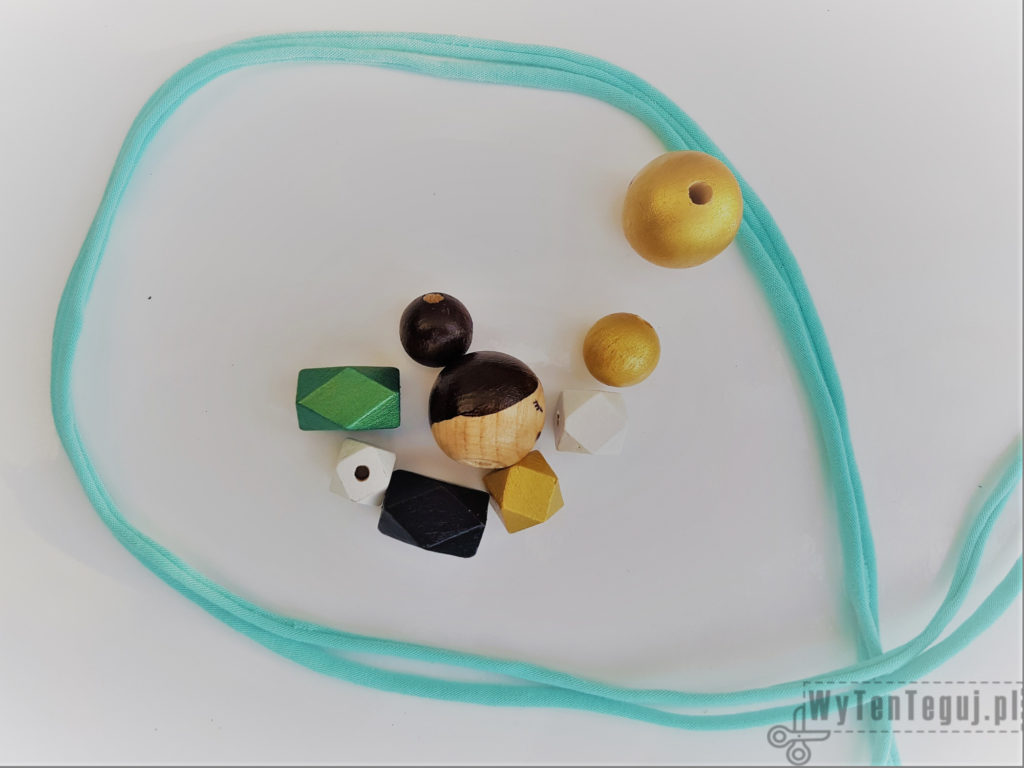
Supplies
- Wooden beads in various sizes and shapes
- Acrylic paints
- Clear spray lacquer
- Marker or fineliner
- Twine from jersey
- Marker
- Scissors
- Stick for skewers
Making of doll necklace
The doll necklace is quite simple to make. The first stage is stretched in time, because you have to wait for the paint and varnish to dry. Completing the necklace is just a pleasure 🙂
Painting wooden beads
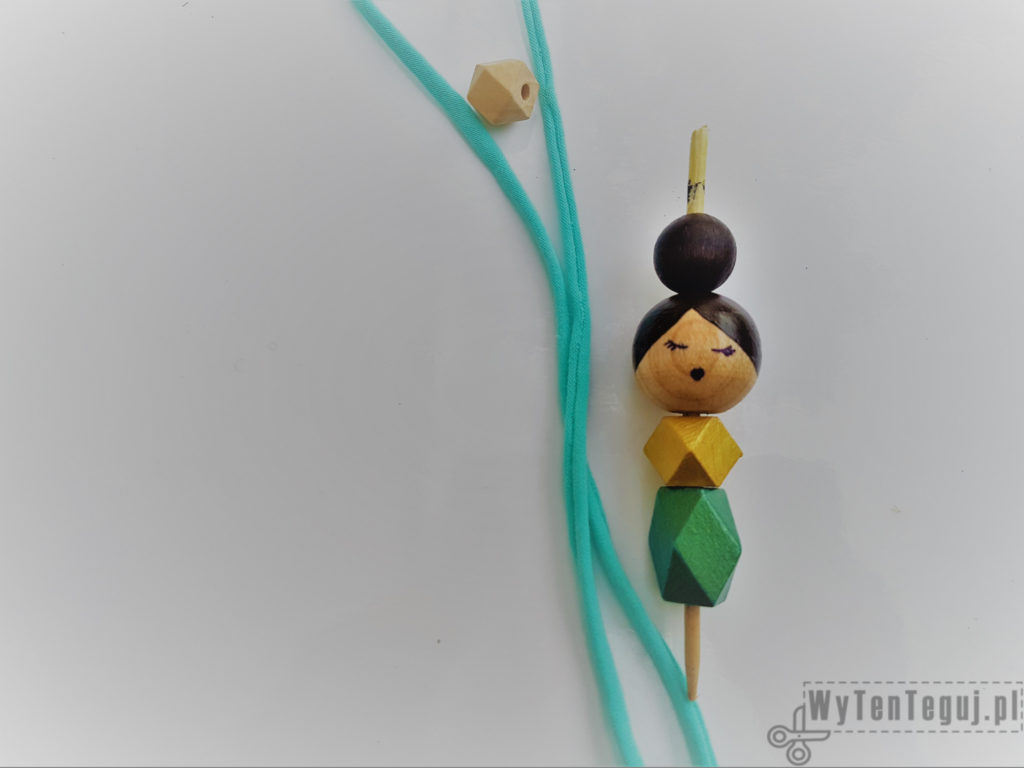
Work should start with “stuffing” the wooden beads on stick for skewers. It is important that the beads do not move, because it makes painting very difficult. If the hole is much larger than a stick, it is worth sealing with, for example, painting tape.
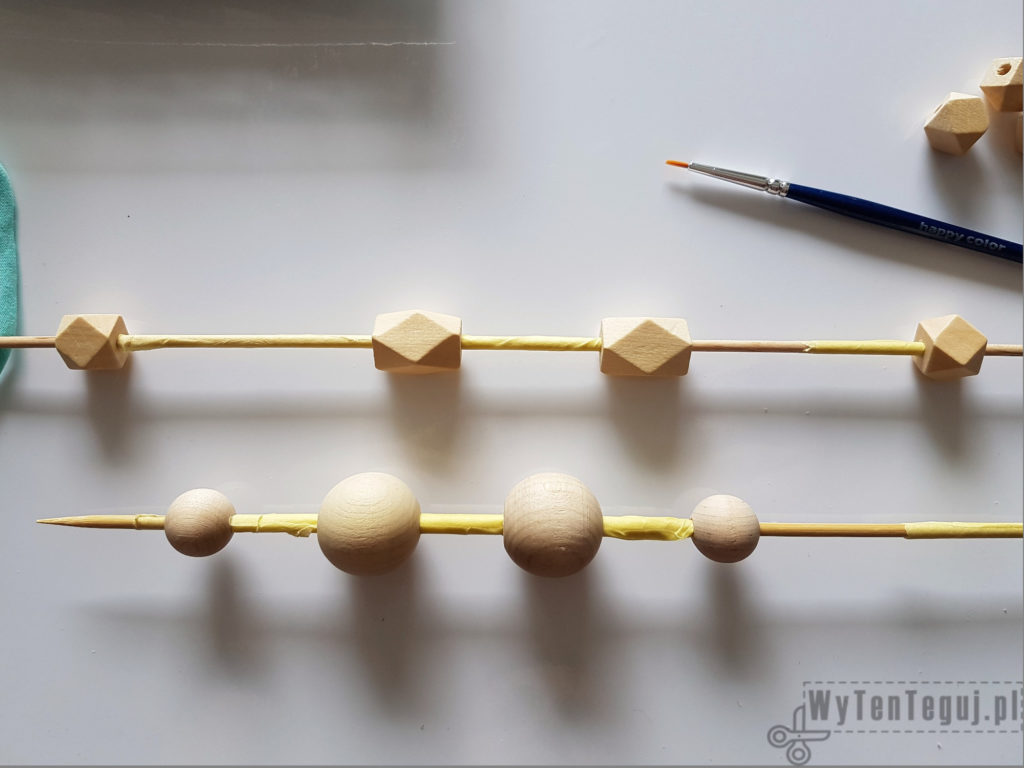
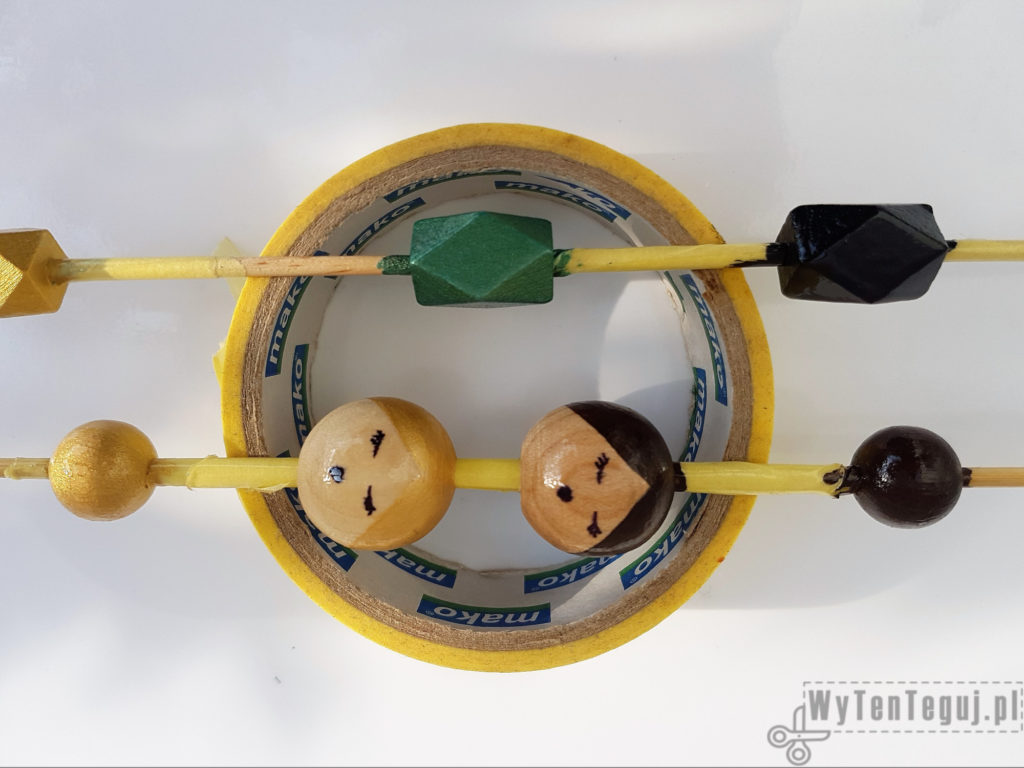
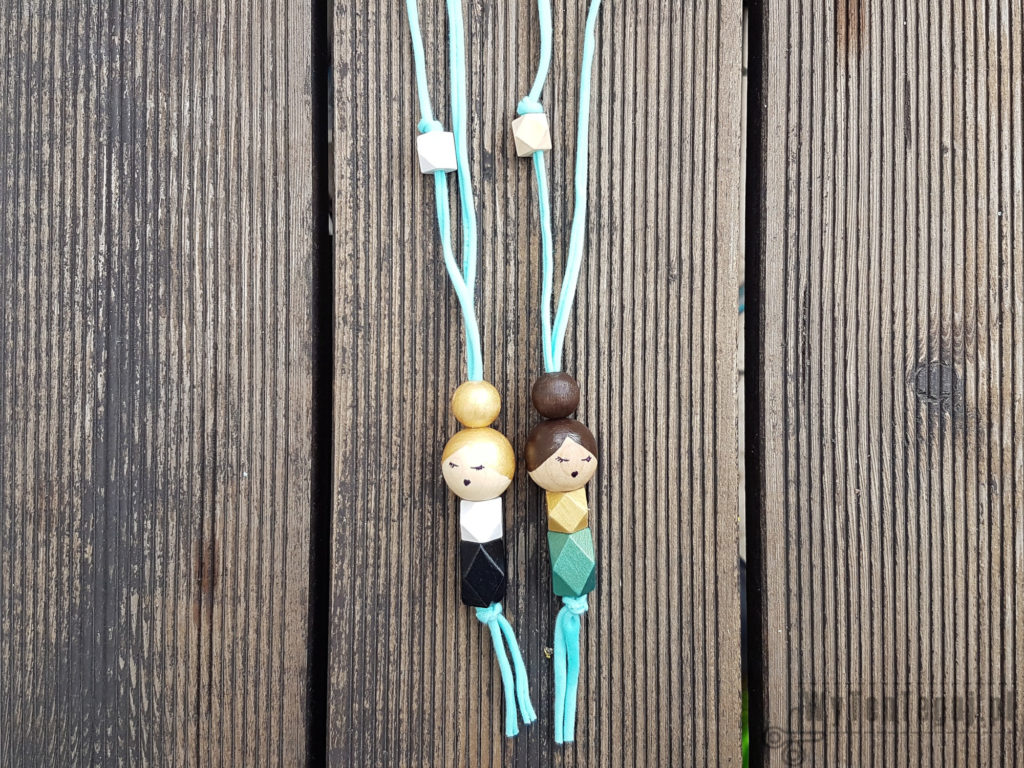
Paint beads with selected colors. If wood shines through, paint the next layer. After each layer, leave the beads to dry. I decided to have 2 dolls. One golden-haired with a white and black body. The second with brown hair and a gold-green bottom. I also decided on additional small beads.

When the paint dries, spray with clear varnish. After the paint dries, draw the face of the doll with a marker. It is important to draw the eyes and lips on the lacquered ball because the marker is spilled on the raw wood. For me, unfortunately, it happened, although I put one layer of varnish. That’s why I advise you to put 2 layers before drawing details.
Spray again with clear varnish and leave to dry.
Completing the doll necklace
Prepare all painted beads and string.
Plan your composition. I added one bead above the doll, so I started with it because it is on a single string. I secured him with a knot so it would not run up.
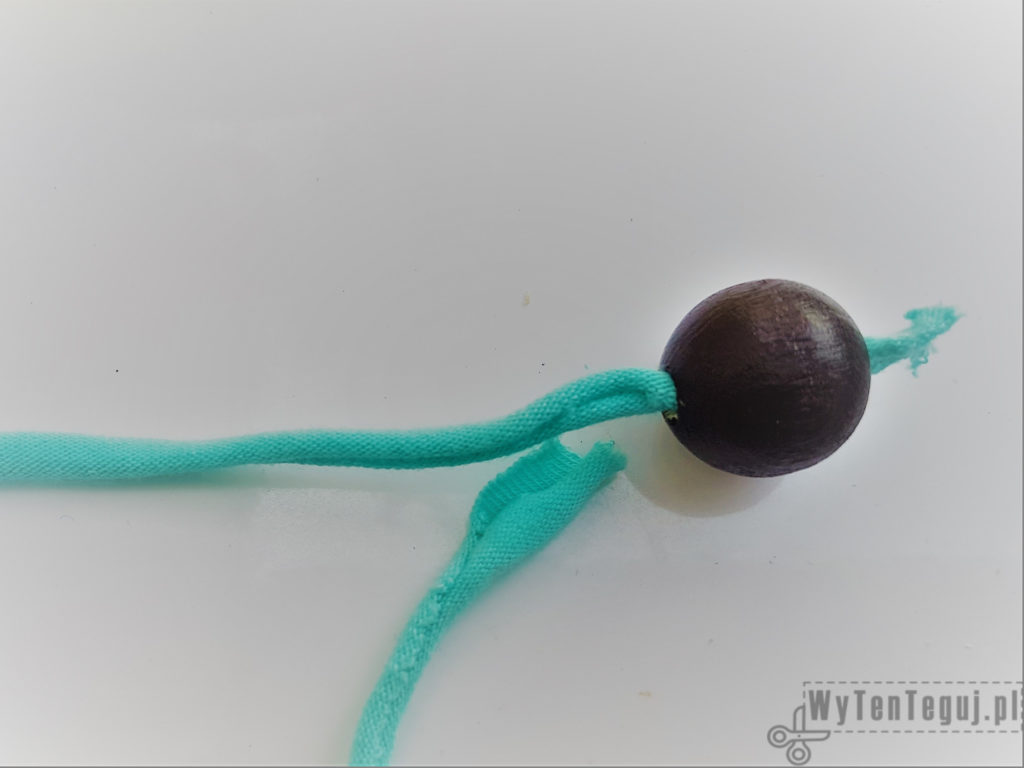
Now it’s time for the main part, or doll. She is strung on both ends of the string, which can cause problems for beads with a smaller hole. After a few unsuccessful attempts, I found a way to do it.
- First, thread the bead on a single string.
- Then “hide” the beginning of the second string in the first.
- Drag the string connection through the bead and it’s ready.
At the end, tie a knot under the doll and cut the ends of the string.
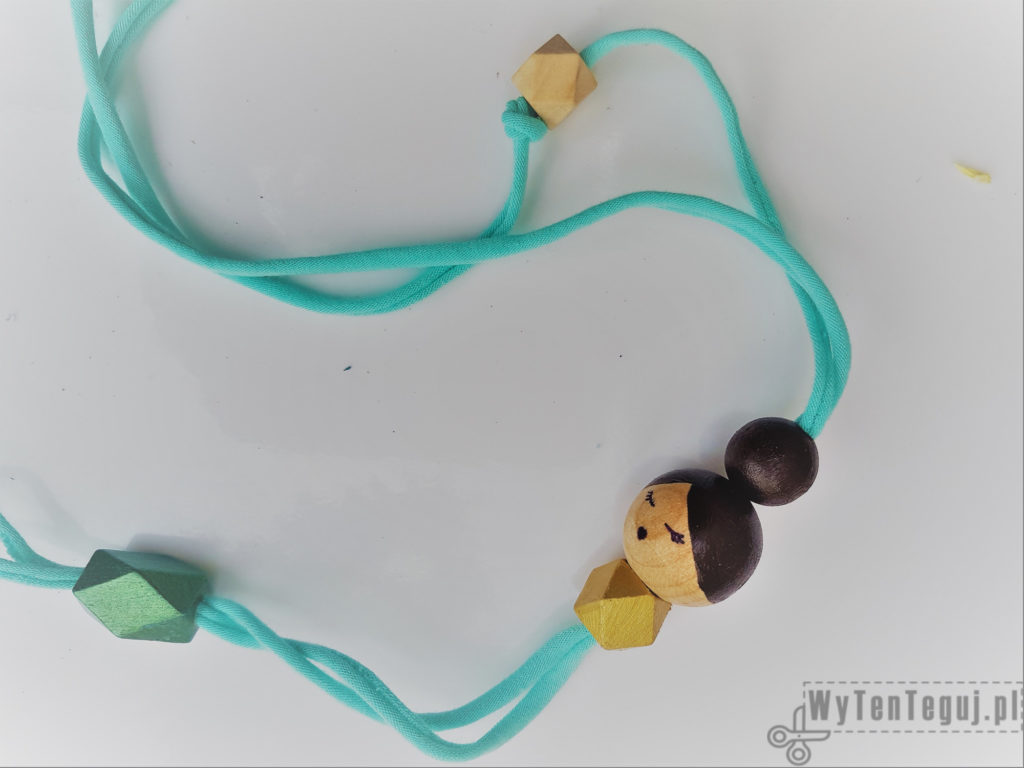
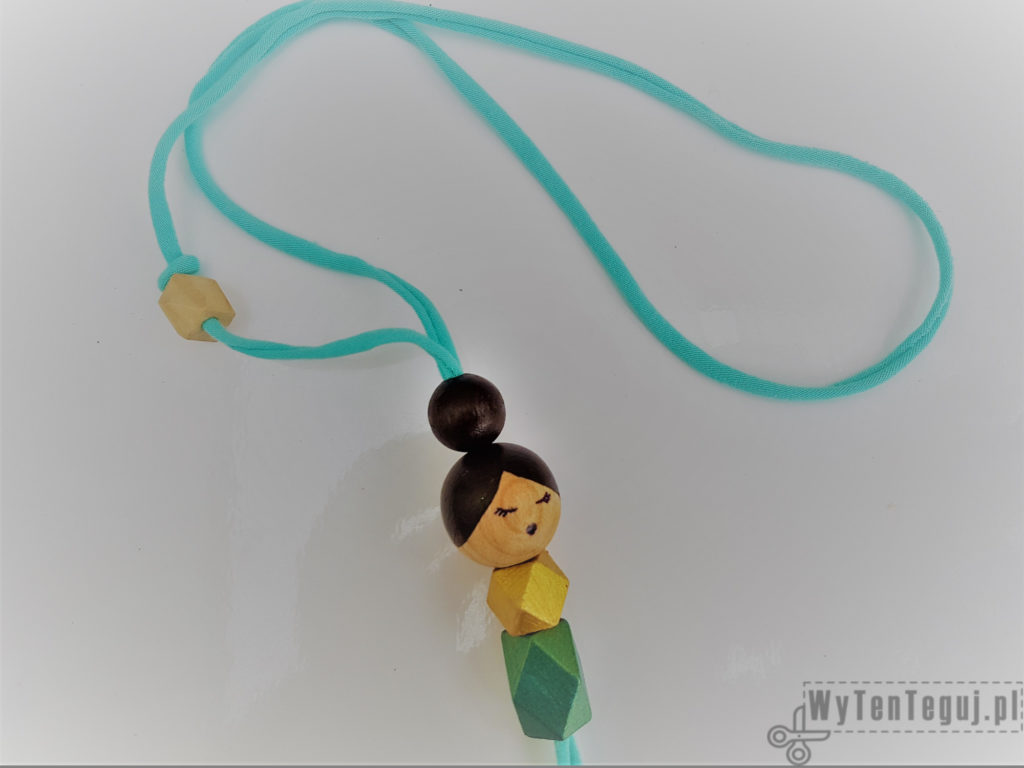
The pendant is ready. Now you can wear it or give it to someone 🙂
If you are looking for more ideas for DIY decorations then you will find them in the decorations section.
Inspiration found on etsy.com.
Related posts
Nothing gives more satisfaction than doing something yourself. I haven’t even thought about DIY as my hobby, I’ve just done different “projects” when it was needed. Sometimes it’s a disguise for the Masquerade Party in kindergarten. Another time, cutting out the pumpkin and baking the witch’s fingers for Haloween. Or simply organizing holiday souvenirs. Now I decided to share my realizations with you. Let’s go it together!

I like DIY items, unique and also more valuable because we make it with our own hands.
thank you for sharing
the necklace is very cute