
The school organized a competition for the first grades for the autumn herbarium. Children and their parents were to prepare a herbarium in any format with at least 20 plants. To begin with, we started collecting leaves, flowers and grasses and drying them, and the format and concept came later. But more on that below 😊
I must admit that the hardest thing for me was to give my daughter the initiative, accept her ideas and accept that something may be uneven 😉 It was not a bad lesson for both of us, and we both learned a lot from it. I recommend it to every stubborn mother 😂
Check out our idea for the autumn herbarium. Additionally, below you can download herbarium labels to describe the plants. At the bottom of the post, there is also a short video of my daughter presenting her herbarium 🙂
![]() Polska wersja: Jak zrobić zielnik?
Polska wersja: Jak zrobić zielnik?
Materials needed to prepare a herbarium
- Dried plants – tips on drying below
- White cardboard in A4 format with a cover (brown bottom sheet)
- Pen or marker
- Wide adhesive tape
- Paper glue
- Universal glue
- Ribbon or string
- 1 sheet with a pattern. It is a page for the cover, in our case it has leaves pattern and comes from an adult coloring book. The wrapping paper will be too thin.
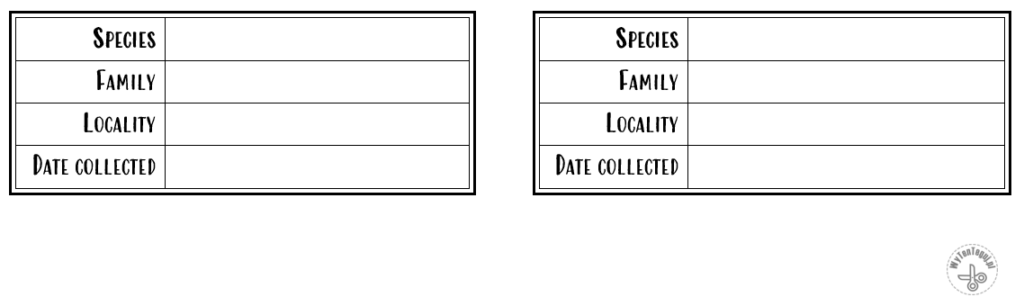
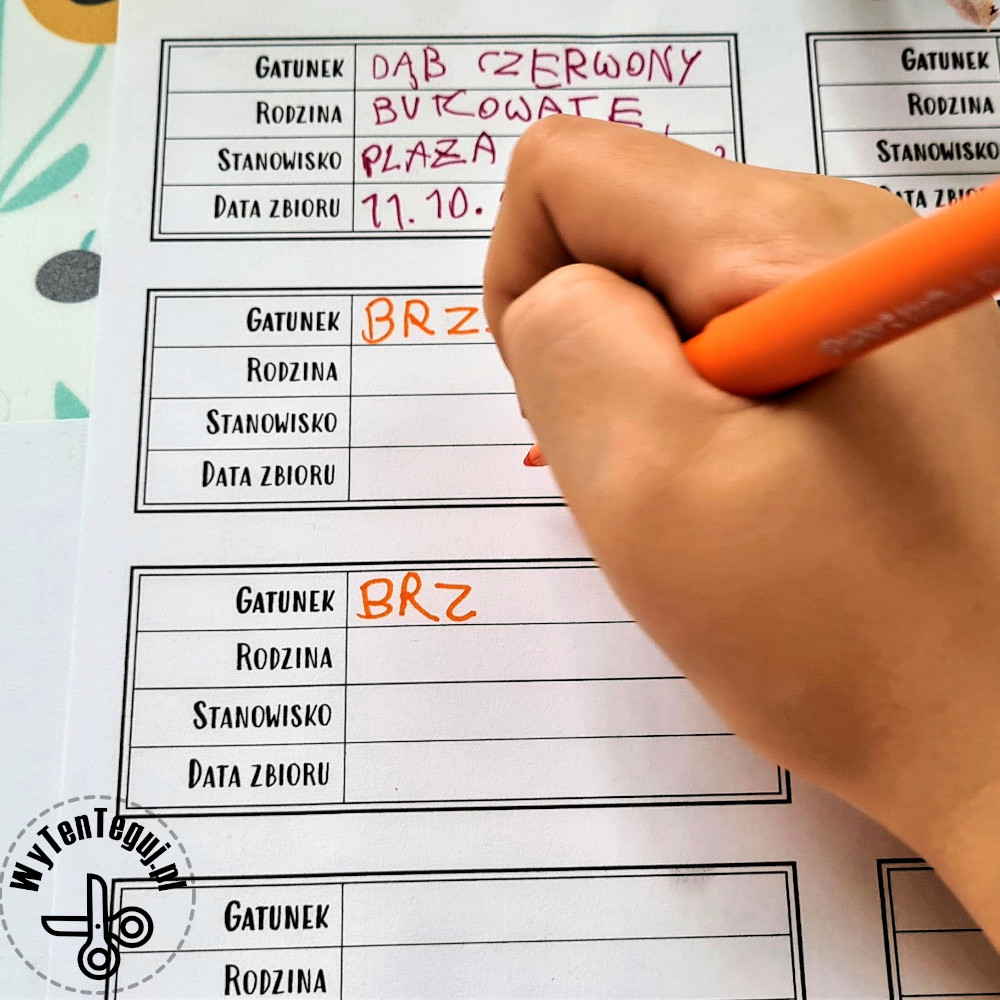
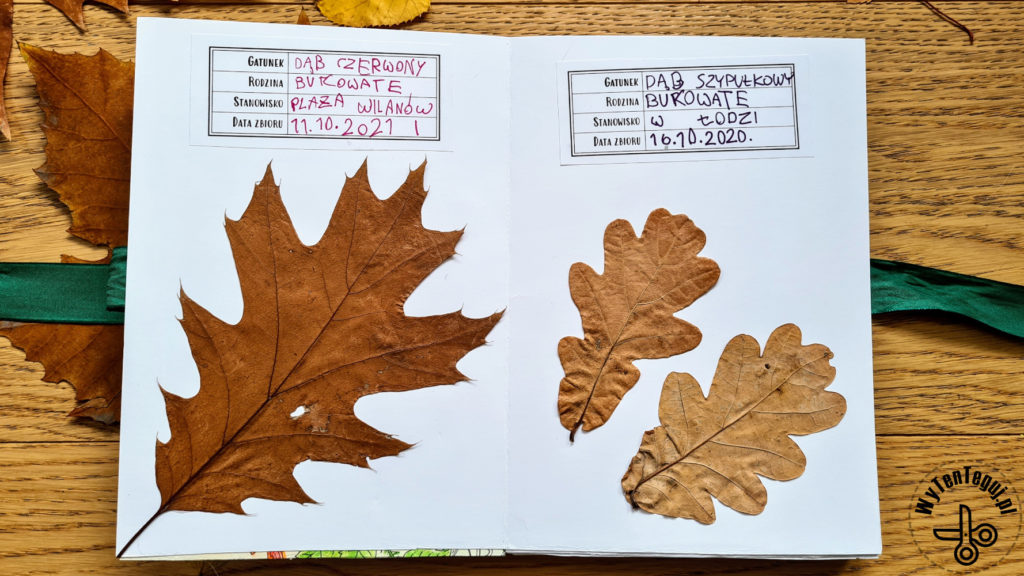
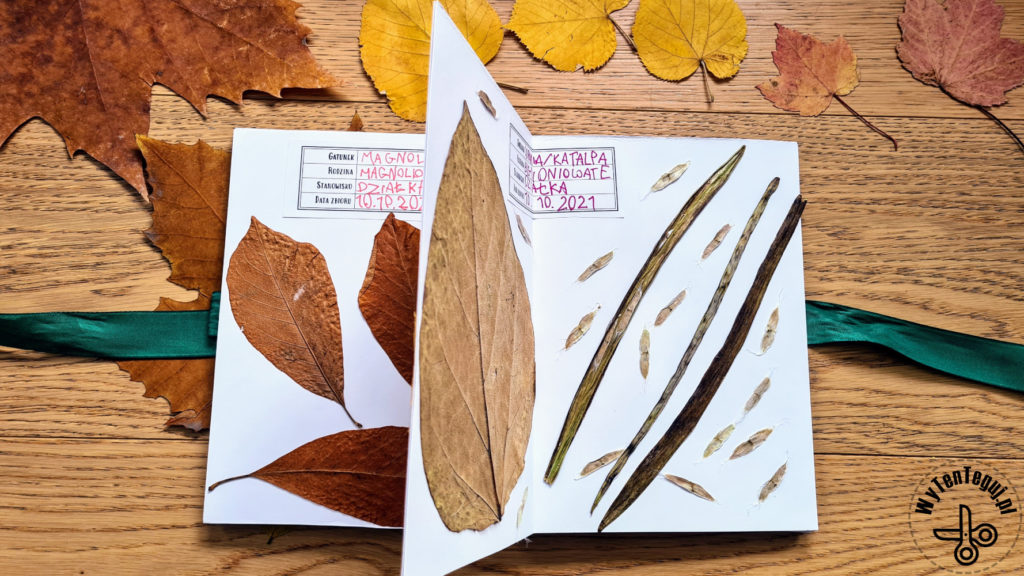
- Labels to describe the plants. I prepared simple version of labels with fields (species, family, locality, date of collection).
Printable herbarium labels
How to make a herbarium?
Preparation of a herbarium consists of several phases, which is why it is extended in time. The first phase, which is collecting and drying the plants, takes the most time.
- Collecting and drying the plants
- Preparing cards with plants and labels
- How to make a book out of sheets
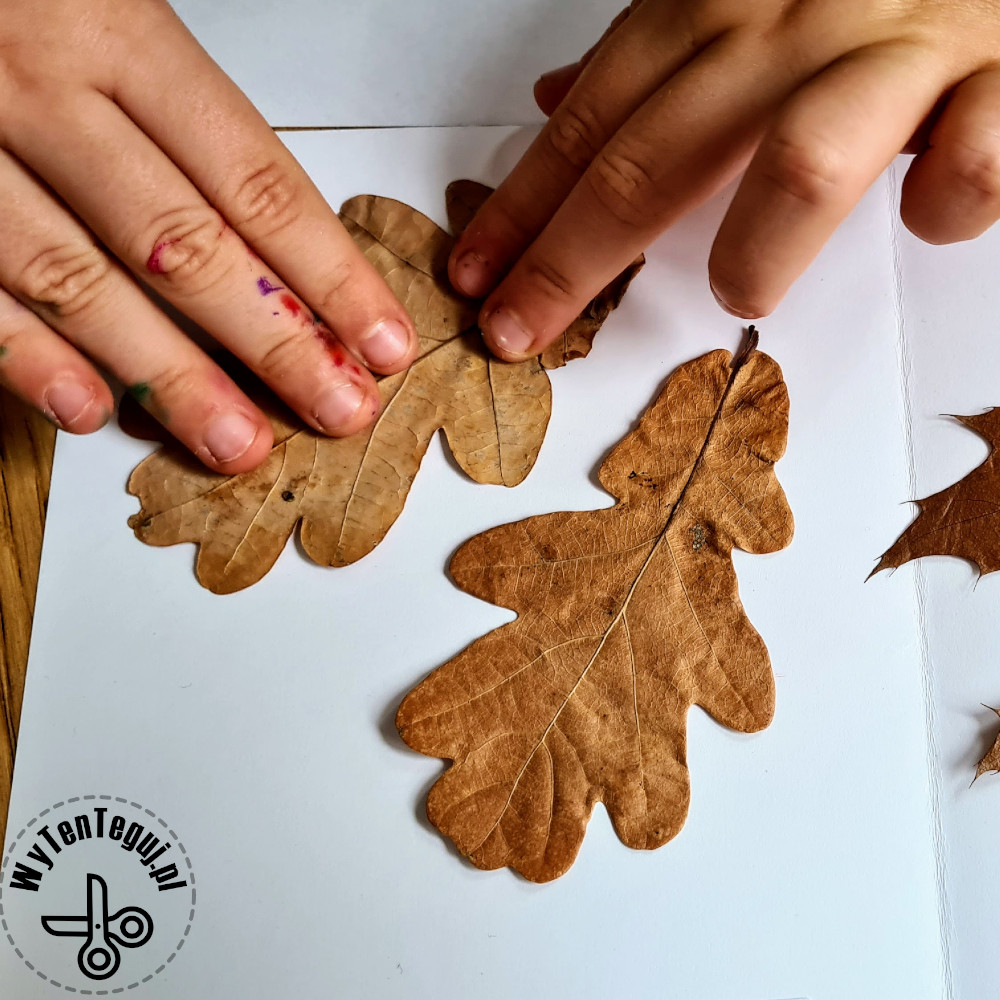
Gathering and drying plants
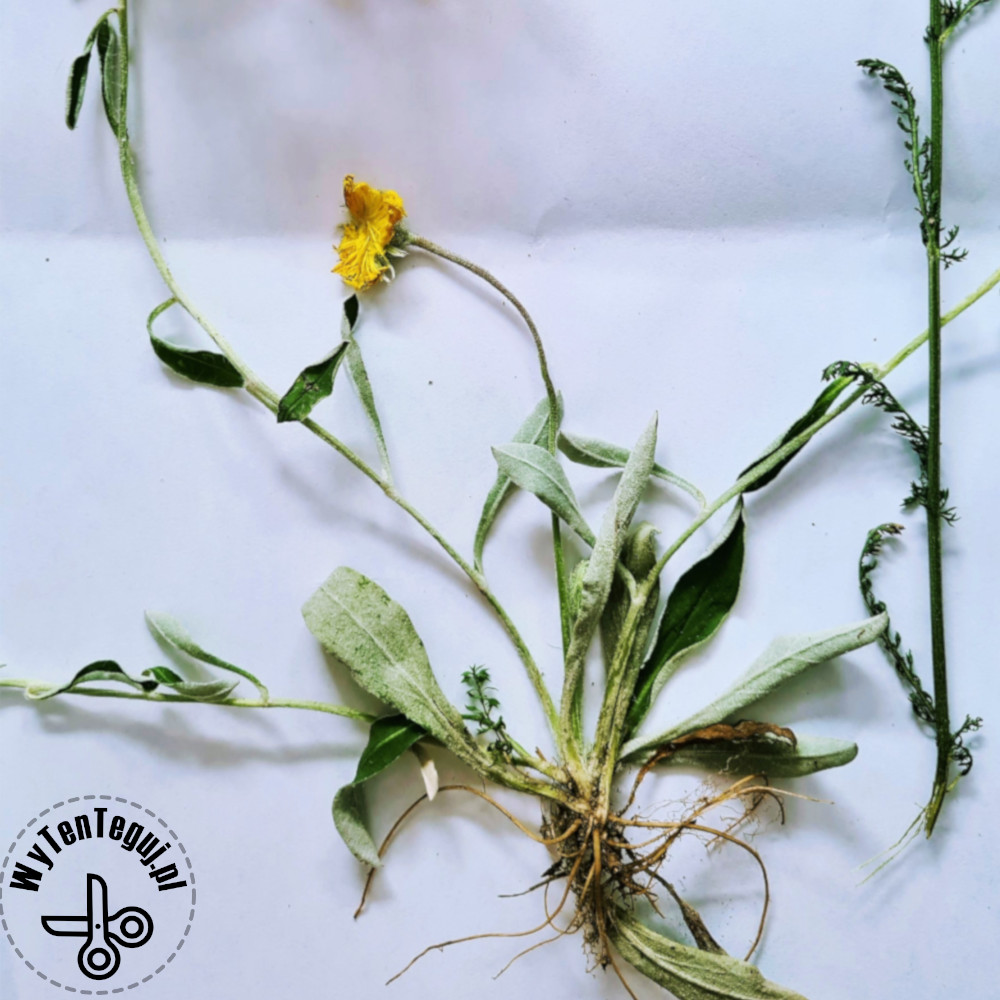
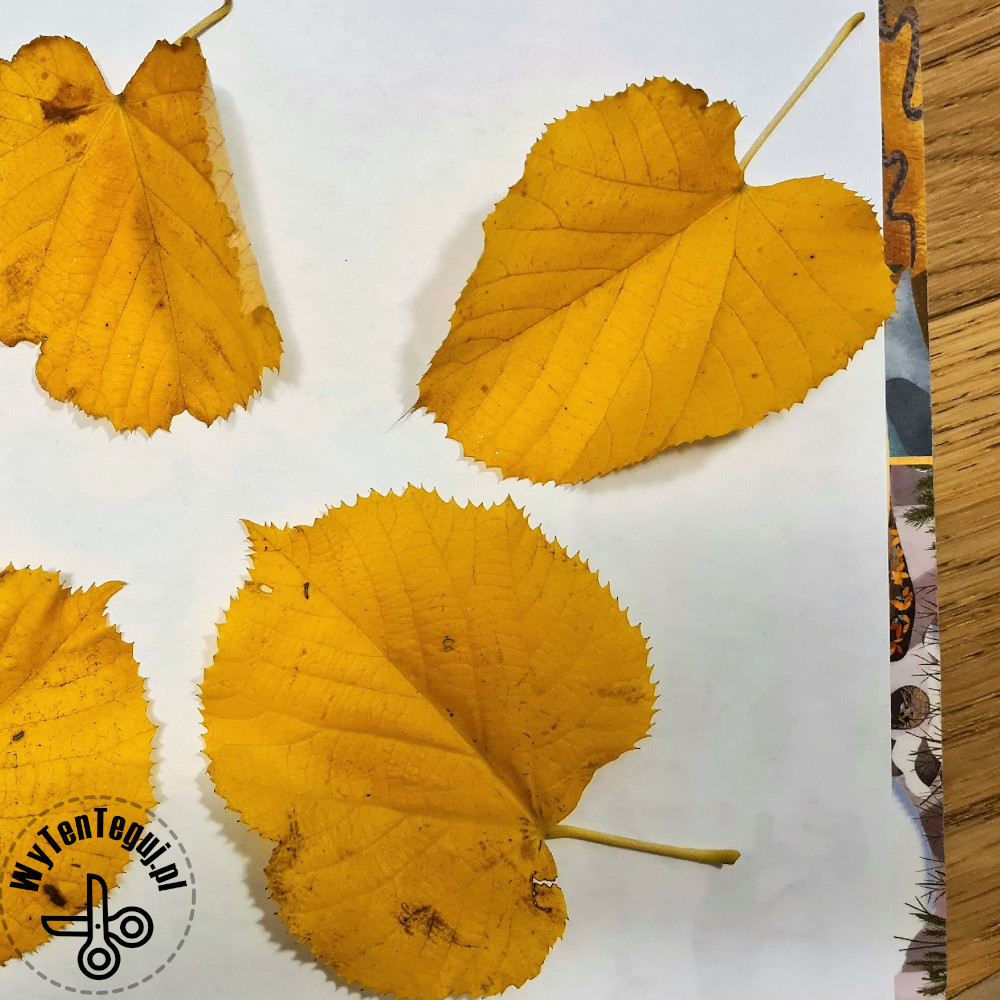
Plants are the heart of every herbarium, so it all begins with them. When collecting plants, choose the healthy specimens without rot or black spots. Plants look worse after drying than before, so if something is wrong at the beginning, it will only get worse later.
At home, dry between sheets of paper so that the sheets can absorb moisture from the plant. Glossy magazines will not work. Excessive children’s drawings or coloring books work well, but only those that can be thrown away later. After drying, the pages are wavy, so you need to add an additional sheet before inserting plants into the book.
We took a piece of paper, put a leaf on it, then another sheet and a book, making kind of a sandwich. Then another leaf between the pages and the book again. This way we built a nice tower 🙂
Additionally, once a day we checked what was happening with our specimens and changed the wet sheets. We did not throw them away, but we used them the next day when they were dry again.
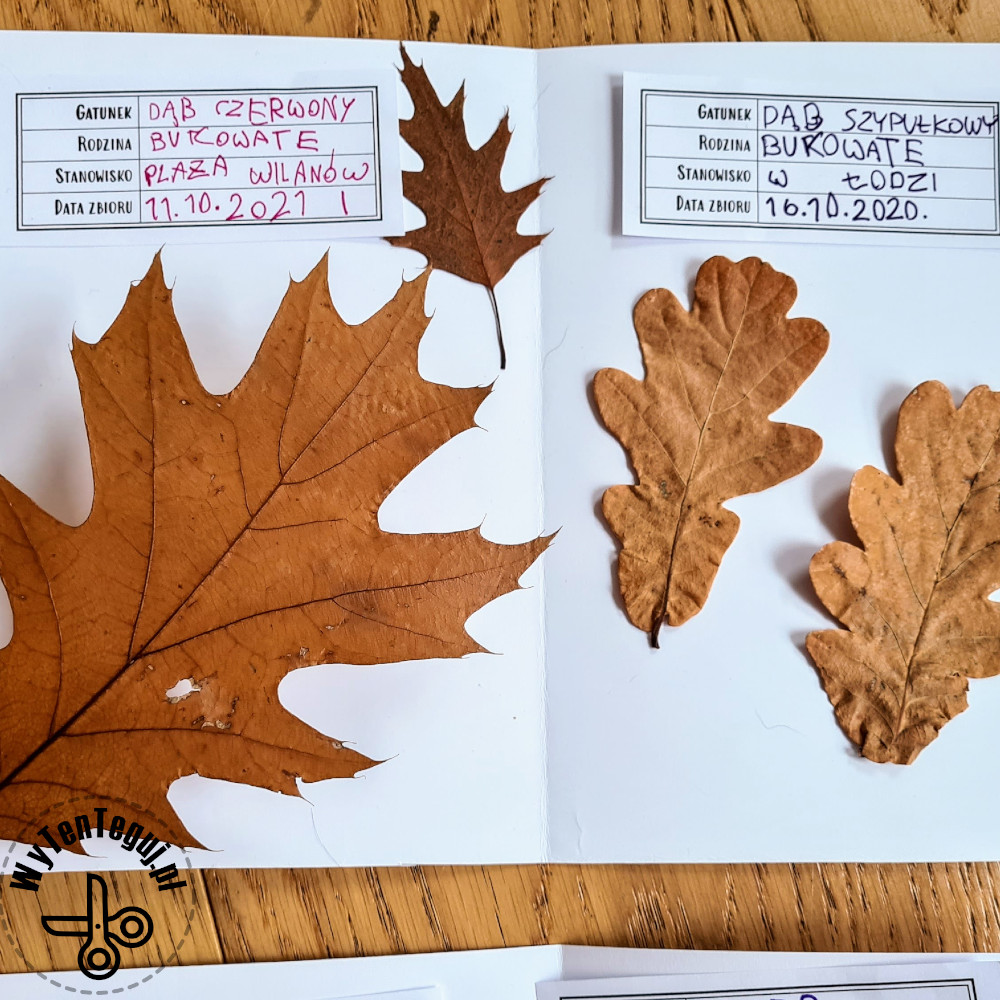
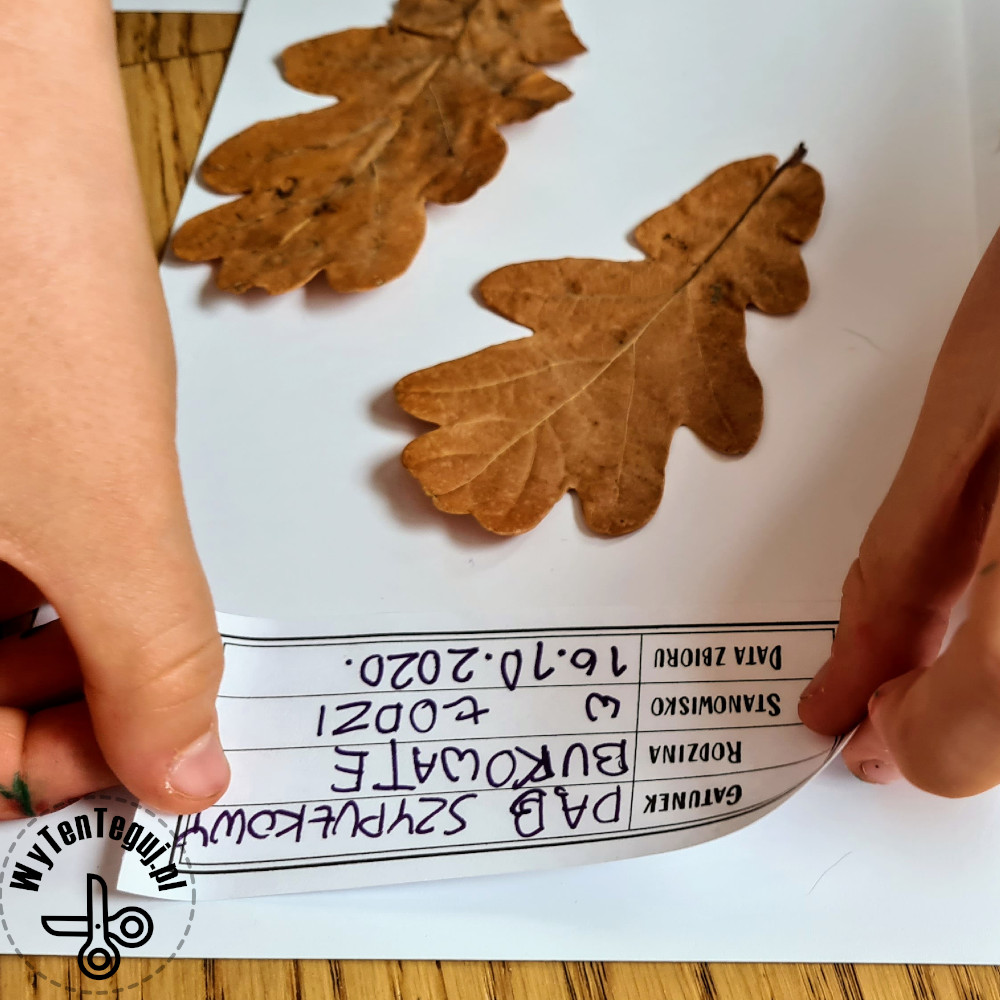
Prepare cards with plants and labels
Once you have dried plants, you can go to the next phase, which is the preparation of cards with plants.
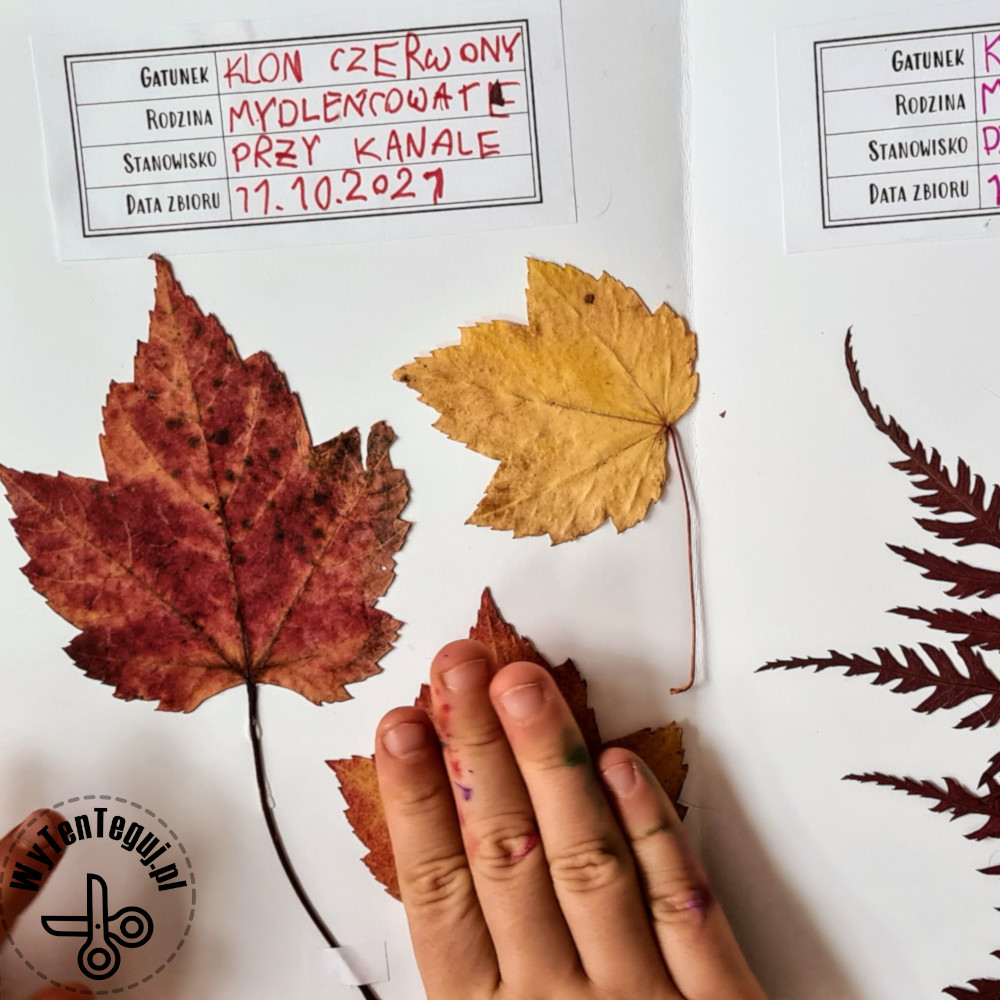
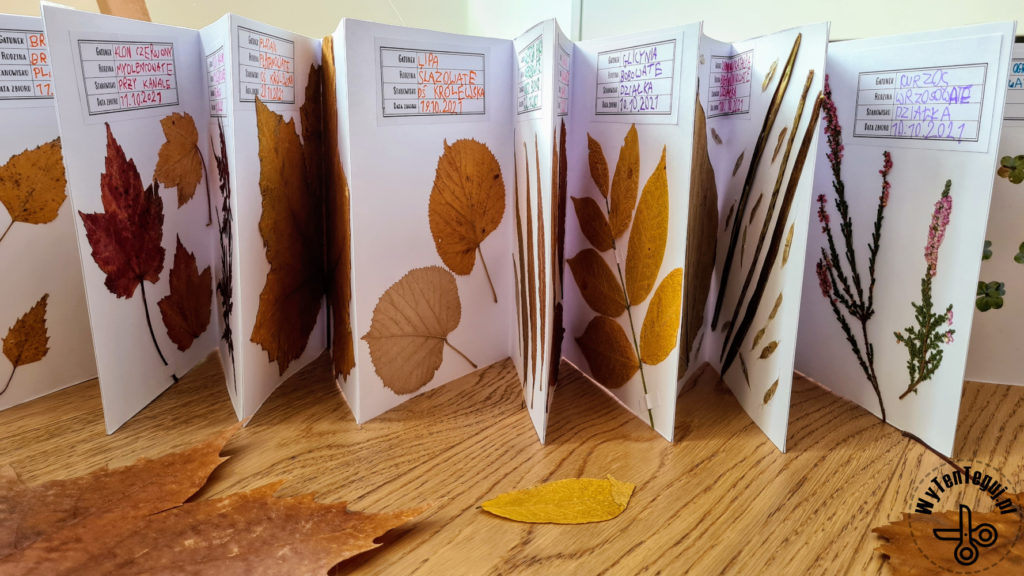
Labels
Filled labels will be useful, although this activity takes the longest. My daughter got bored quickly and wrote 4 labels at at time for a few days, so it took until the last day to complete all of them 🙂
We used a simplified label with information about the species, family, locality and date of collection. It may seem that information about the family is too detailed at the first grade level, but it helped us to group the plants and understand the relationships between them 🙂
Herbarium format
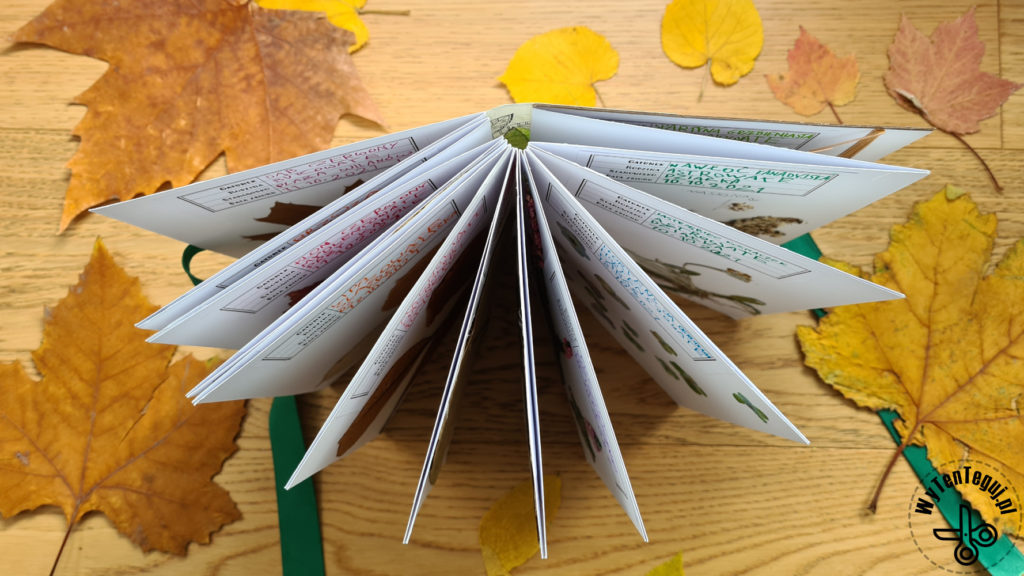
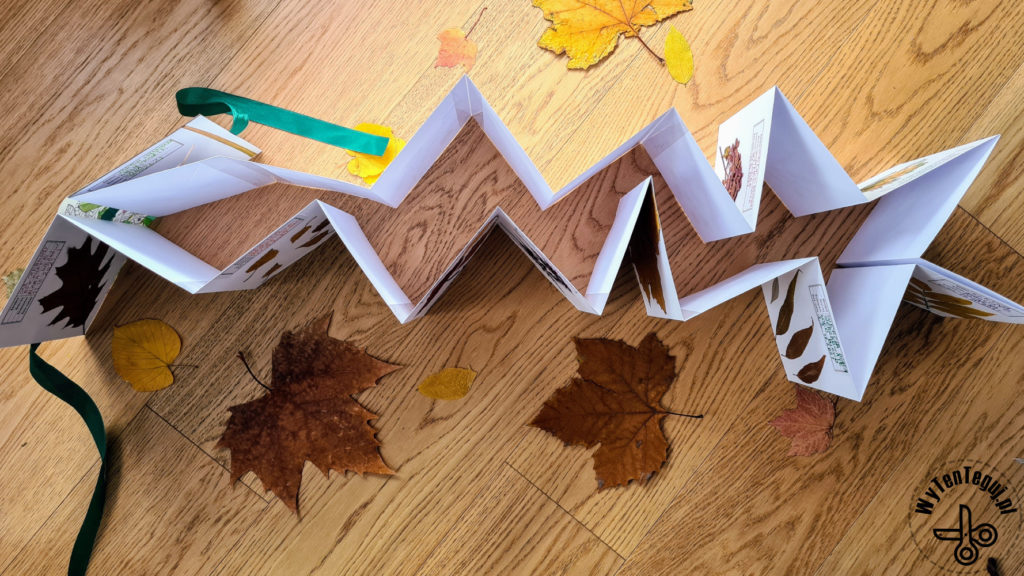
Our herbarium is in the form of an accordion fold book, so we worked in A4 format. First, we folded each sheet of paper in half, then folded it flat. Each half (i.e. half of A4 size) was space for a different plant (with 2 exceptions for catalpa and plane tree, which were on the entire A4 page). At the beginning, we spread out the dried plants to see which ones to choose and how they fit.
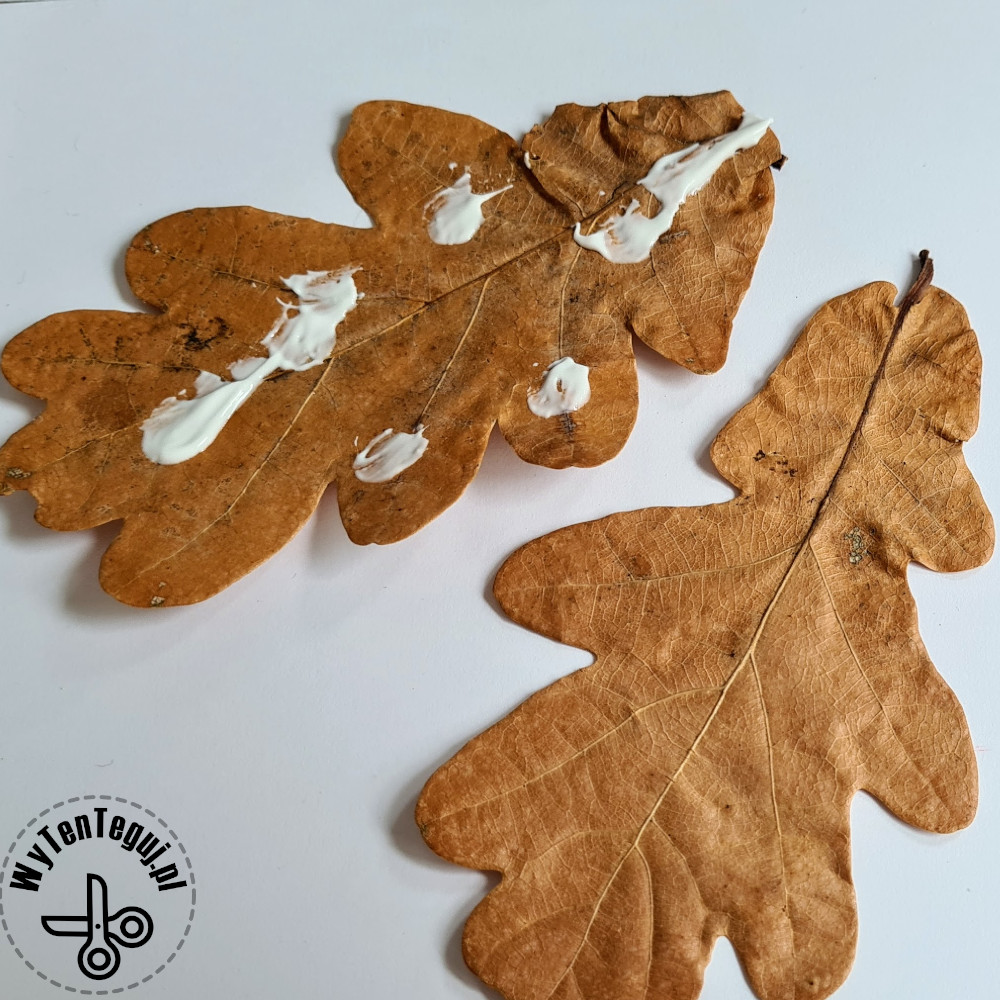
The last step was sticking the labels and plants with the all-purpose glue.
How to make a book out of paper?
We had a bit of a debate with my daughter whether we would be doing in the form of a traditional book or a accordion fold book, and in the end it turned out to be two in one 🙂
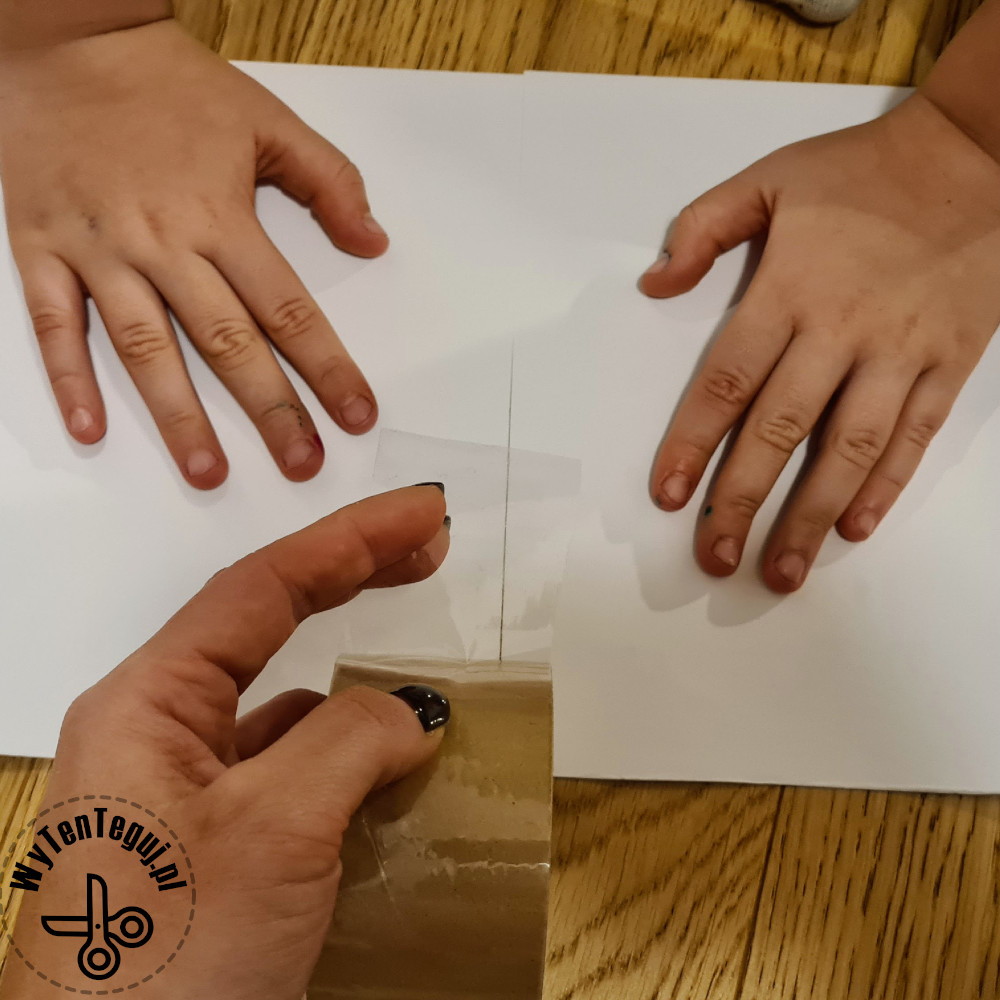
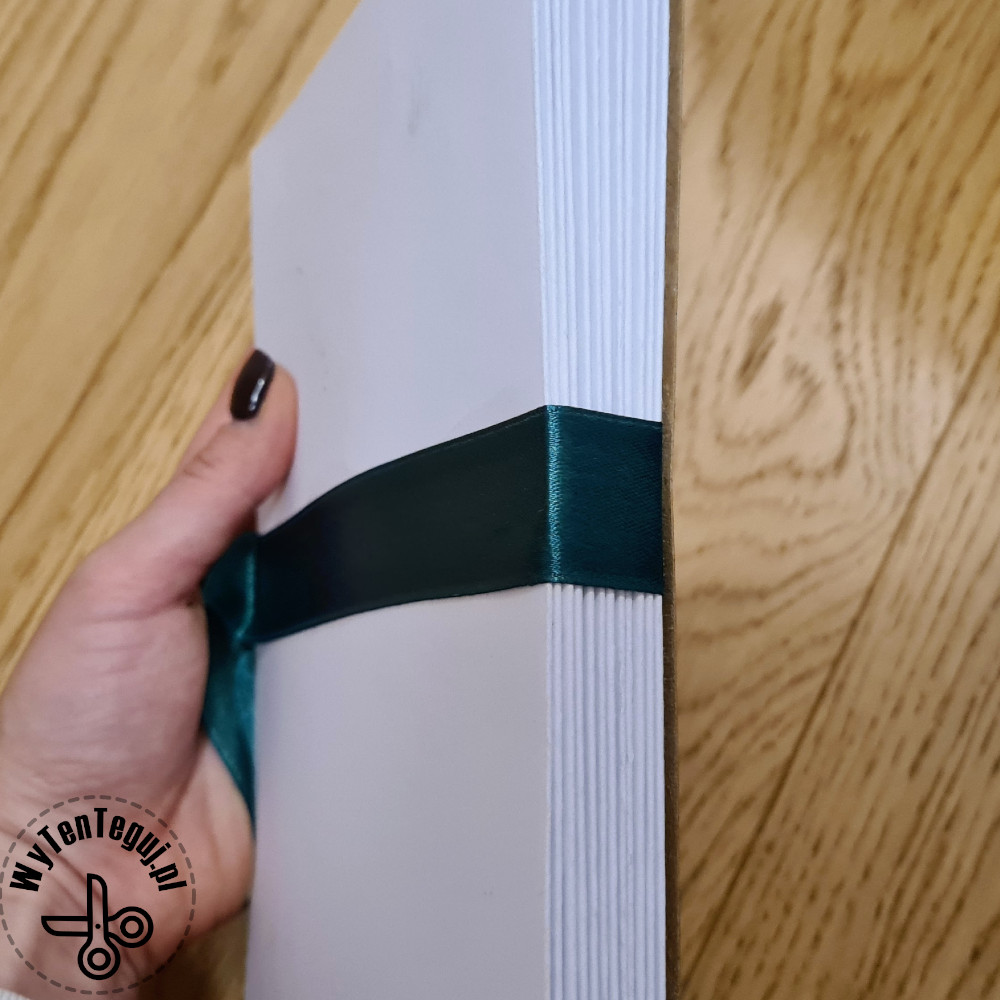
At the beginning, we glued the herbarium cards together with a wide sticky tape. This is how a accordion was created with all the cards linked.
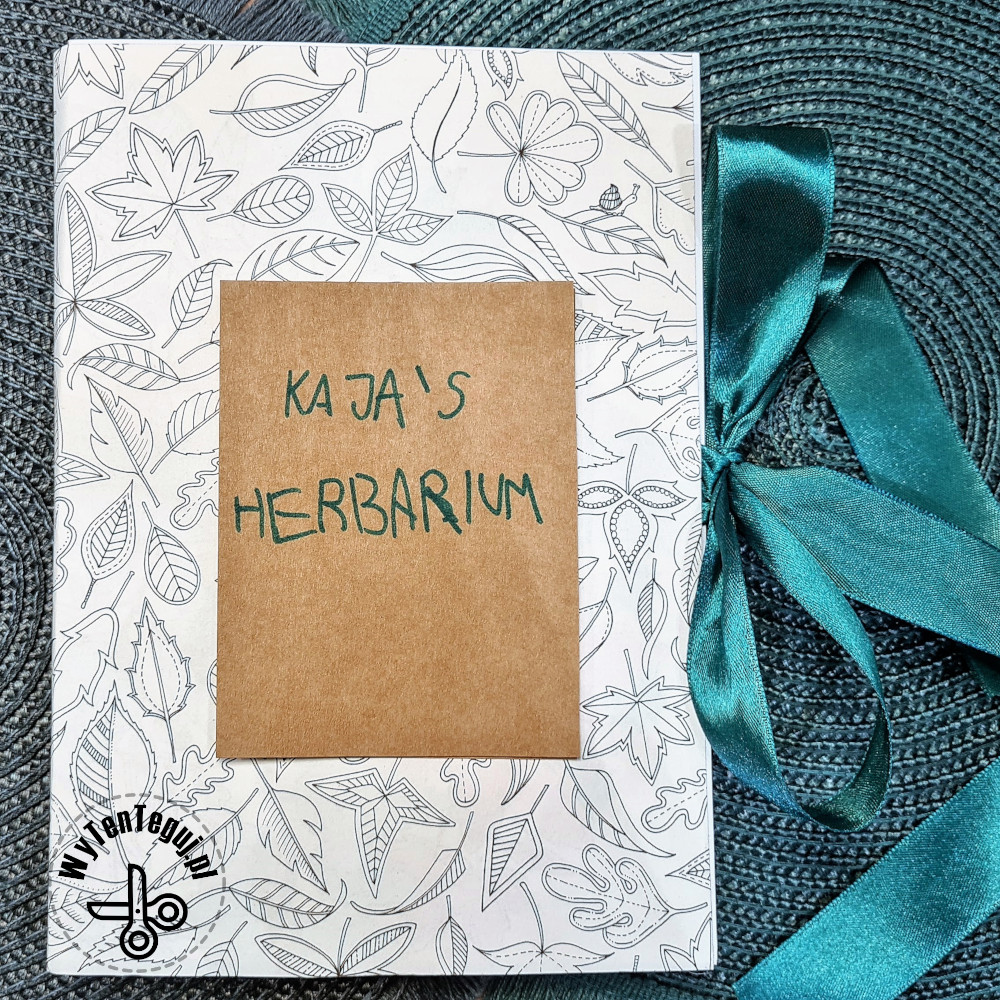
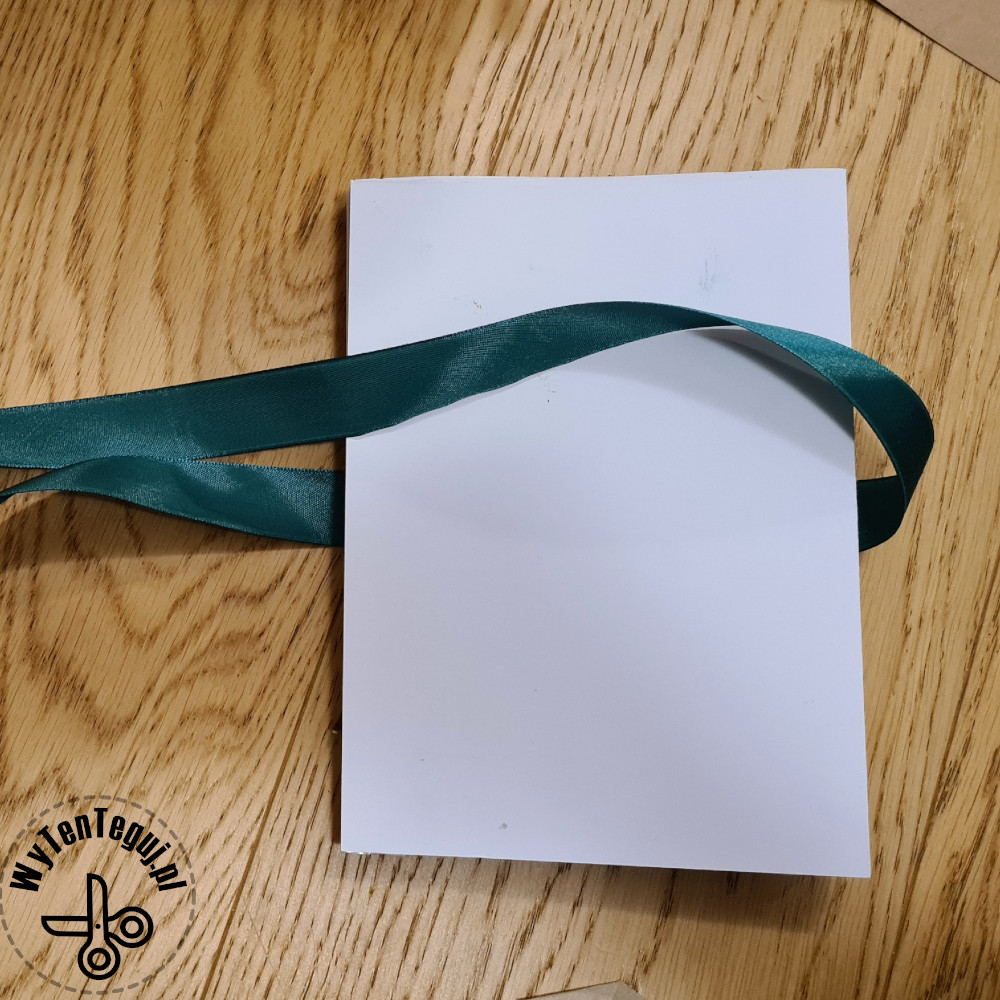
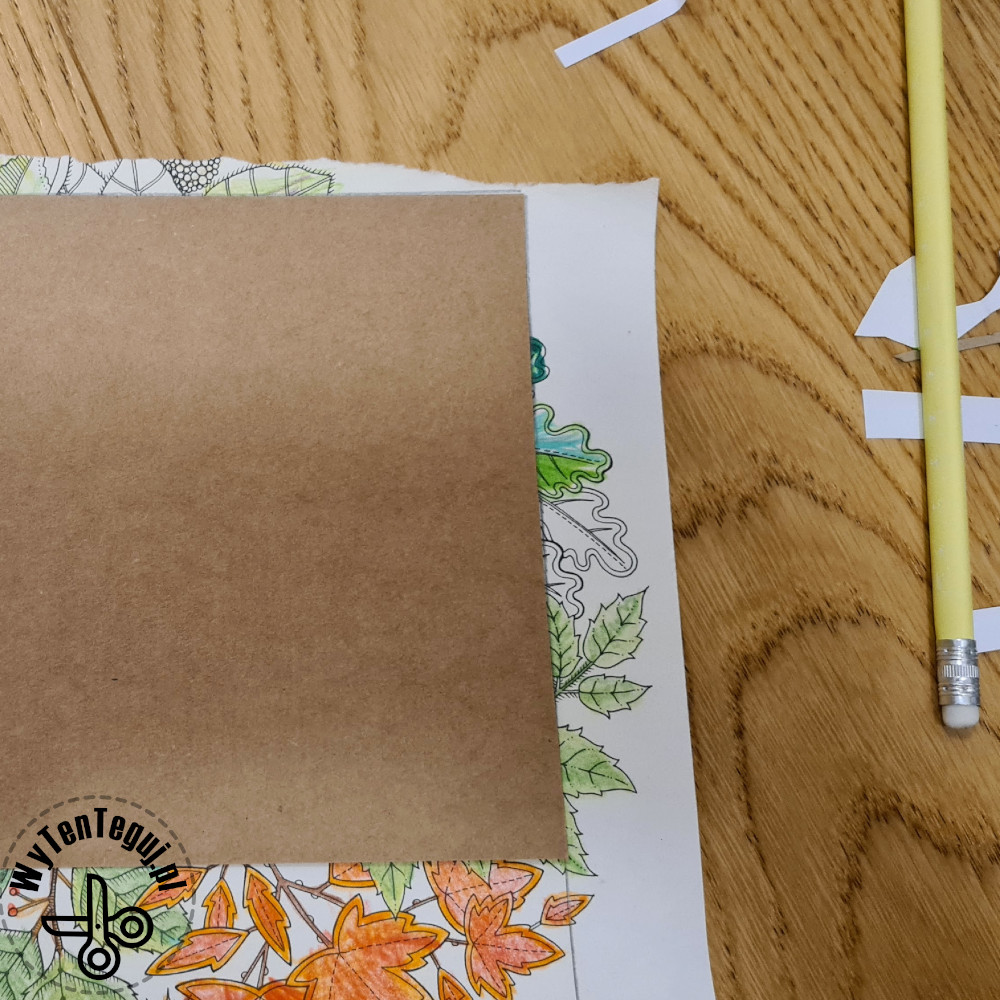
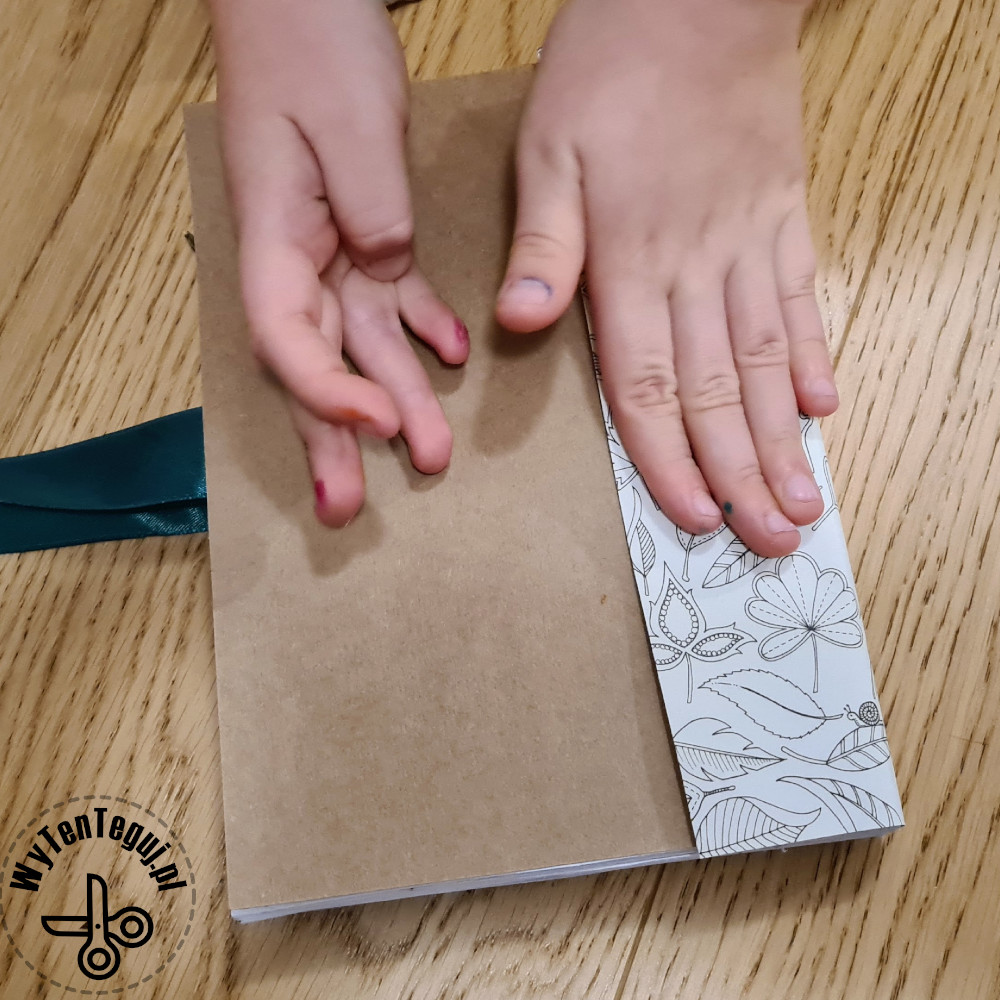
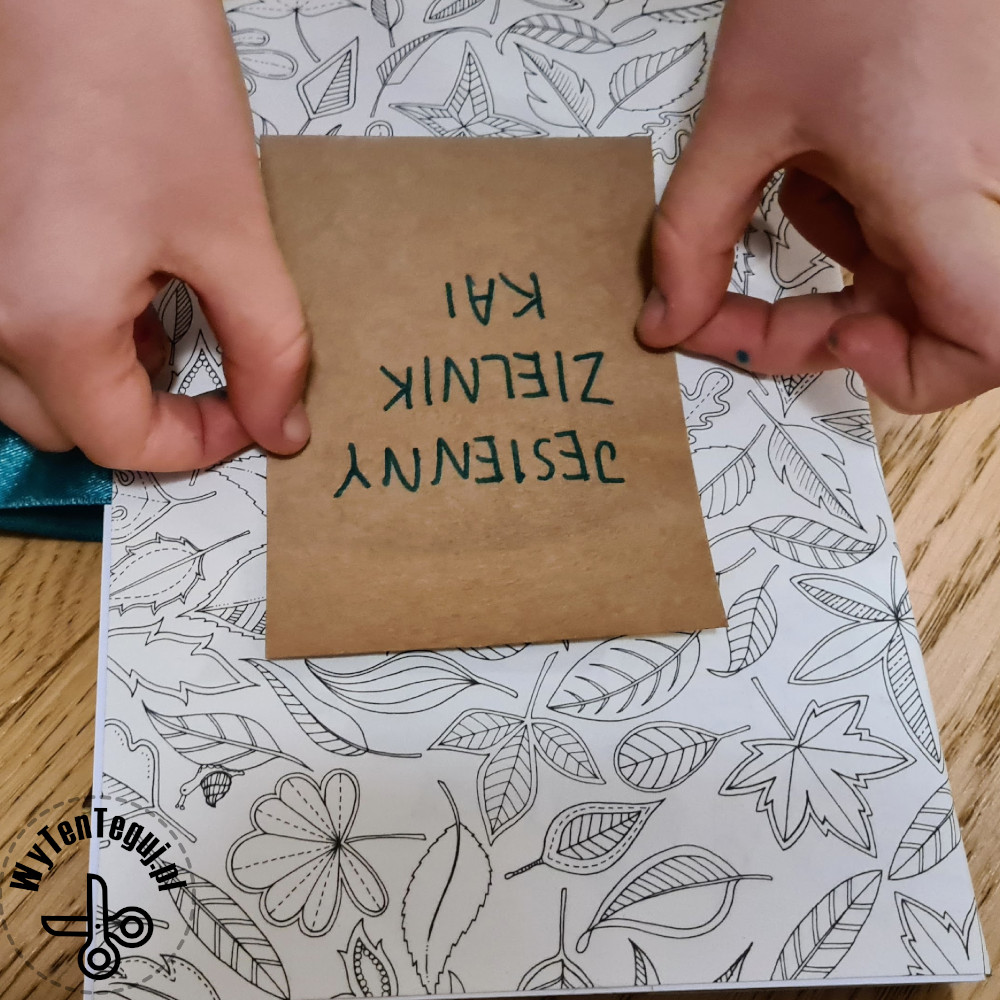
We thought about the cover for a long time and made many fittings. Eventually, the back of the cover was made of brown paper. We used leaf patterned paper as front and spine of the book. In addition, the rectangle for the signature is again made of brown paper. For this, or rather under this, a ribbon that can be tied on a herbarium.
Recipe for a book out of paper:
- Fold the pages in half.
- Stick the pages together at the back to form an accordion.
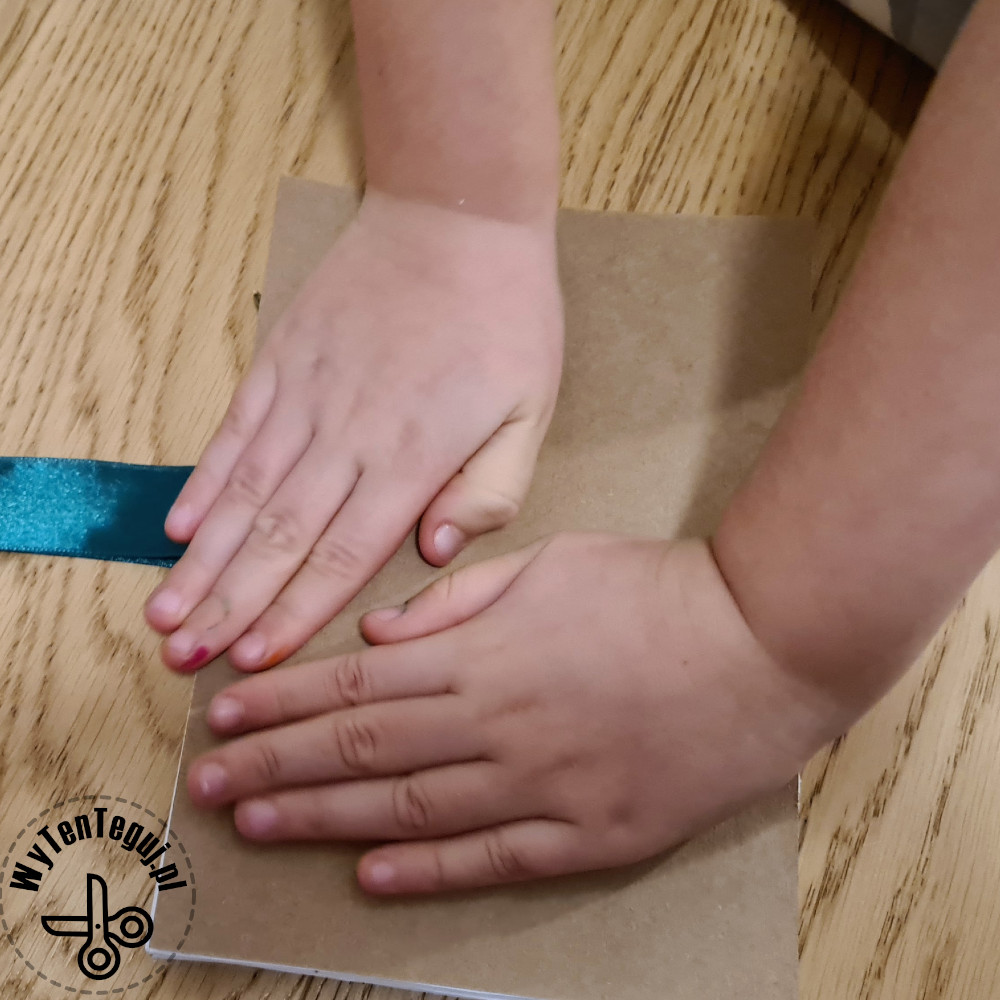
- Measure out a ribbon and wrap it around the accordion.
- On the last page and on the ribbon glue the cardboard.
- Prepare a patterned cardboard, longer than the cover length, so that it forms a spine and overlaps the back cover.
- Stick it on the first side and on the ribbon at the same time.
- Then fold over the spine and stick it on the back cover.
- Stick the title rectangle on top.
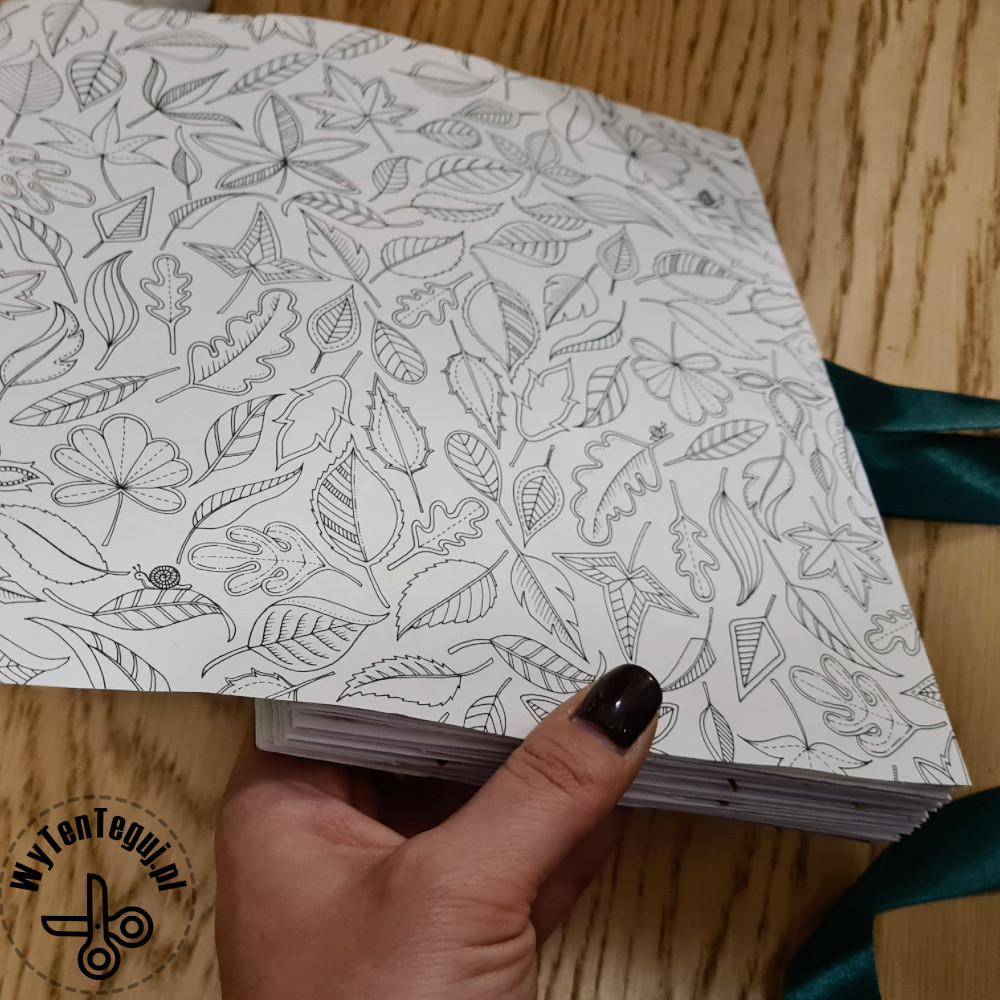
The herbarium is ready, take a look 🙂
Check out our ideas
You can find more ideas for playing with children in the DIY with children section.
Follow us in social media
If you want to be up-to-date with our newest posts, like our Facebook fanpage, follow us on Instagram, Pinterest and YouTube.
Nothing gives more satisfaction than doing something yourself. I haven’t even thought about DIY as my hobby, I’ve just done different “projects” when it was needed. Sometimes it’s a disguise for the Masquerade Party in kindergarten. Another time, cutting out the pumpkin and baking the witch’s fingers for Haloween. Or simply organizing holiday souvenirs. Now I decided to share my realizations with you. Let’s go it together!

wow