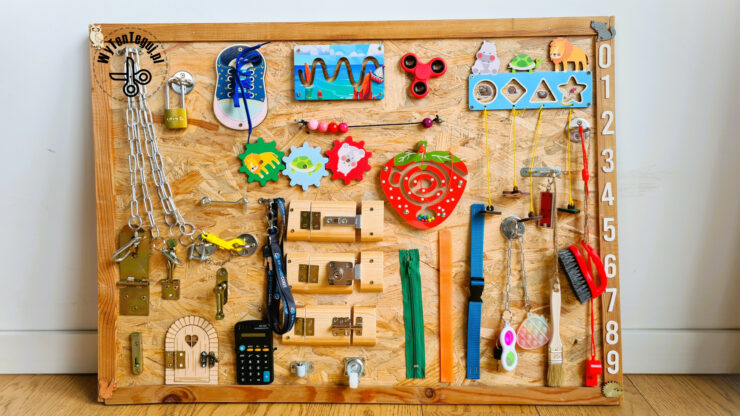
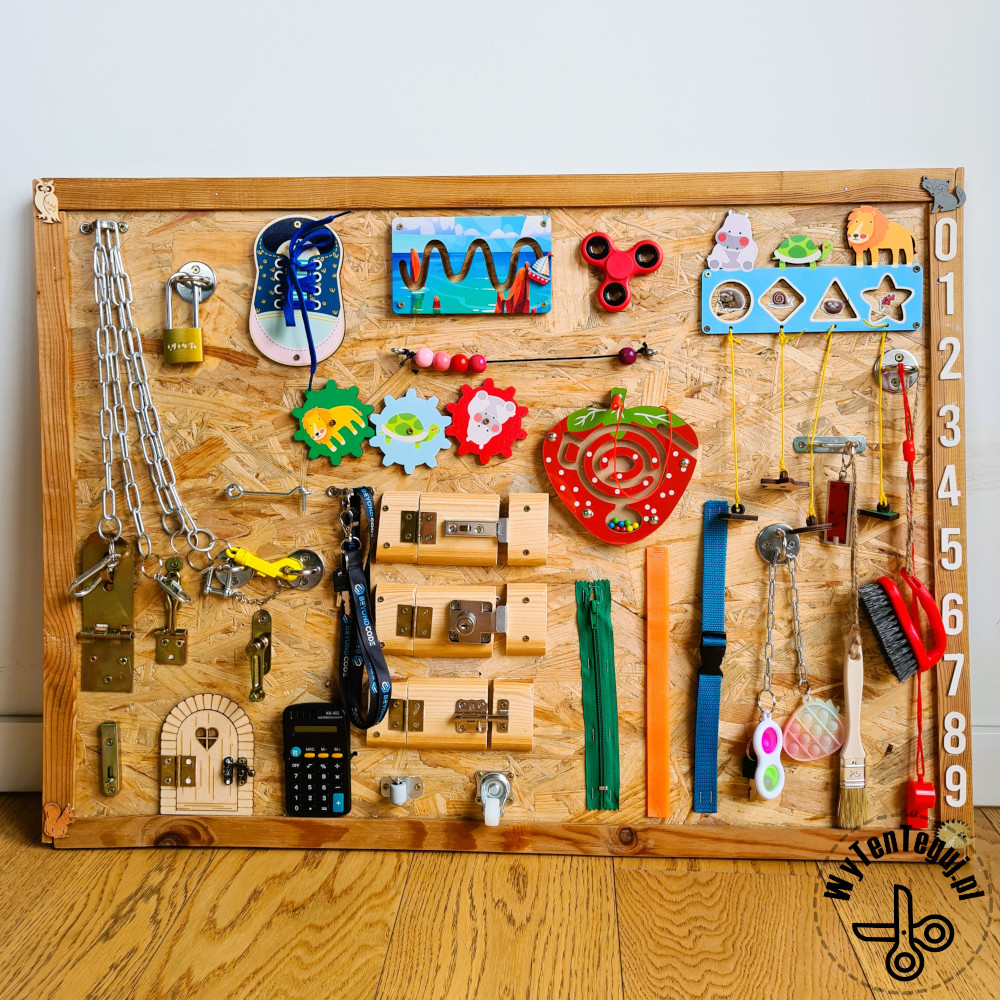
The busy board is a toy full of secrets for children from an early age. It is used for playing, for finger training, for tinkering and for learning about everyday objects. There are at least several types of busy boards, and the main ones I have encountered are: Montessori-style board, natural board – wooden, sensory board, board with toys. I decided to mix, and so on my board there are manipulative toys, as well as many items from everyday life, such as a padlock, a lock or a calculator. In this post you will learn how to make a busy board and whether it is better to make it yourself or buy a ready-made one.
![]() Polska wersja: Jak zrobić tablicę manipulacyjną
Polska wersja: Jak zrobić tablicę manipulacyjną

Busy board – DIY or buy it?
The eternal question – buy or make? I usually have no doubts about doing myself. But I must admit that I had moments of doubt and after a few hours of work I regretted not buying a ready-made one. On the other hand, I made the board together with my daughters, who helped me arrange the elements and, at the end, carried out tests and quality control. So it was a really fruitful way to spend half of Saturday together 🙂
So, before making a decision, I recommend considering a few things:
- Do you have a board for a base? The board is quite expensive, my initial research at Bricoman turned out that boards are quite expensive and there was no perfect size, so cutting was still needed. Also, if you don’t have a board for a base, I suggest you buy a ready-made busy board.
- Other materials – what do you already have in stock and what do you need to buy? I had a few eyelets at home that were left over from a safety net, some carabiners and screws. I bought the remaining items online and in stores (I write about the details below).
- Equipment – do you have the necessary equipment, mainly do you have a screwdriver? I also used a hammer, a saw and a stapler, but the latter is not necessary.
- Time – consider whether you will have time to make such a board. You need at least half a day, but also take into account that the final time depends on several factors:
- What is the condition of the base board? Do you have it ready-made or do you need to cut it? Do they need to be sanded, painted and covered with strips?
- Are you planning on doing opening windows? They are the coolest, but the most time-consuming and you need additional boards.
- What will be the size of the array and how many elements will there be on it?
- Do you have experience in drilling and screwing? I had a little bit of drilling and no screwing, and at the beginning it went dramatically. Later, when I discovered that you first drill a hole and then screw in, it went really smooth 🙂
To make a busy board you will need:
When you decide to make a board, you will need the appropriate equipment, a base board and manipulation elements.
Equipment
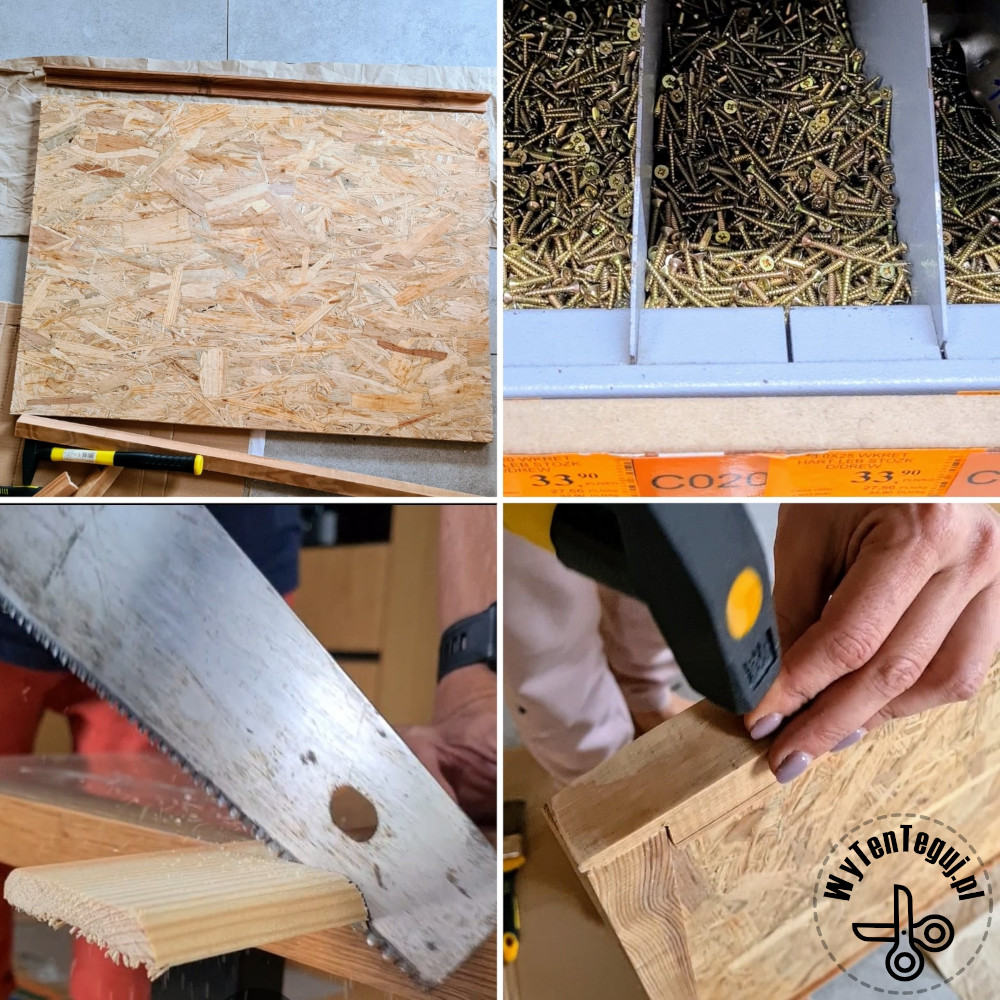
- Drill/driver – this is the most important equipment. Used for drilling holes and screwing in screws.
- Hammer – needed to nail the strips on the sides of the board. Slats are unnecessary if you have a smoothly finished base board.
- Saw – needed to cut the wood for the door.
- Taker/stapler – Useful for attaching ribbons, Velcro and quick-release fasteners. You can omit it and attach these elements with screws.
- Sandpaper – to smooth the edges of the door.
- Nails and screws
Board – the base of the busy board
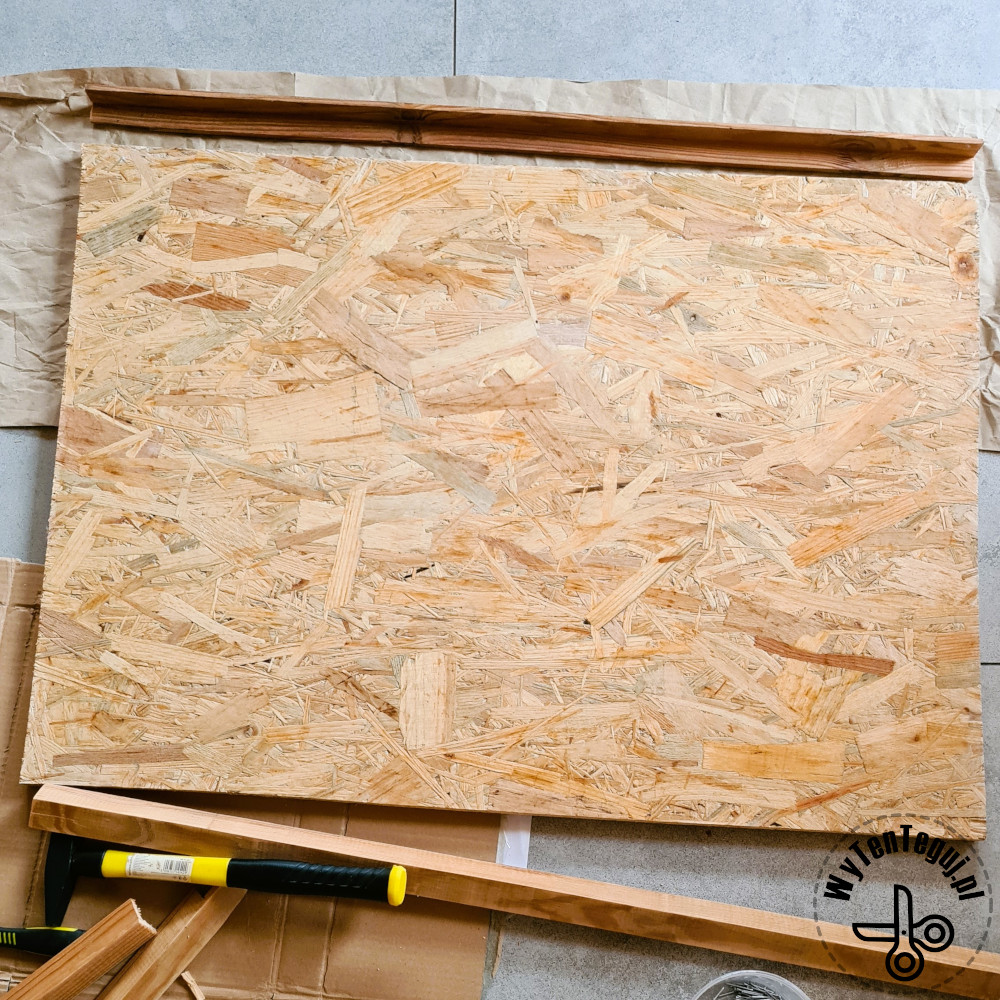
The base of the busy board is what I will tentatively call the board. There are also several options for what this board can be made of: plywood, MDF board, OSB board. They can all be purchased in DIY stores.
Fortunately, I found in the basement an OSB board measuring 60 x 75 x 2 cm. It was quite thick and had jagged edges, so I had to additionally upholster it with strips that I found in my father-in-law’s woodshed.
Manipulative elements
When it comes to manipulative elements, there is a lot of scope for creativity and it seems that the only limitation is your imagination.
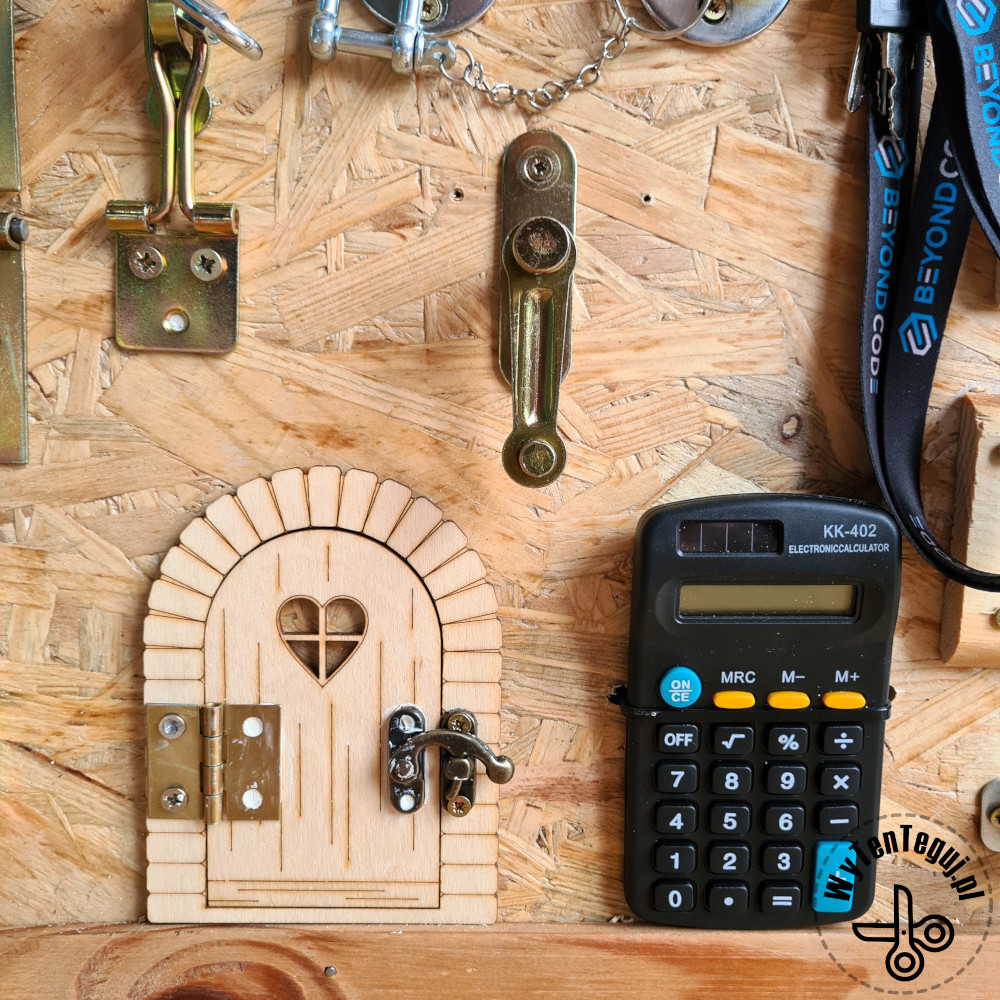
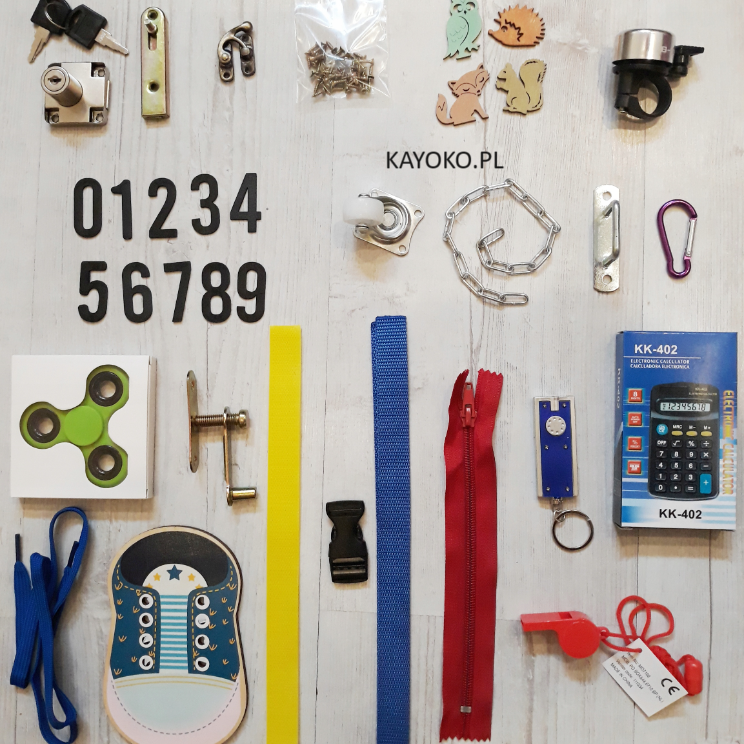
It is worth starting with items that you do not use at home, such as a calculator, an old telephone with a dial and receiver.
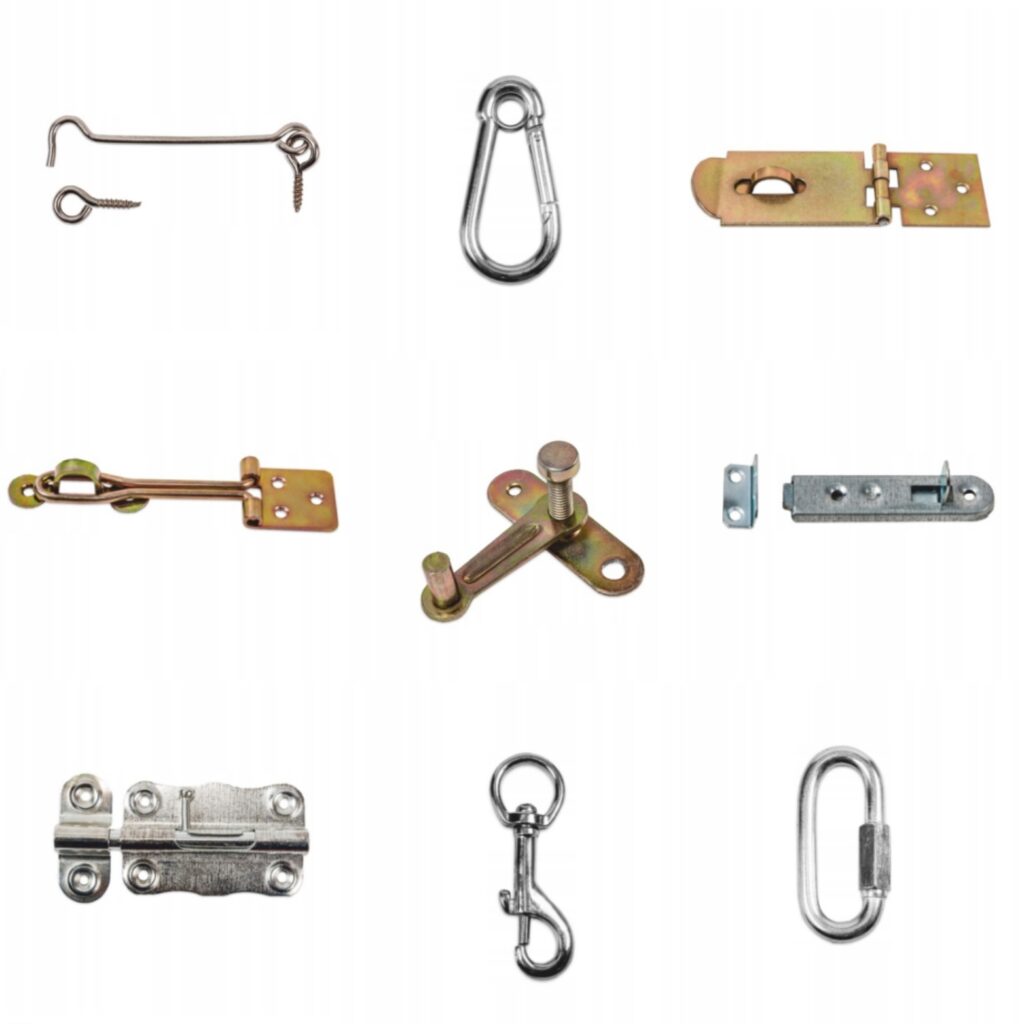
Metal elements
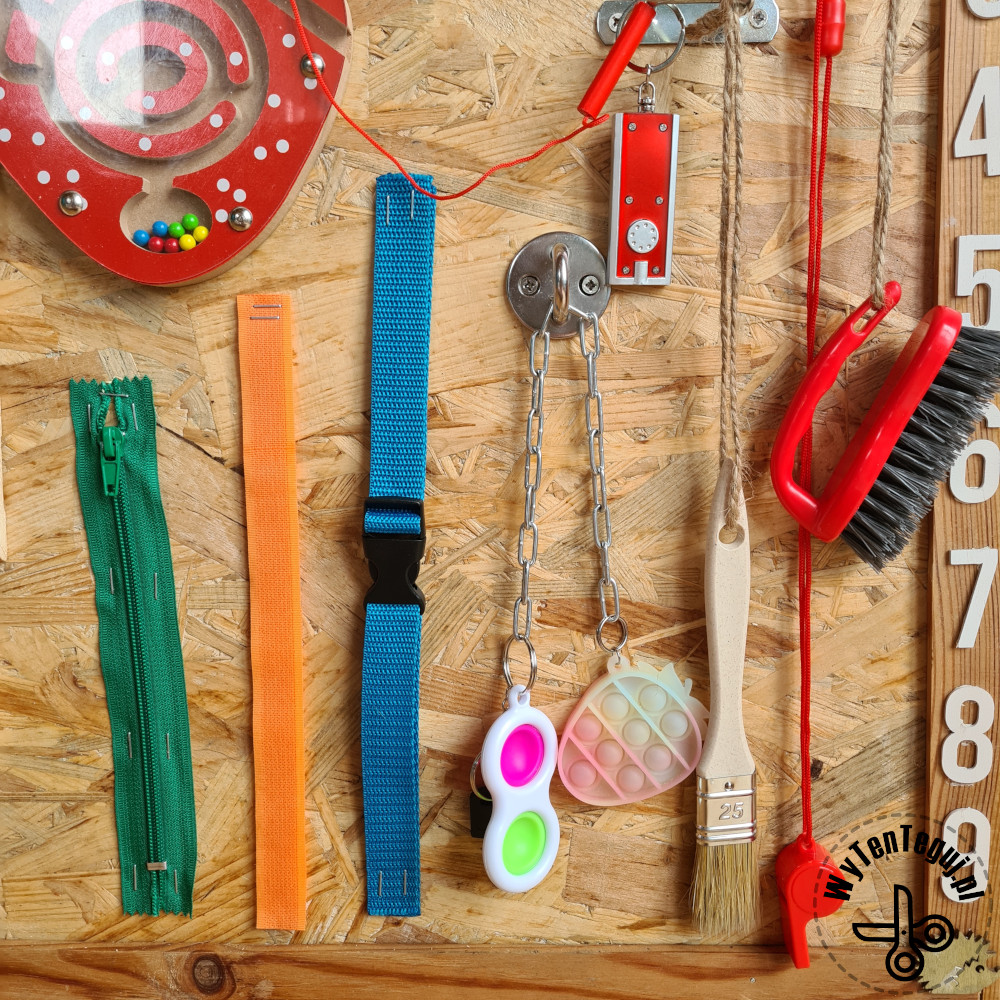
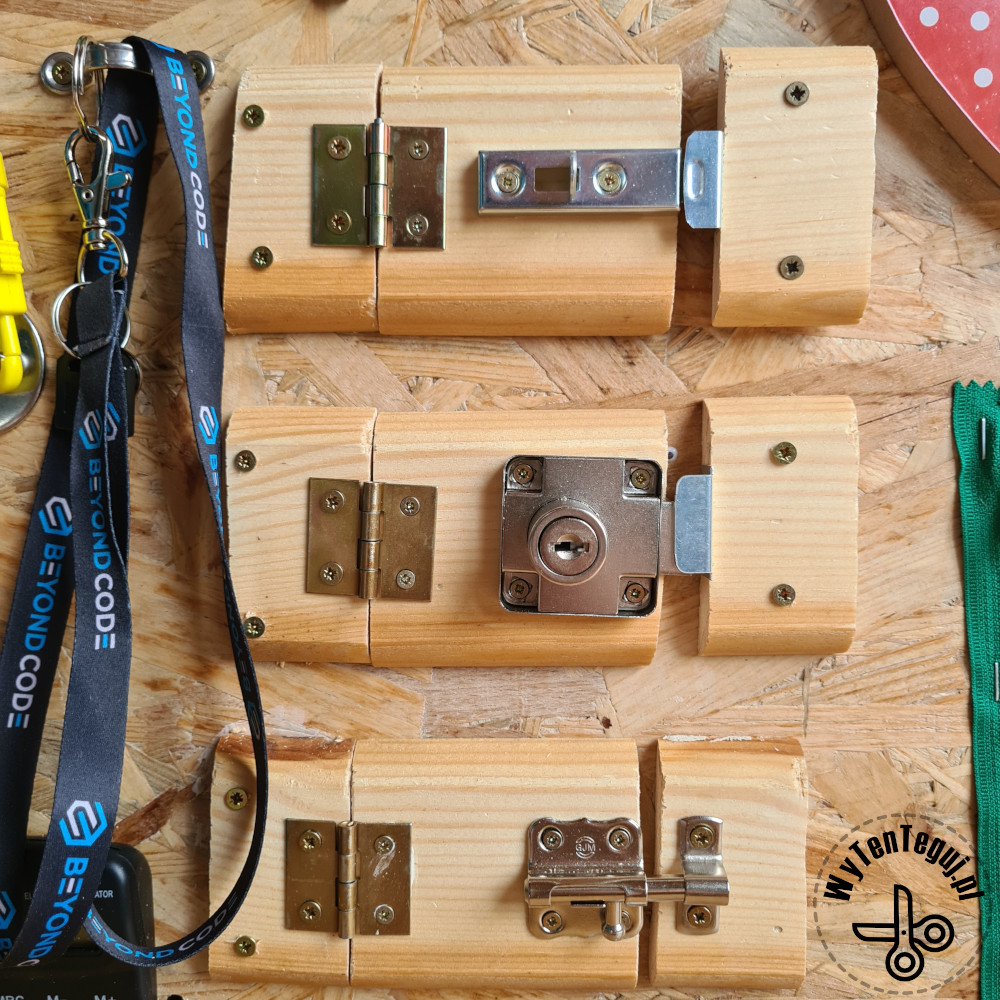
Secondly, there are metal elements and various types of padlocks, locks and latches that can be purchased stationary in DIY store. I bought online: window hook, snap hook with thimble, hot-dip snap hook, shackle, galvanized spindle, wire spindle, window screw cap, furniture latch, universal deadbolt, braided hinge, 3mm chain, flat brush, hand brush.
Toys
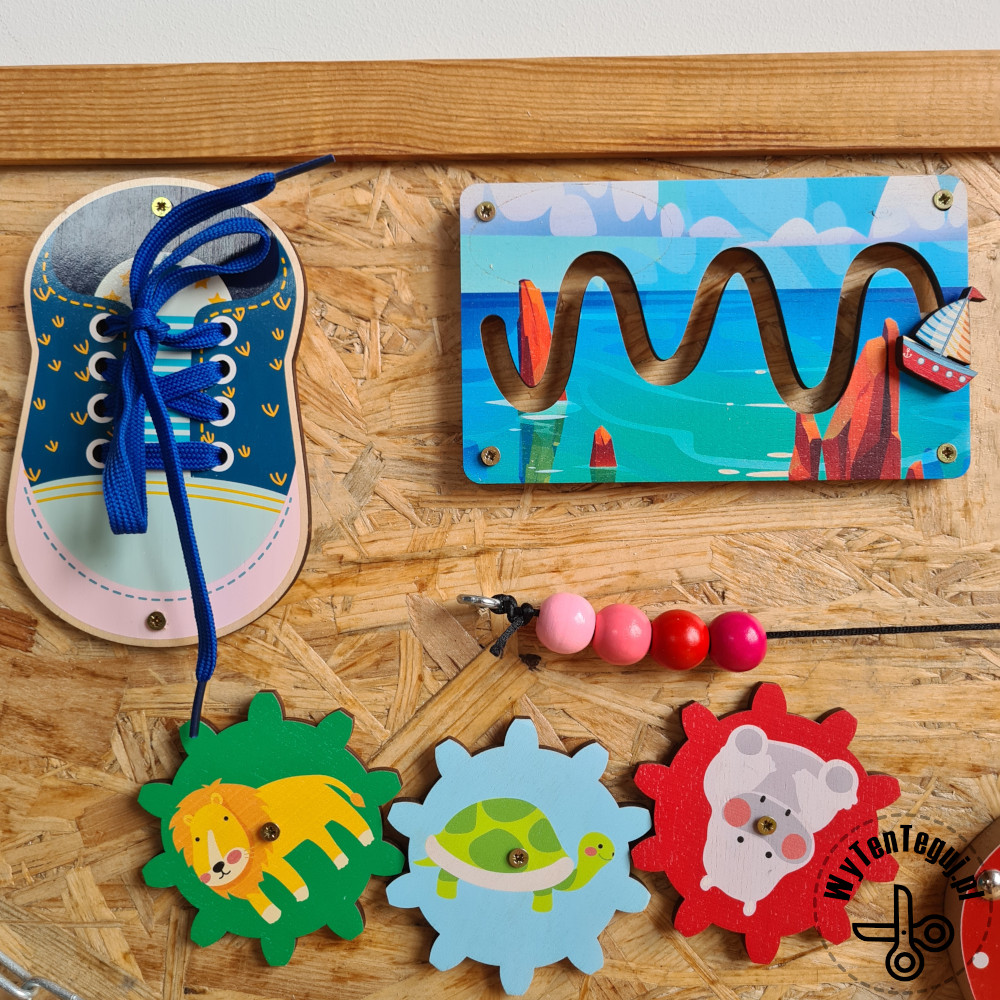
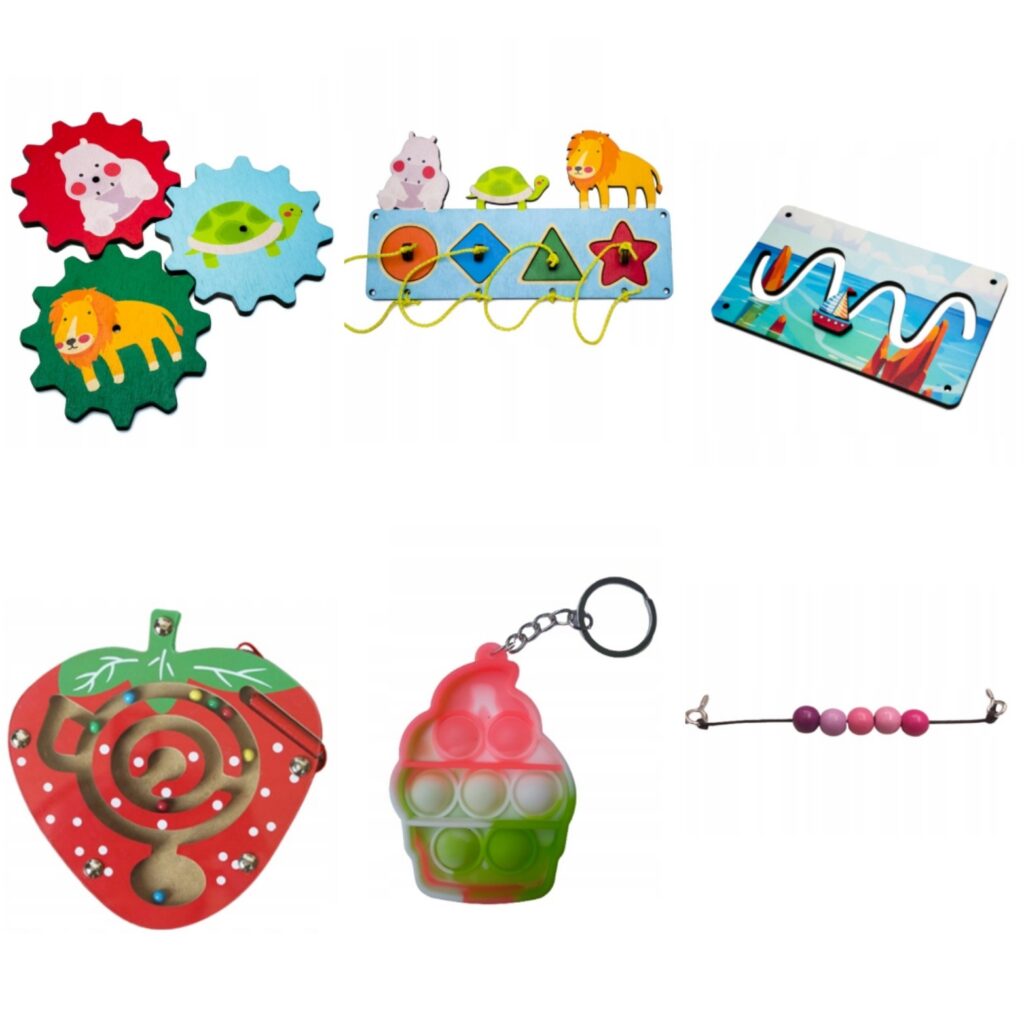
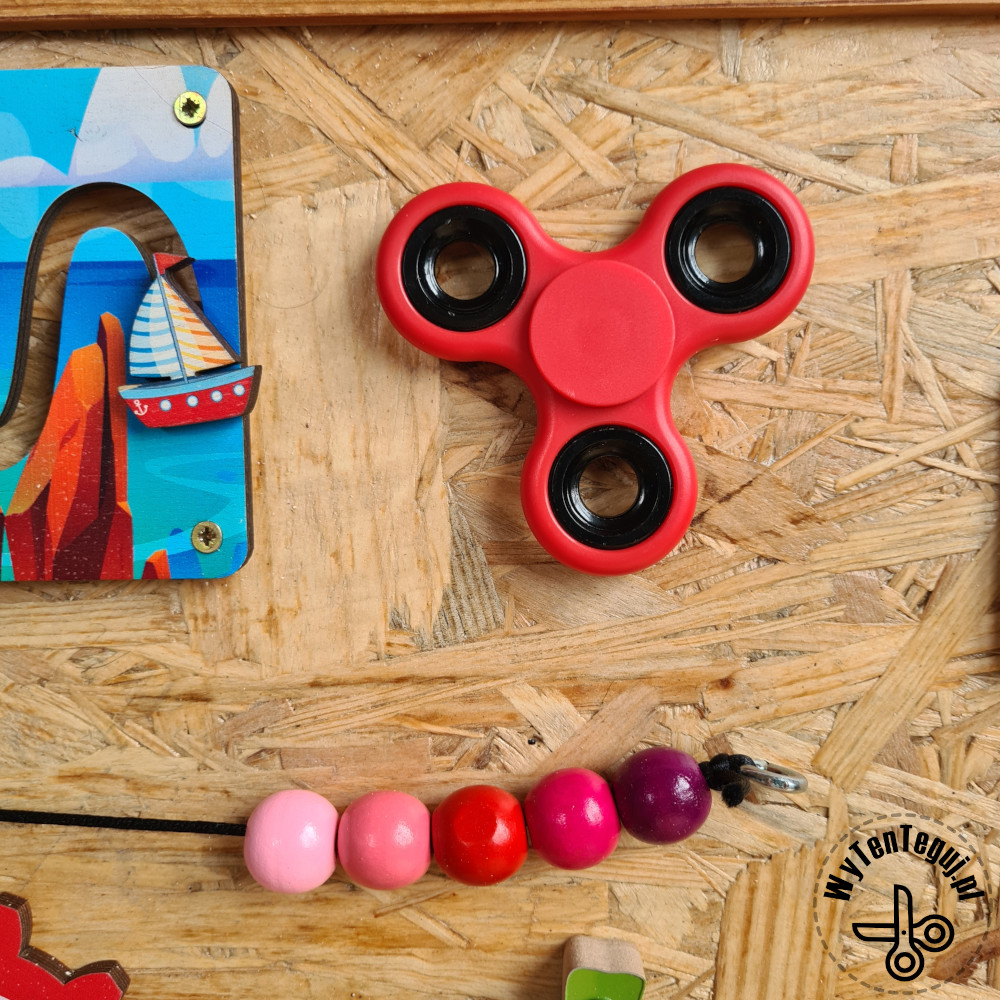
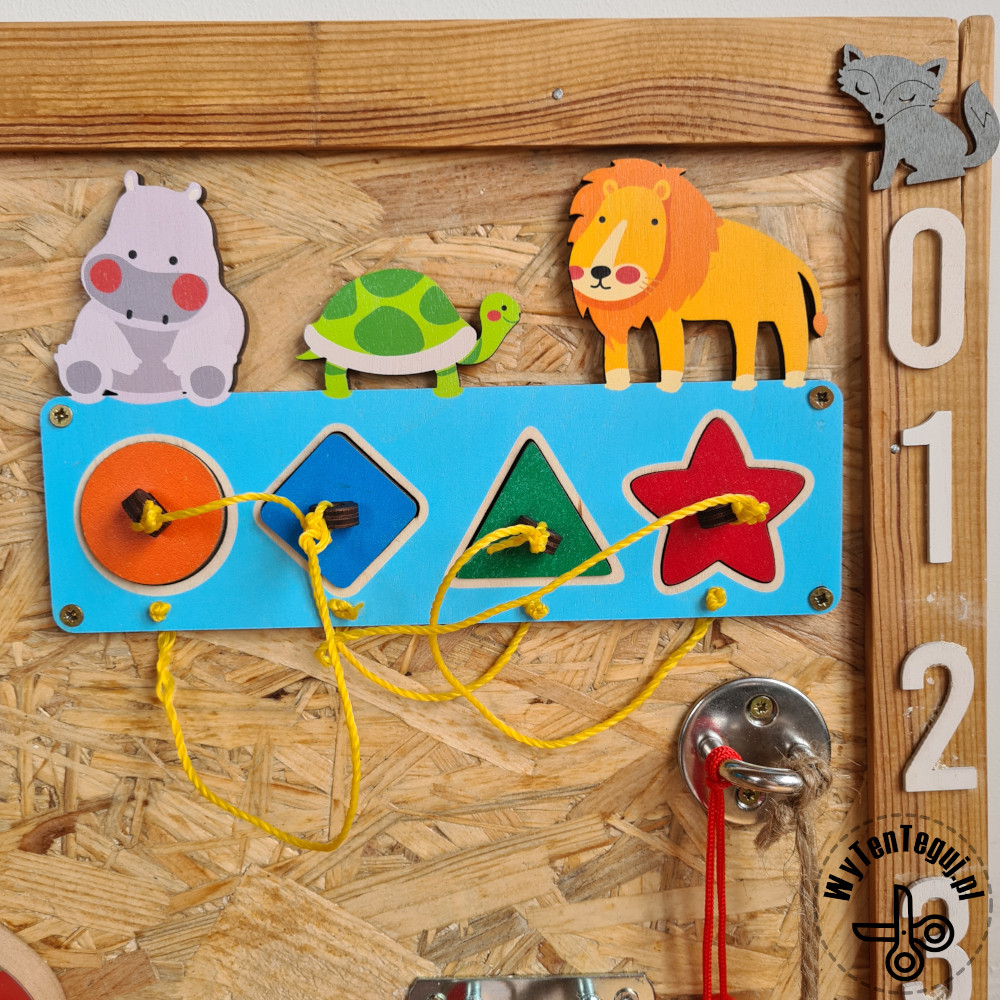
The last element are dedicated toys for the busy board, such as: shape sorter, maze, abacus or gears. Such elements can be purchased painted or in natural colored plywood. The easiest way to find them online.
The top attraction is the spinner, I highly recommend this element. Children aged 1 to 9 played with it 🙂
Dedicated sets
You can also buy online sets of elements for busy board. I bought a set containing 20 elements: Velcro, zipper, strap, calculator, whistle, carabiner, bicycle bell, white swivel furniture wheel, spinner, crank, square handle, square furniture lock, 50 pieces of assembly screws, straight latch, box closure, numbers, shoe with lace, chain 25 cm, LED flashlight lamp, decor – 4 animals – owl, hedgehog, fox and squirrel.
How to make a busy board
![]() The first step is to prepare the base, i.e. the board to which you will screw the manipulation elements. It must be secured so that no splinters stick out.
The first step is to prepare the base, i.e. the board to which you will screw the manipulation elements. It must be secured so that no splinters stick out.
![]() The next step is to arrange the elements on the board so that each is easily accessible and does not interfere with each other.
The next step is to arrange the elements on the board so that each is easily accessible and does not interfere with each other.
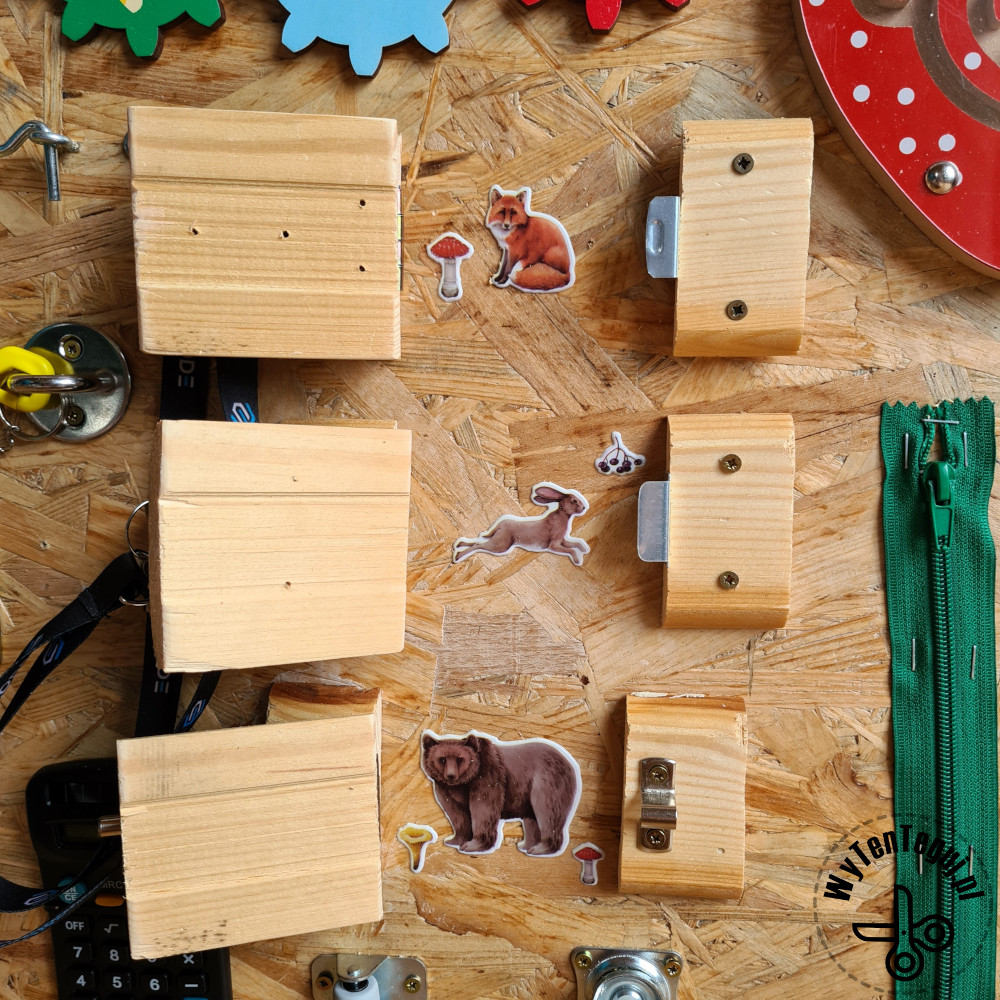
![]() The opening windows are, in my opinion, the coolest element, but quite time-consuming. You need to prepare and sand the boards, then screw the “frames” to the board, install the hinges and locks.
The opening windows are, in my opinion, the coolest element, but quite time-consuming. You need to prepare and sand the boards, then screw the “frames” to the board, install the hinges and locks.
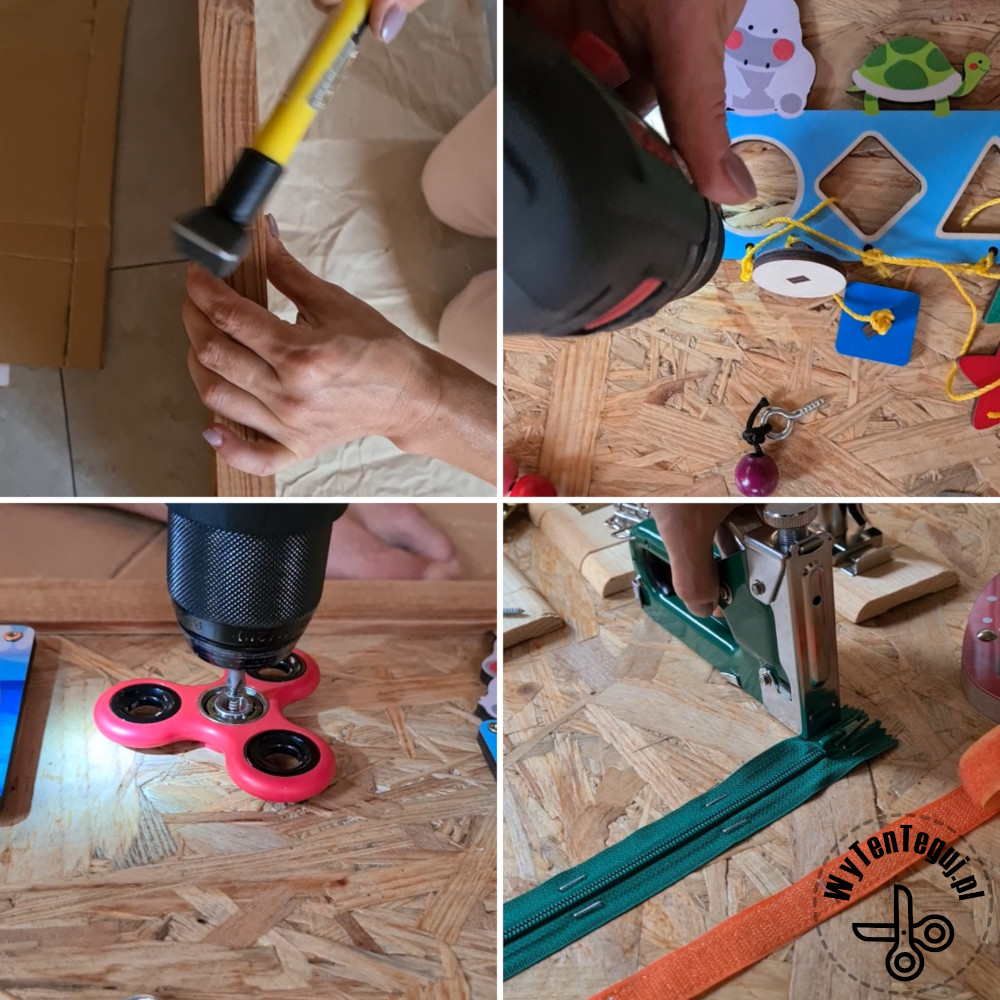
![]() The last stage is screwing all the elements. Important information that I didn’t know before: first you drill a hole and then screw in the screw 🙂 It’s also worth planning what’s where first and marking where the holes will be. Then drill holes smaller than the screws and finally mount all the elements with screws.
The last stage is screwing all the elements. Important information that I didn’t know before: first you drill a hole and then screw in the screw 🙂 It’s also worth planning what’s where first and marking where the holes will be. Then drill holes smaller than the screws and finally mount all the elements with screws.
The busy board is ready to play with

Check out our ideas
If you are looking for more inspiration for DIY with children you can find it in our Kids section in others or Montessori.
Follow us in social media
If you want to be up-to-date with our newest posts, like our Facebook fanpage, follow us on Instagram, Pinterest and YouTube.
Nothing gives more satisfaction than doing something yourself. I haven’t even thought about DIY as my hobby, I’ve just done different “projects” when it was needed. Sometimes it’s a disguise for the Masquerade Party in kindergarten. Another time, cutting out the pumpkin and baking the witch’s fingers for Haloween. Or simply organizing holiday souvenirs. Now I decided to share my realizations with you. Let’s go it together!
