Colorful, lightweight, and oh-so eye-catching – flat bead bracelets are the summer accessory right now! 🌞 They’re the perfect DIY jewelry project: easy to make, endlessly customizable, and guaranteed to brighten up any outfit. The best part? You don’t need fancy tools – just a bit of patience and some basic supplies.
Making flat bead bracelets is such a fun way to spend a creative afternoon. And trust us: once you make your first one, you’ll be hooked – it’s impossible to stop at just one! 😉
Our Collections So Far
We’ve already created a few themed collections, and let me tell you – it’s addictive! We’ve had so much fun with:
🍓 Fruity vibes – juicy, colorful, and playful.
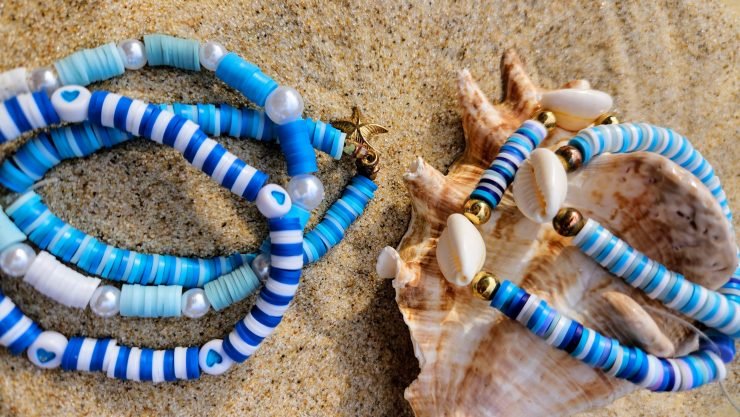
🌊 Seaside vibes – calm blues, sandy neutrals, and shells.
🌺 Hawaiian vibes – tropical flowers and vibrant brights.
🌲 Forest vibes – our most unique one, featuring handmade bison and wolf beads we discovered at a local woodshop.
Each collection feels different, and designing new patterns together is just pure joy.


What You’ll Need
✨ Flat beads – we use LaManuli beads (they come in 3 different sets).
✨ Elastic jewelry cord (around 0.5 mm thick) – already included in the set.
✨ Scissors
✨ Extra decorative beads – LaManuli sets also include letter beads, golden rounds and cubes, shells, and pearls. We also added themed beads to some collections, like little fruits or tropical flowers. For the Białowieża collection, we even scored local woodshop treasures with bison and wolf motifs.


Step-by-Step Tutorial
Step 1: Prep your base
Cut a piece of elastic cord – make it a few centimeters longer than your wrist so you have room to tie it off later.
Step 2: Pick your pattern
Solid color? Rainbow stripes? Geometric blocks? Lay your beads out first to test different looks. Mix and match accents until you love the combo.
Step 3: Start stringing
Thread the beads onto the cord. Pause every so often to check if the color flow feels right.
Step 4: Check the fit
Wrap the bracelet around your wrist – it should be snug but comfy. Leave a tiny bit of room since the cord stretches.
Step 5: Tie it up
Knot the cord securely with a double or triple knot.
Step 6: The finishing touch
Trim the extra cord and tuck the knot inside a bead to hide it. Voilà – your bracelet is ready to shine! 🎉


DIY Tips & Tricks
🌟 Stack them – they look amazing in sets of 3–4.
🌟 Play with contrasts – matte + shiny, brights + neutrals.
🌟 Personalize with letter beads or shells for a boho touch.
Flat bead bracelets are fun, quick, and sooo addictive. Try one, and before you know it, you’ll have a whole collection of your own! 💕
Check out our ideas
Other ideas for spring and summer crafts can be found in the Spring and Summer sections.
If you look for more DIY cards ideas check our Cards section.
If you are looking for more creative activities for kids check our DIY with kids section.
Follow us in social media
If you want to be up-to-date with our newest posts, like our Facebook fanpage, follow us on Instagram, Pinterest and YouTube.
Nothing gives more satisfaction than doing something yourself. I haven’t even thought about DIY as my hobby, I’ve just done different “projects” when it was needed. Sometimes it’s a disguise for the Masquerade Party in kindergarten. Another time, cutting out the pumpkin and baking the witch’s fingers for Haloween. Or simply organizing holiday souvenirs. Now I decided to share my realizations with you. Let’s go it together!
