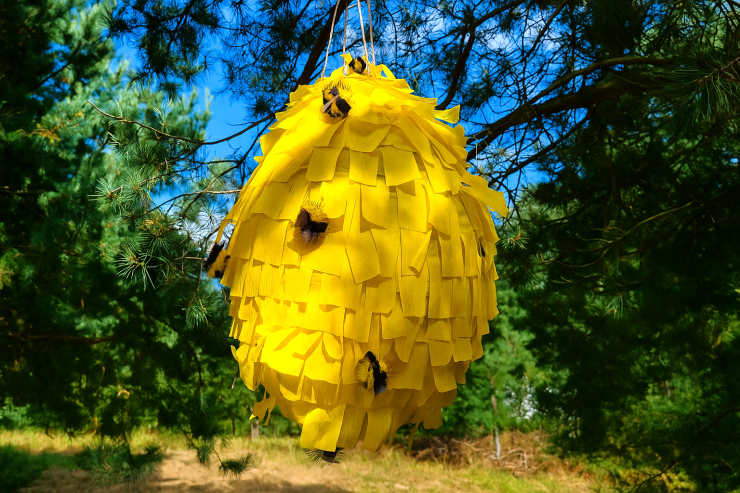
A piñata is always a party hit – for kids and grown-ups alike! This time we’ve made something extra special: a beehive piñata. 🐝🍯 It’s both a decoration and an activity in one, and the best part is – you can easily make it at home. To create the hive, we’ll use the classic papier-mâché method: layering strips of newspaper onto a balloon with homemade glue made from potato starch and water. Once dry, we’ll decorate it with yellow crepe paper and cute little bees made from pom-poms and black pipe cleaners.
Read on for our step-by-step tutorial and see how to make your very own beehive piñata 🐝.


Materials
- balloon (preferably round)
- old newspapers
- potato starch and water (for homemade glue)
- yellow crepe paper
- pom-poms (yellow, for the bees)
- black pipe cleaners (for antennae and stripes)
- foil or a piece of plastic packaging (for wings)
- scissors
- tape and/or hot glue
- string for hanging the piñata

Step-by-Step Instructions
Step 1: Piñata base
Blow up the balloon – this will be the shape of your hive.
Step 2: Homemade potato starch glue
Mix 2–3 tablespoons of potato starch with half a cup of cold water. Pour this into a saucepan with 1 cup of boiling water, stirring constantly until the mixture thickens into a smooth paste. Let it cool slightly before using.
Step 3: Covering the balloon
Tear the newspaper into strips. Dip each strip into the glue and stick it onto the balloon, layer by layer. Apply 3–4 layers, leaving a small hole at the top for filling with candy. Allow it to dry completely (overnight works best).


Step 4: Removing the balloon
Once the papier-mâché is dry and hard, pop the balloon and carefully remove it. Now you have the hive base.

Step 5: Decorating the hive
Wrap the entire hive in yellow crepe paper. For extra effect, you can add darker stripes by layering additional pieces of crepe paper.


Step 6: Making the bees 🐝
Create bees from yellow pom-poms. Add stripes and antennae from black pipe cleaners, and cut little wings out of foil or plastic. Glue the bees onto the hive so they look like they’re buzzing around it.
Step 7: Assembly & fun
Cut an opening, fill the piñata with candy and small toys, then seal it shut. Attach a sturdy string to the top – make sure it’s well secured, since the piñata has to withstand some strong hits! 🎉


Check out our ideas
If you are looking for more ideas for playing with children, then you will find them in the DIY with children section.
Follow us in social media
If you want to be up-to-date with our newest posts, like our Facebook fanpage, follow us on Instagram and Pinterest.
Nothing gives more satisfaction than doing something yourself. I haven’t even thought about DIY as my hobby, I’ve just done different “projects” when it was needed. Sometimes it’s a disguise for the Masquerade Party in kindergarten. Another time, cutting out the pumpkin and baking the witch’s fingers for Haloween. Or simply organizing holiday souvenirs. Now I decided to share my realizations with you. Let’s go it together!
