This project was a real adventure! 💪 Three people, three days, and hundreds (or maybe thousands!) of tiny beads placed with absolute precision. That’s how our triptych of K-pop Demon Hunters made from La Manuli ironing beads came to life.
The idea came to us spontaneously when I stumbled upon a gorgeous pattern of the Demon Hunters girls on Pinterest — my daughters absolutely love them. We hadn’t worked on anything big in a while, so it felt like the perfect moment to see whether we still had the patience, focus, and… the ability to have fun with it! 😄
This post contains affiliate links.
Materials you’ll need
- Ironing beads – we use LaManuli beads, and you’ll find the full color list below.
- 4 square pegboards – one finished panel is 12×38 cm.
- Baking paper and an iron
- 50×70 cm frame
- Hot glue
- Pattern – we used one from Pinterest. You can download the printable version here:
Bead colors for the K-pop Demon Hunters
Skin tones
Faces and necks of all three girls, we used three shades to create a nice gradient:
- Light brown
- Golden
- Reddish brown from the set (you can also use standard brown)
Lips:
Eyes:
- Black
- White
- Dark brown
- Grey (Mira only)
Zoey
Hair:
Background:
Necklace & top:
- Black
- White
- Grey
- Dark brown (just a few for the necklace)
- Green (from the green mix, but any greens will work)
- Dove blue (from the blue mix – optional, only a few pieces)
- Pastel blue (from blue mix or pastel set)
Rumi
Hair:
Background:
- Dark blue
Necklace & top:
- Black
- White
- Glitter purple (optional – can be replaced with regular purple)
- Pastel purple (a few for subtle shading)
- Grey
- Light grey (optional)
- Honey yellow
- Red
Mira
Hair:
- White
- Light pink
- Light red
- Red
- Reddish brown (or brown)
Background:
- Grey
Necklace & top:
- Black
- White
- Purple
- Glitter purple (few pieces for the lettering – optional)
- Pastel purple (few pieces – optional)
- Grey
- Light grey (few pieces)
- Light blue
How Our K-Pop Demon Hunters Came to Life Step by Step Using La Manuli Ironing Beads
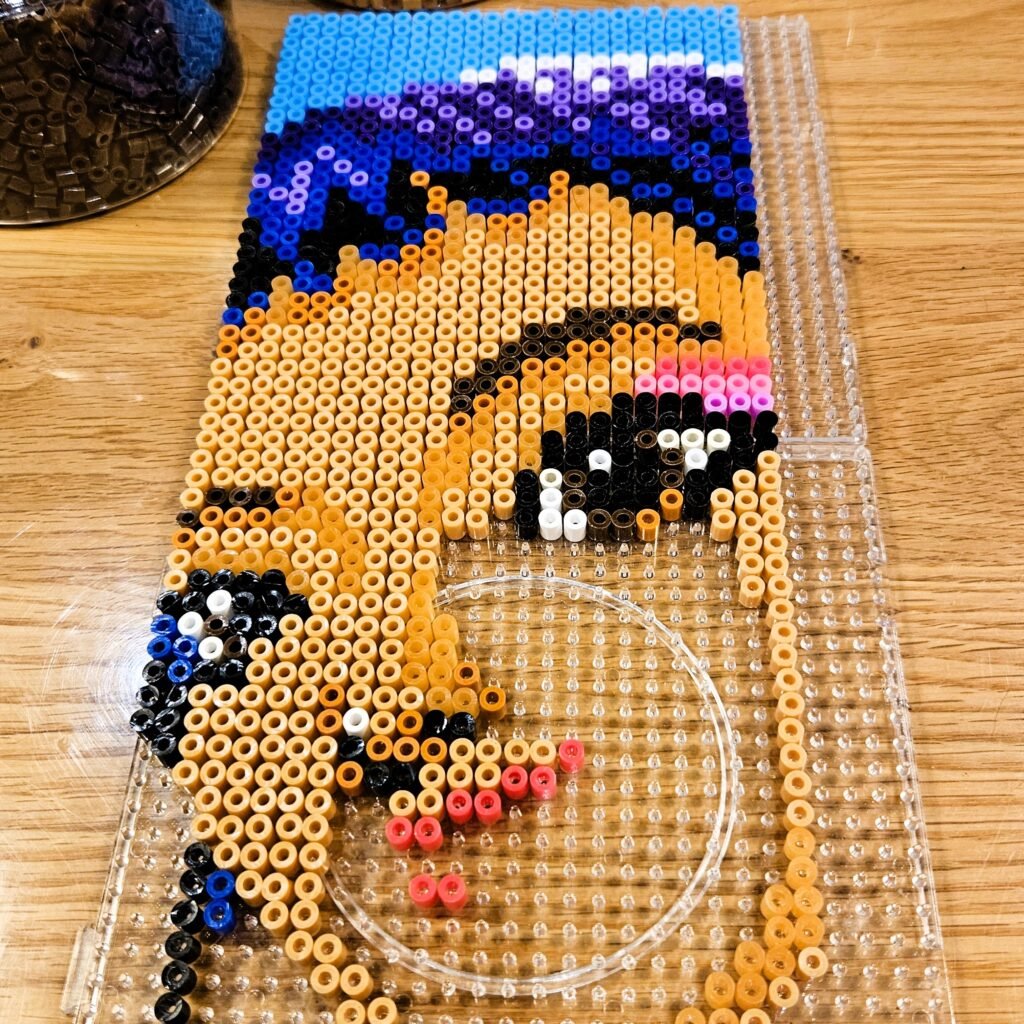
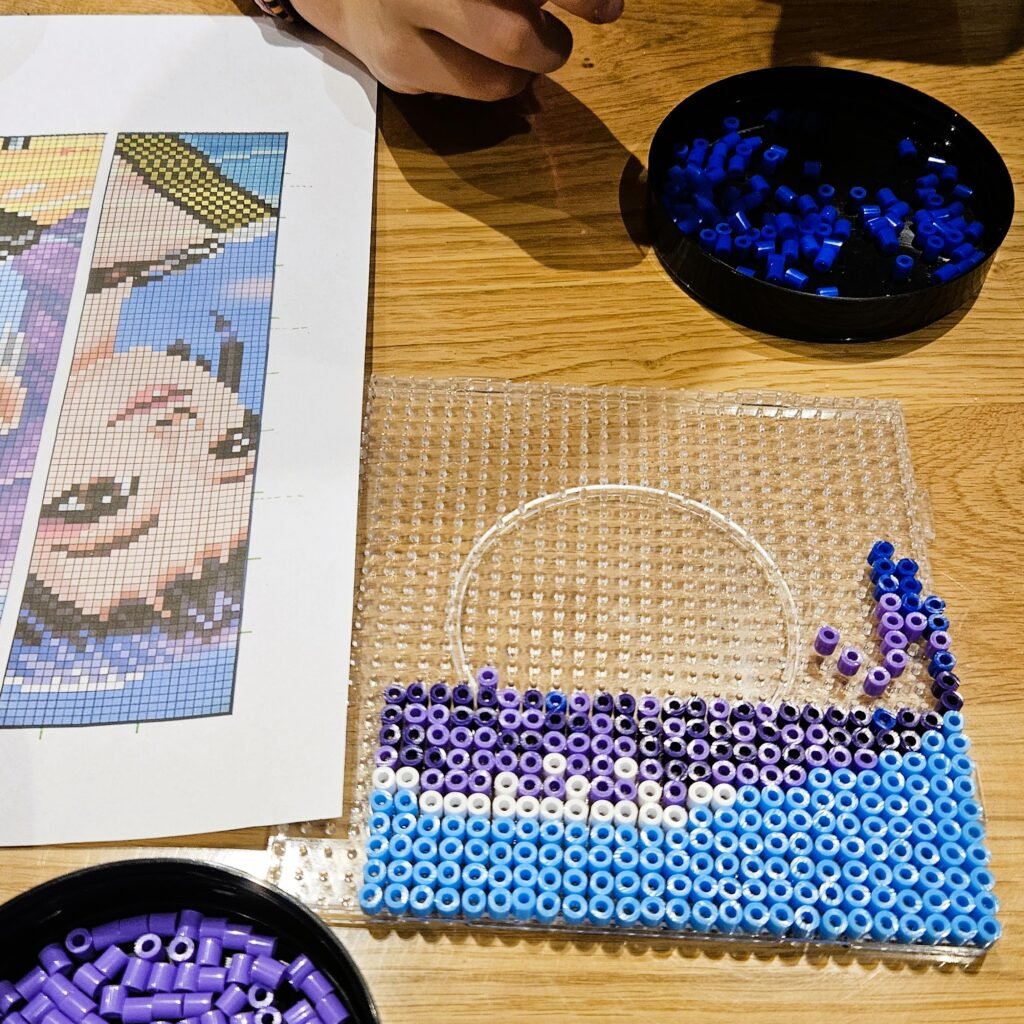
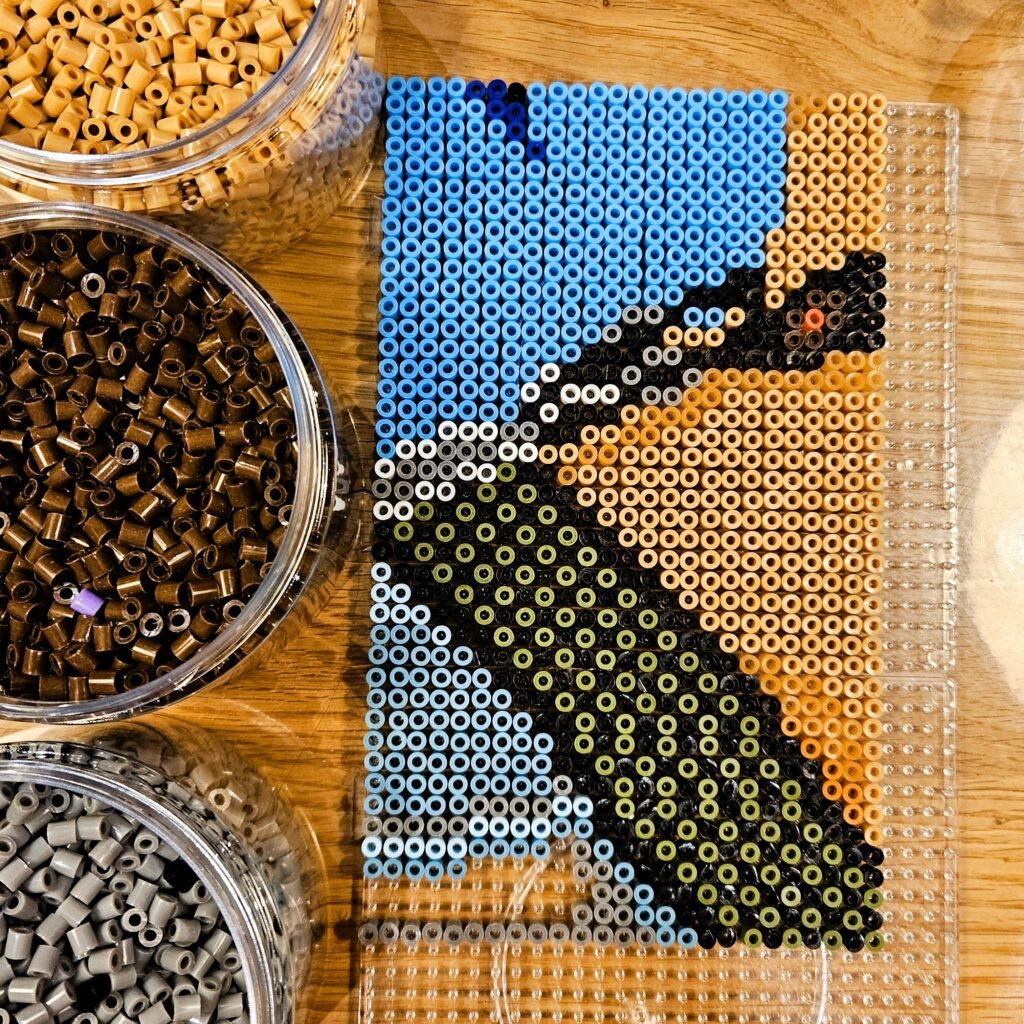
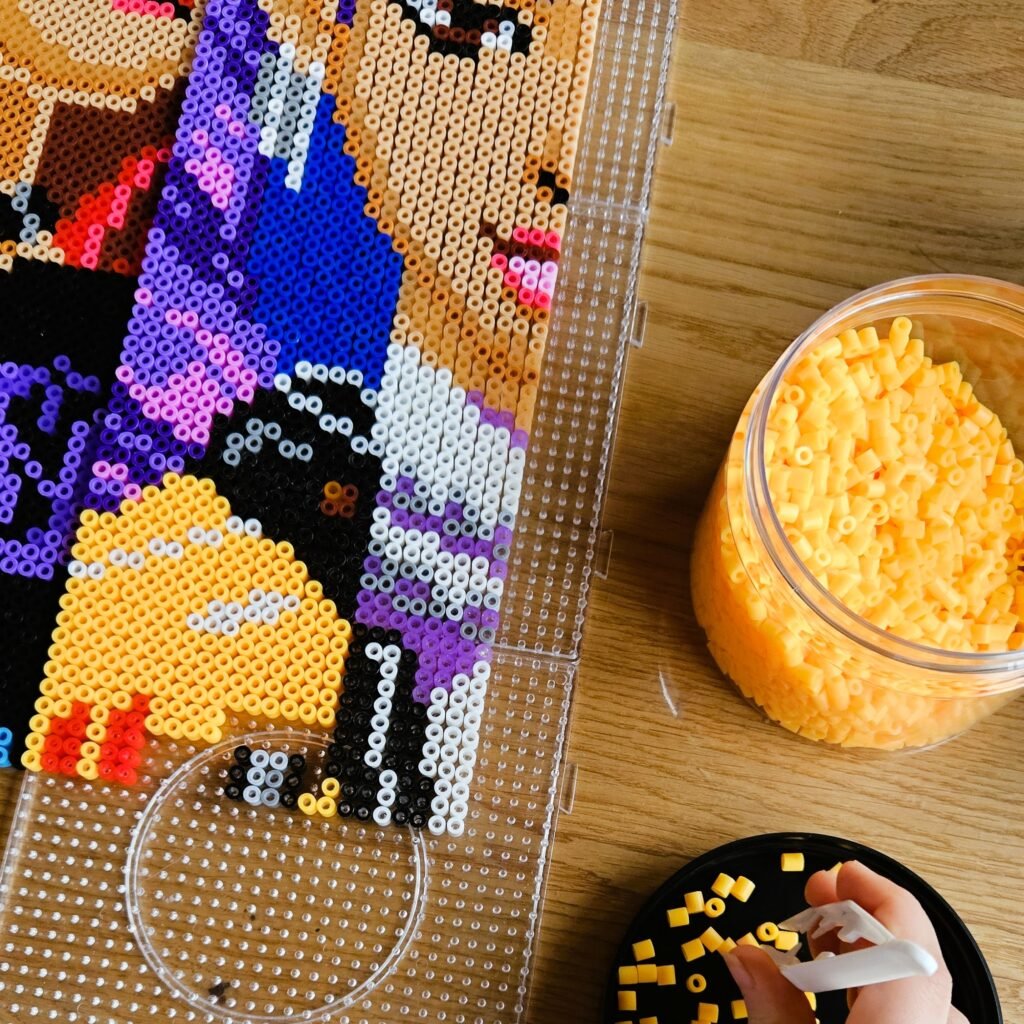
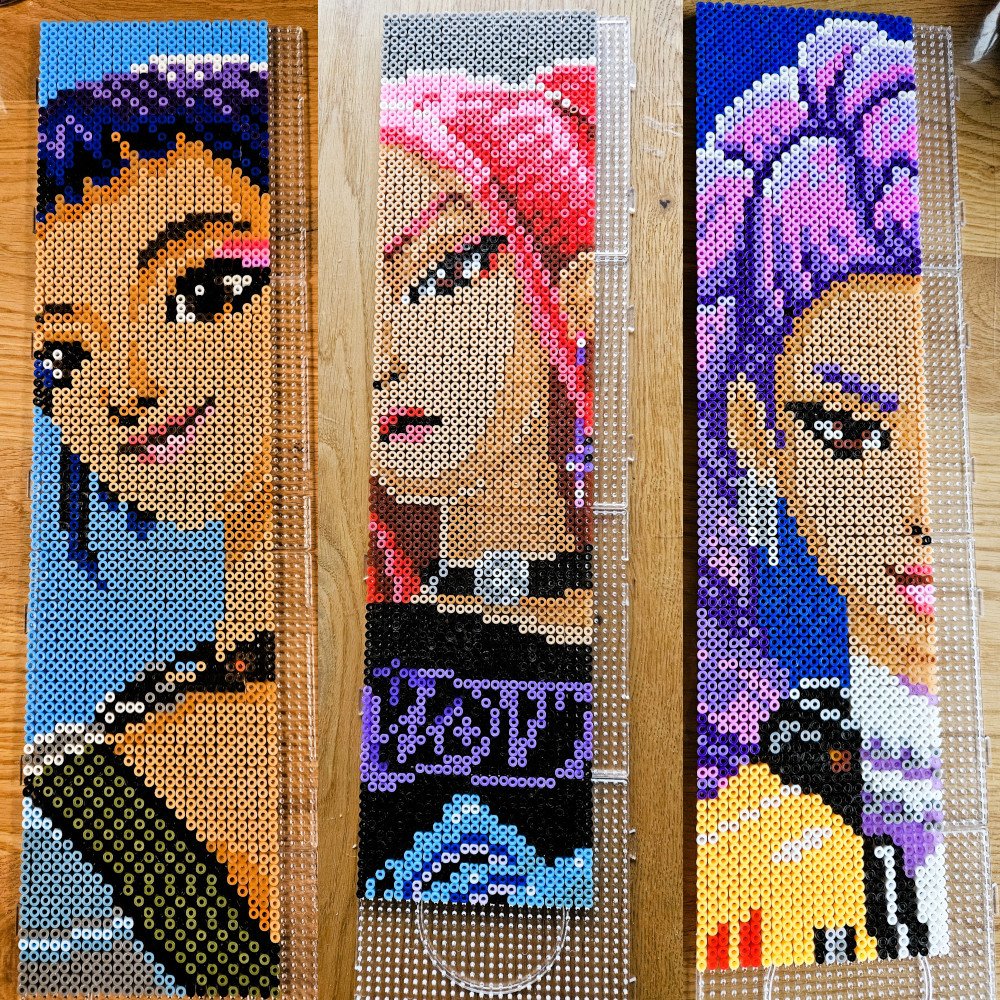
We started with Mira, who happens to be my younger daughter’s favorite. First, we picked out the perfect shades for her skin and hair, measured the pattern, and got straight to work. The design spans four pegboards, so we began from the top. Each of us took a different section, which made the whole process wonderfully efficient.
Slowly but surely — bead by bead — the characters started to take shape and gain personality. And that magical moment when we finally ironed the panels and everything fused together? Absolutely worth it. The satisfaction was huge!
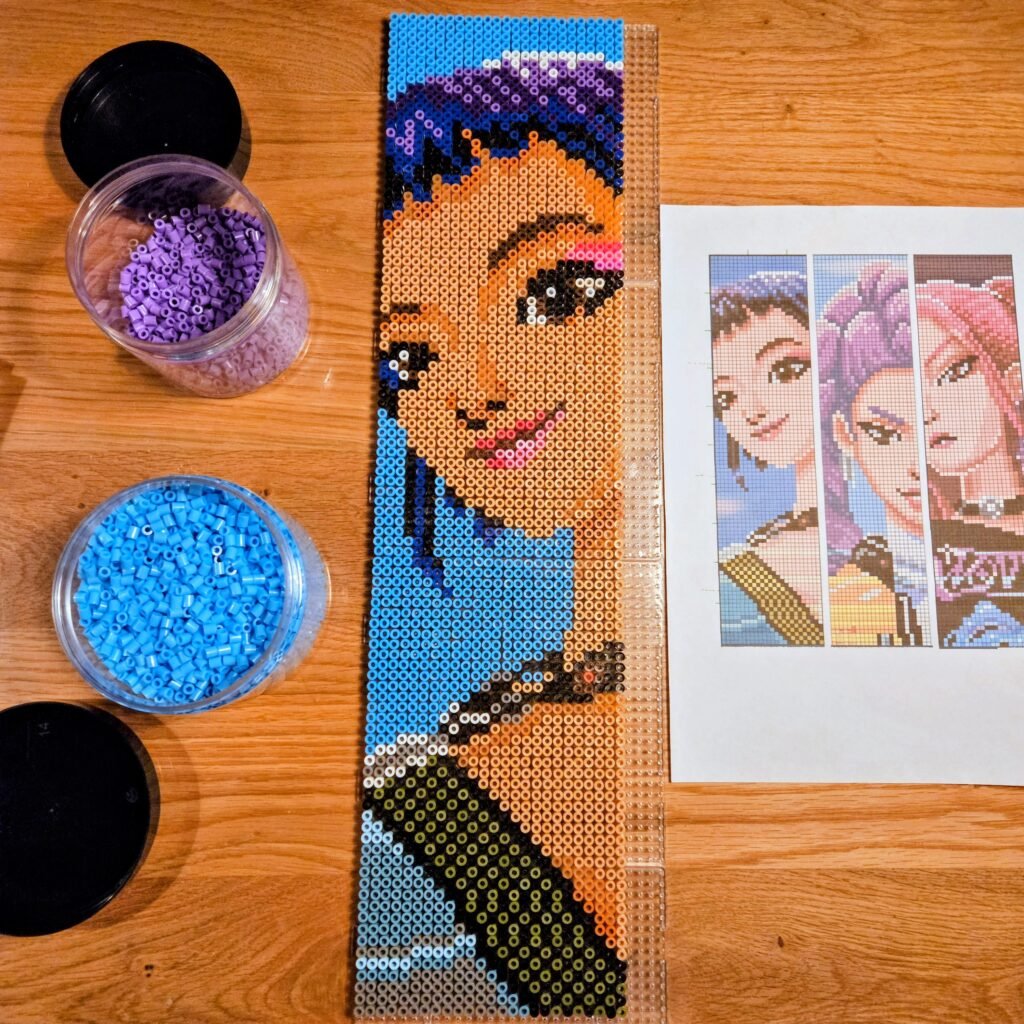
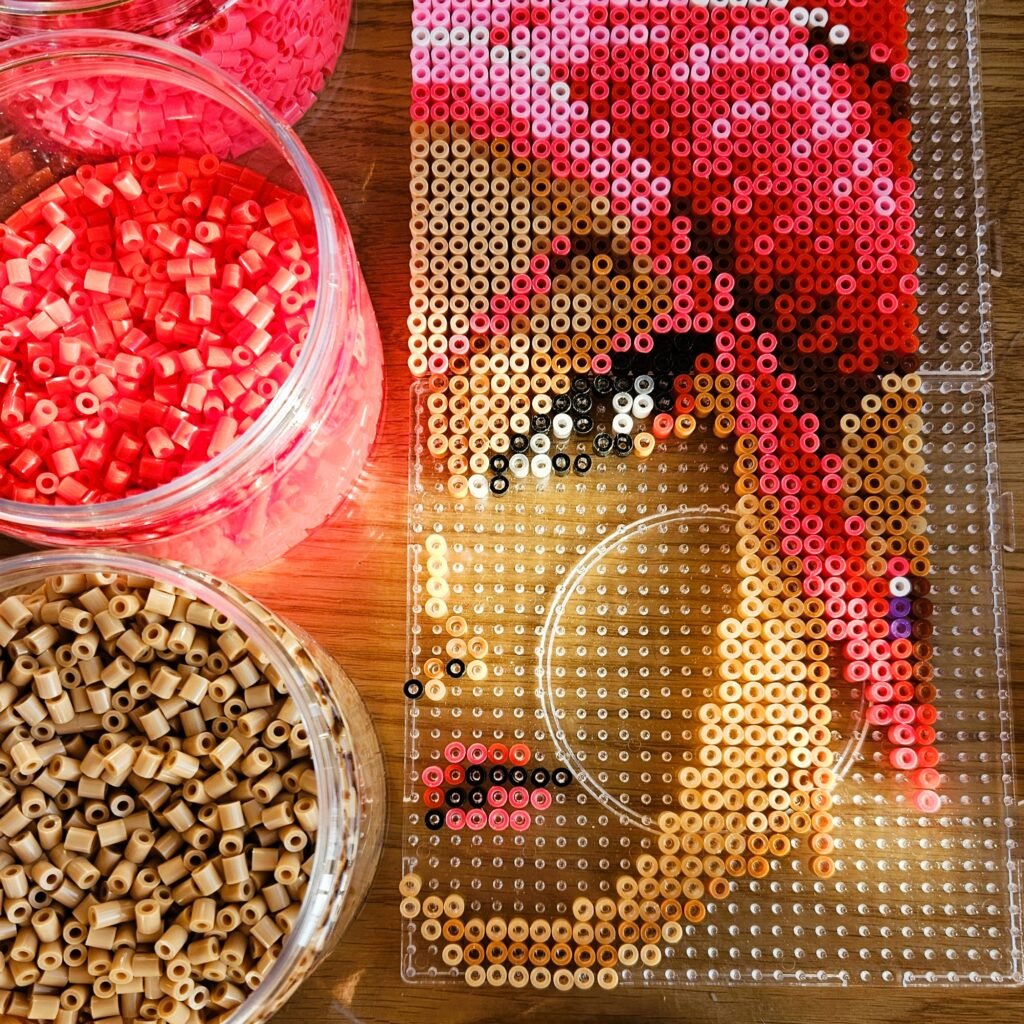
Then we moved to pink Mira

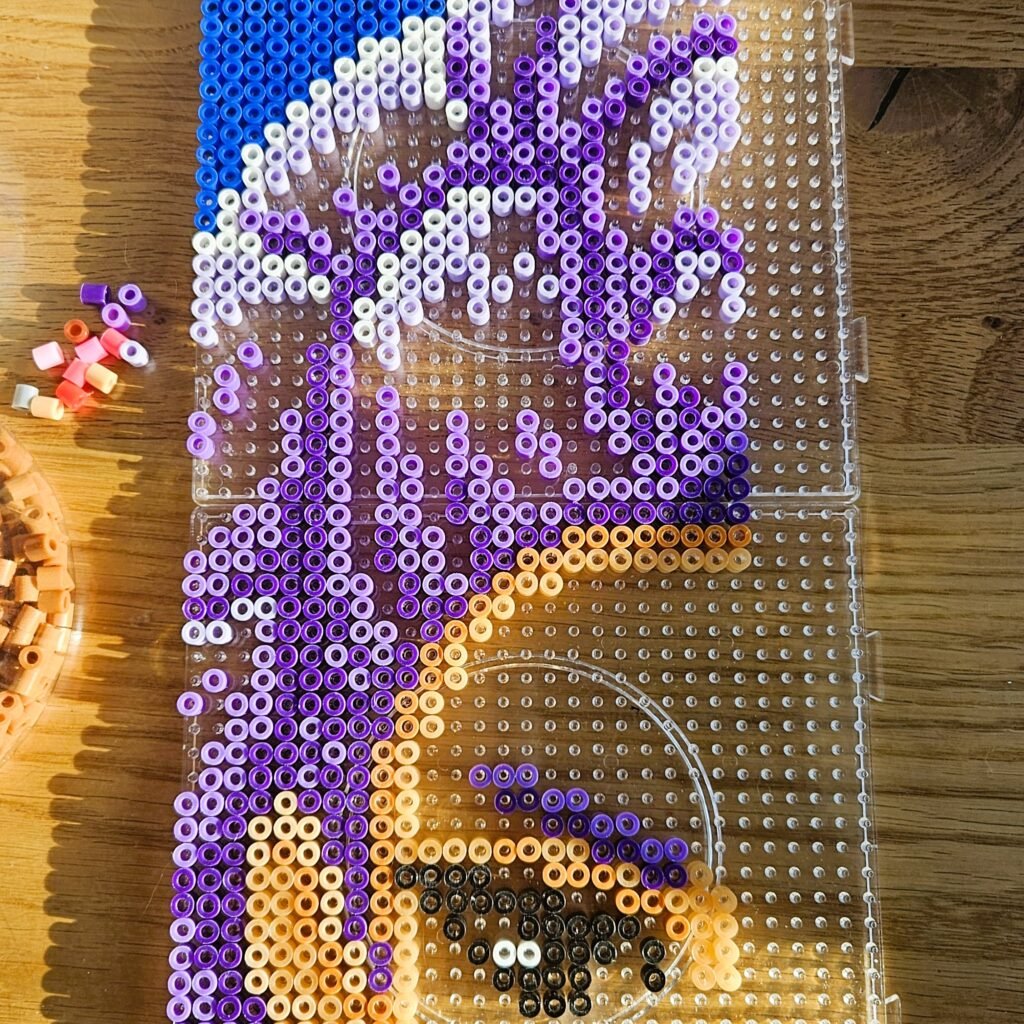
And the last was Rumi
At the end, we glued the bead designs onto the frame using hot glue, attaching them directly to the plexiglass.
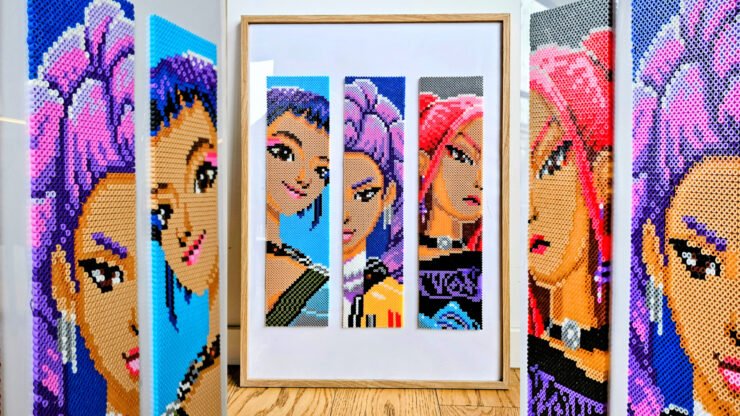
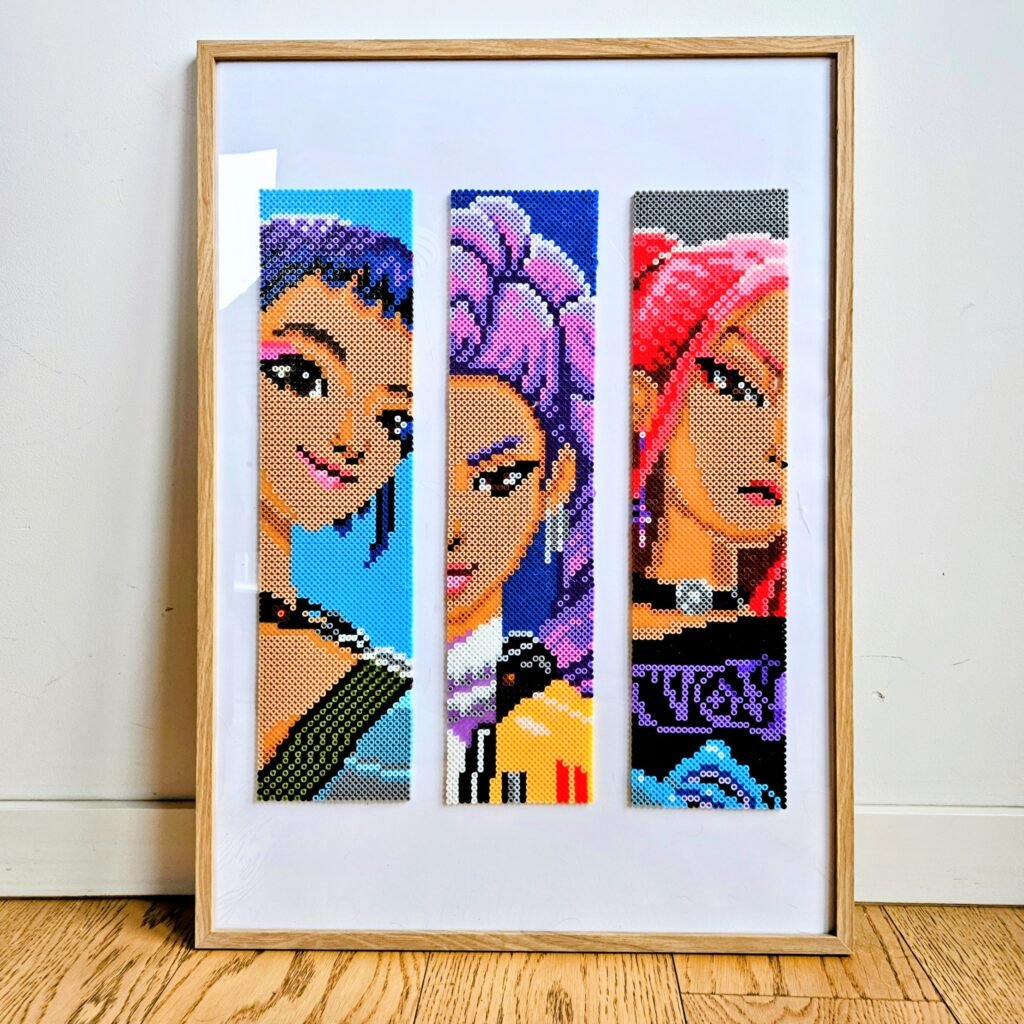
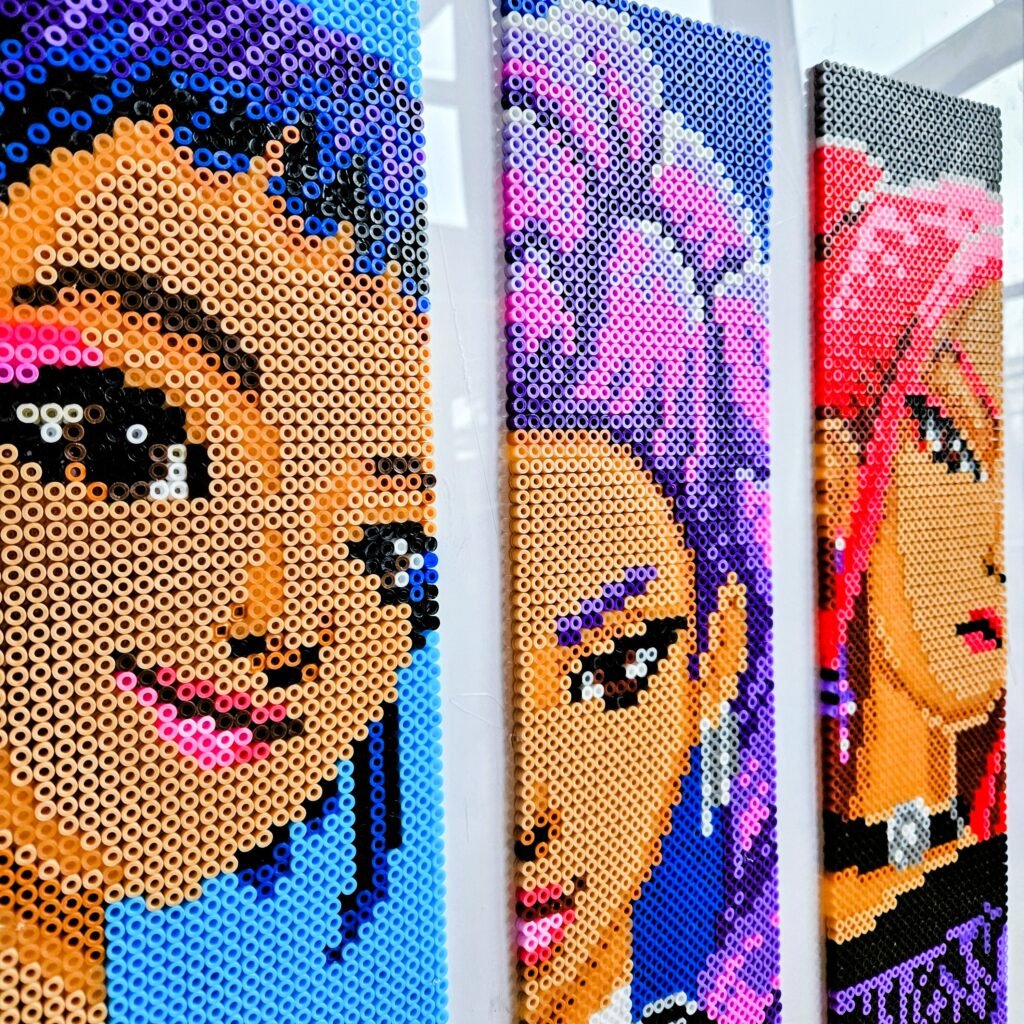
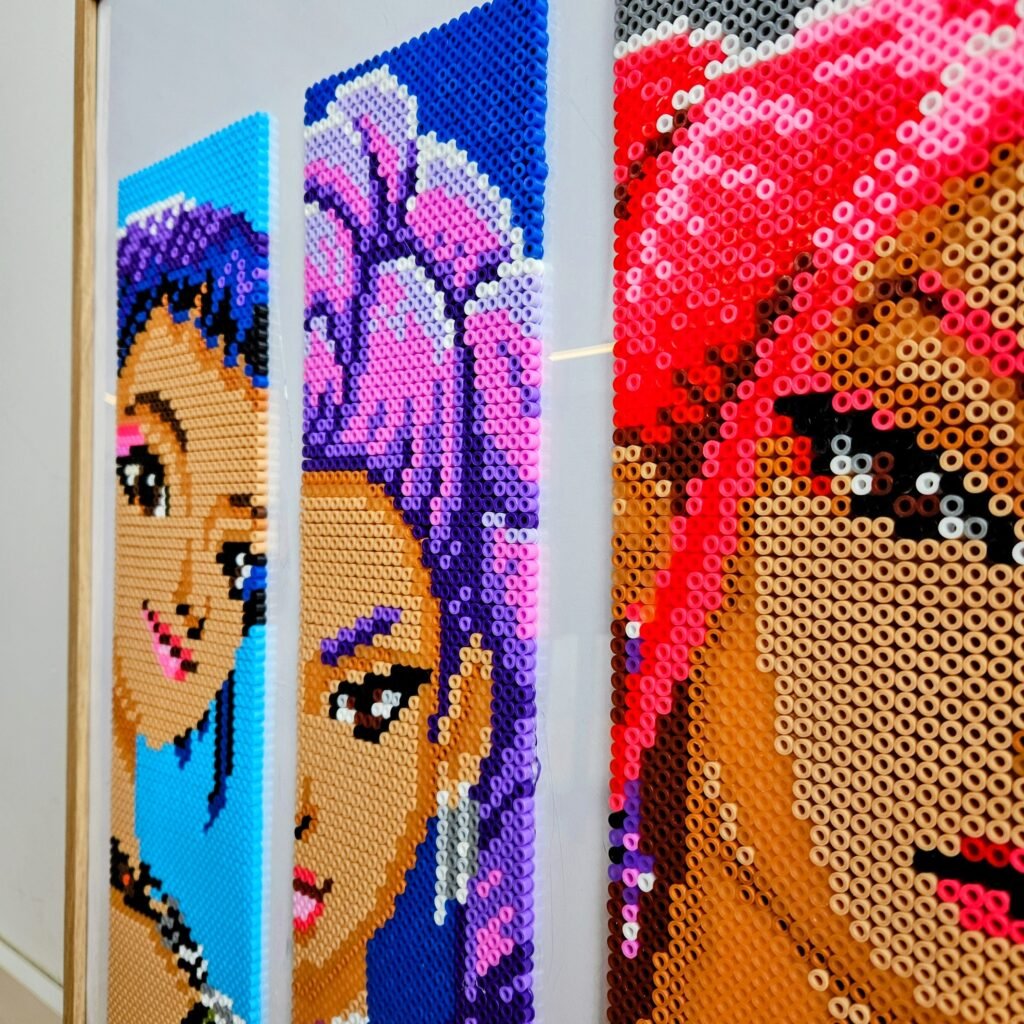
K-Pop Demon Hunters Made from Ironing Beads
And here it is — the final result! Zoey, Rumi, and Mira brought to life in bead form! Colorful, dynamic, full of energy, just like their animated originals. This was our first project of this size in a long time, and we’re incredibly proud of how it turned out.
If you enjoy creating with ironing beads, give a larger format a try. It takes time and a good dose of patience, but the joy of finishing such a big piece is absolutely priceless. 💜
Check out our ideas
For more iron beads patterns and inspirations check our Iron beads section.
If you are looking for more creative activities for kids check our DIY with kids section.
If you look for more DIY cards ideas check our Cards section.
Follow us in social media
If you want to be up-to-date with our newest posts, like our Facebook fanpage, follow us on Instagram and Pinterest.
Nothing gives more satisfaction than doing something yourself. I haven’t even thought about DIY as my hobby, I’ve just done different “projects” when it was needed. Sometimes it’s a disguise for the Masquerade Party in kindergarten. Another time, cutting out the pumpkin and baking the witch’s fingers for Haloween. Or simply organizing holiday souvenirs. Now I decided to share my realizations with you. Let’s go it together!
