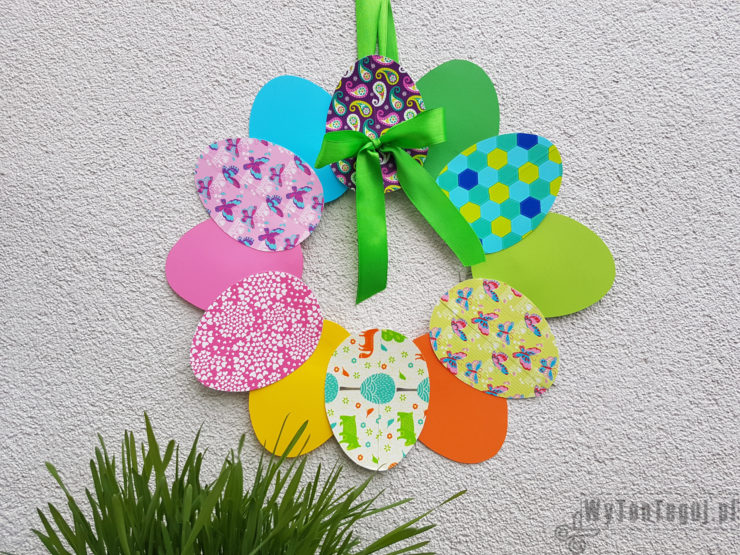
Spring is in the air so it is time to start the season for Easter decorations. I would like to share with you an idea for an easy and colorful Easter paper wreath. For those more courageous there is an option to do it together with the children 🙂
If you want to be up-to-date with our newest posts about DIY, like our Facebook fanpage.
You can find other Easter inspirations along with the instructions in the Easter section.
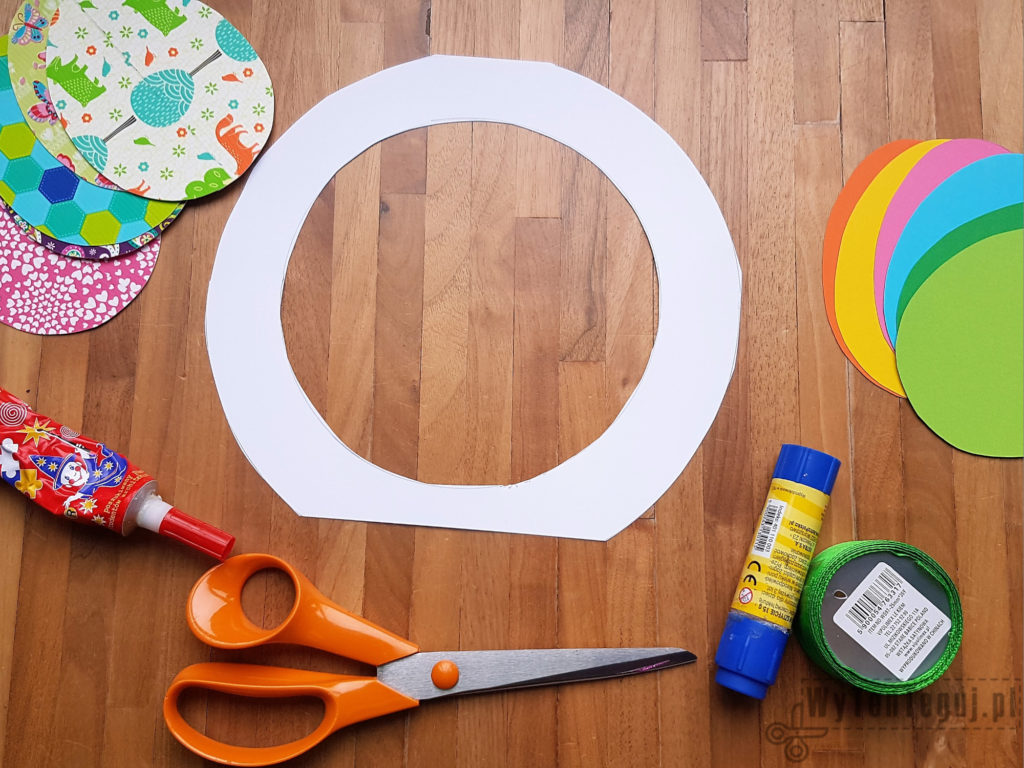
Supplies
- Multi-color cardboard paper
- White cardboard paper
- Paper or tape with Easter or spring pattern
- Ribbon
- Scissors
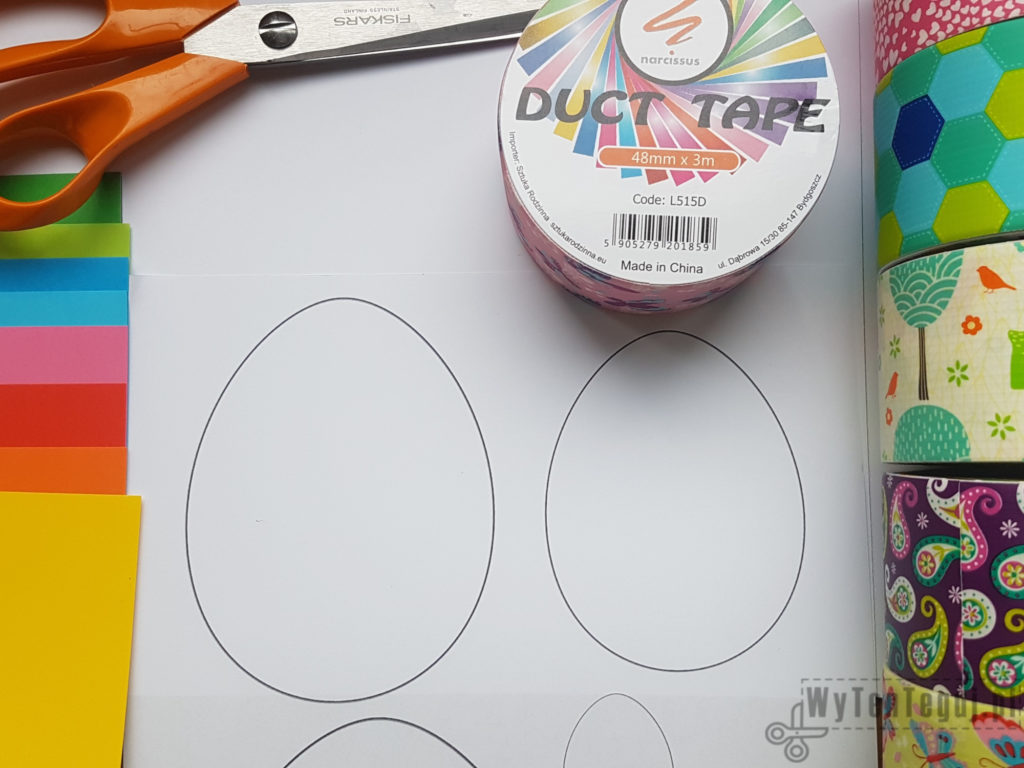
- Egg template (you can download below)
Preparation of paper eggs
We start with the preparation of an egg template. Below there is a printable template of eggs in various sizes. I used the egg from the right upper corner (height: 12cm which is about 4,7 inch).
Print the template (optionally you can draw it from the monitor – white background nicely highlights the sheet and you can see the shape clearly).
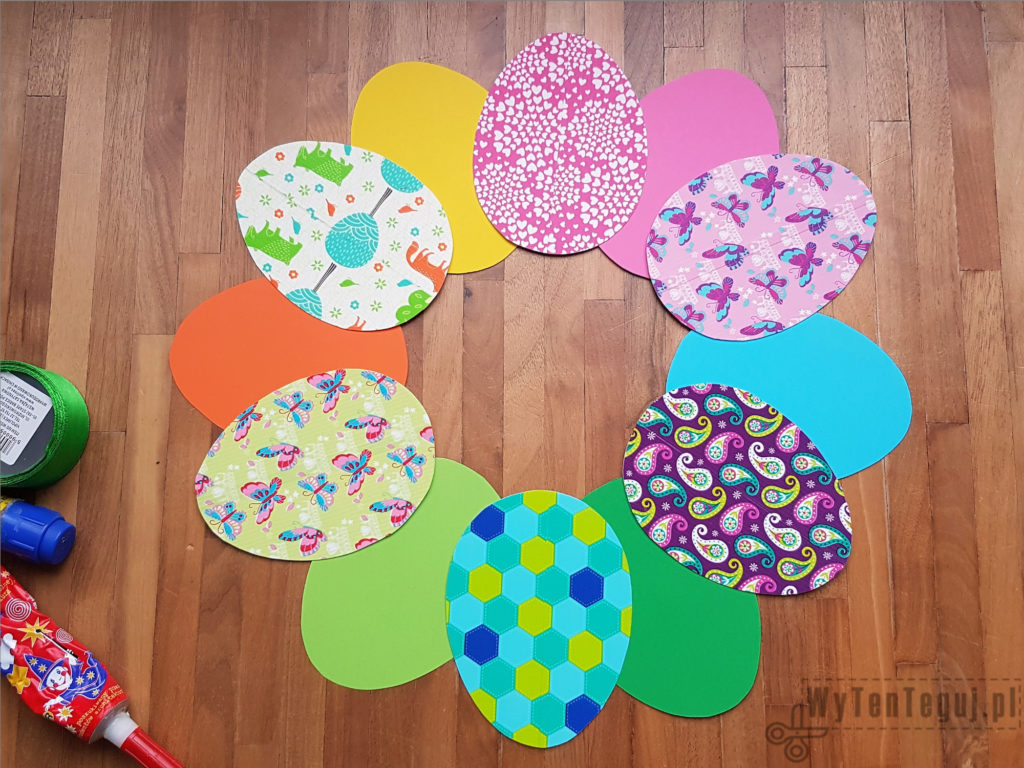
Then cut the egg, copy it on the white cardboard paper and cut it out again. In this way we get a stiff and reusable template that can be easily copied target color cardboard paper.
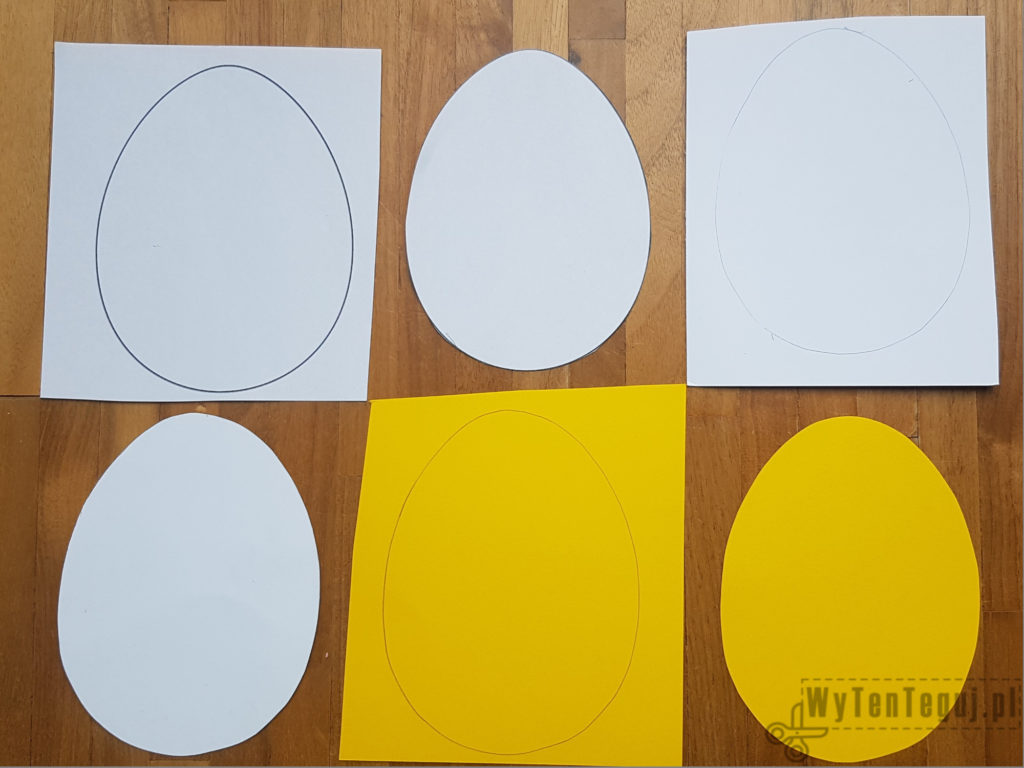
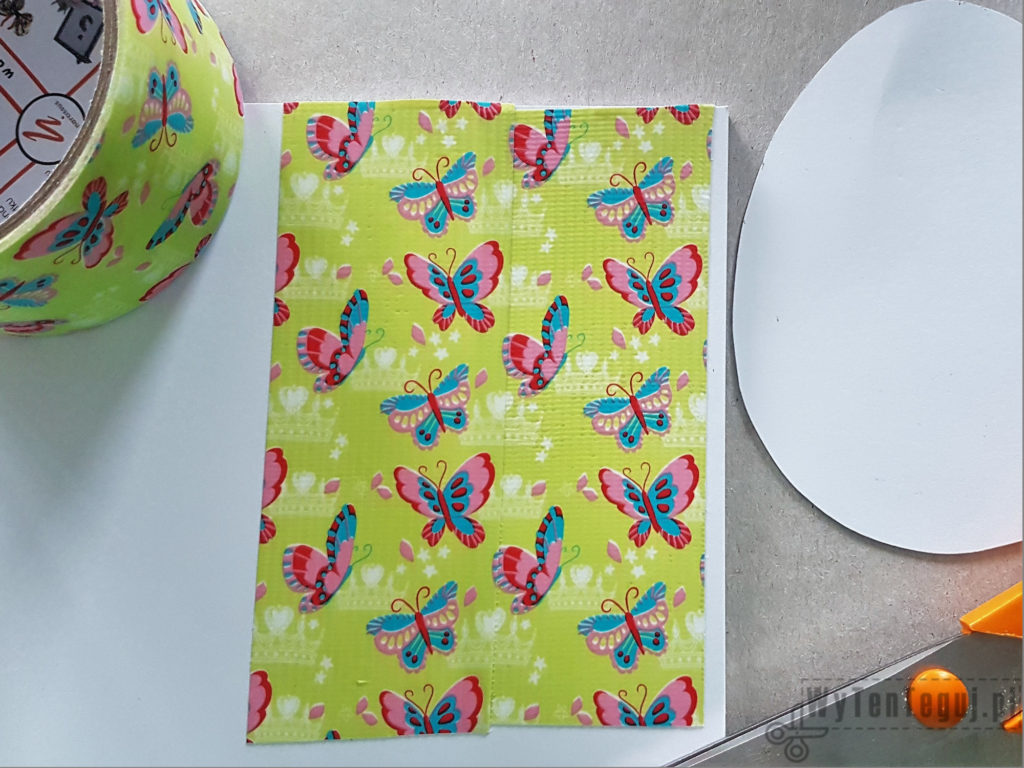
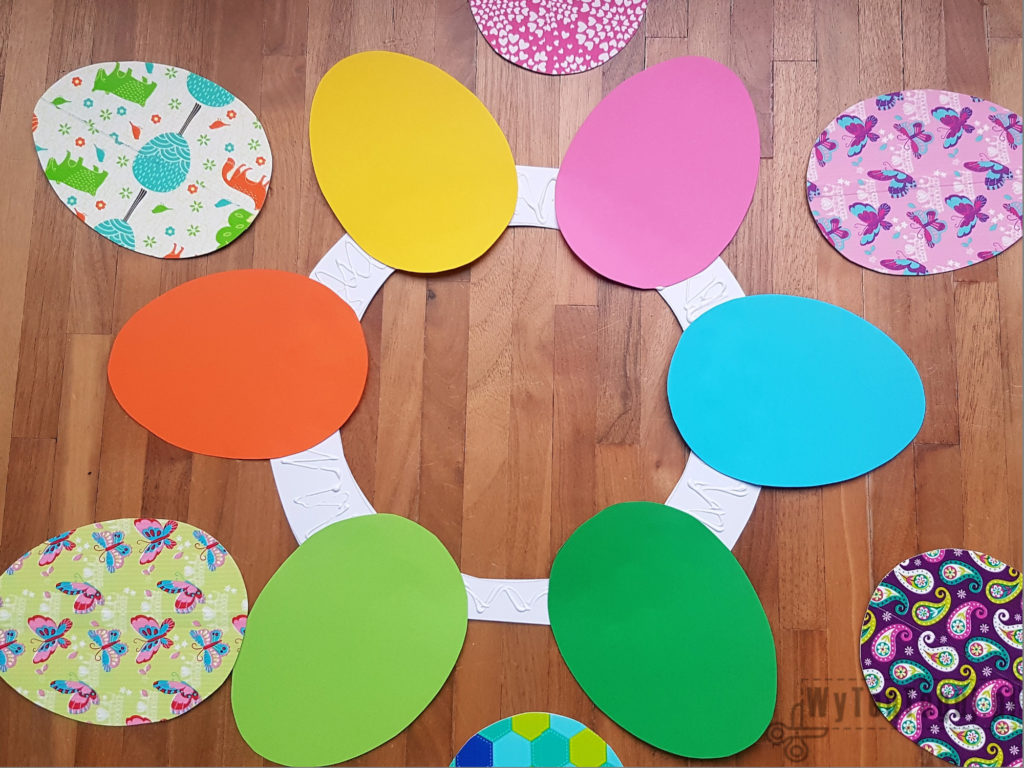
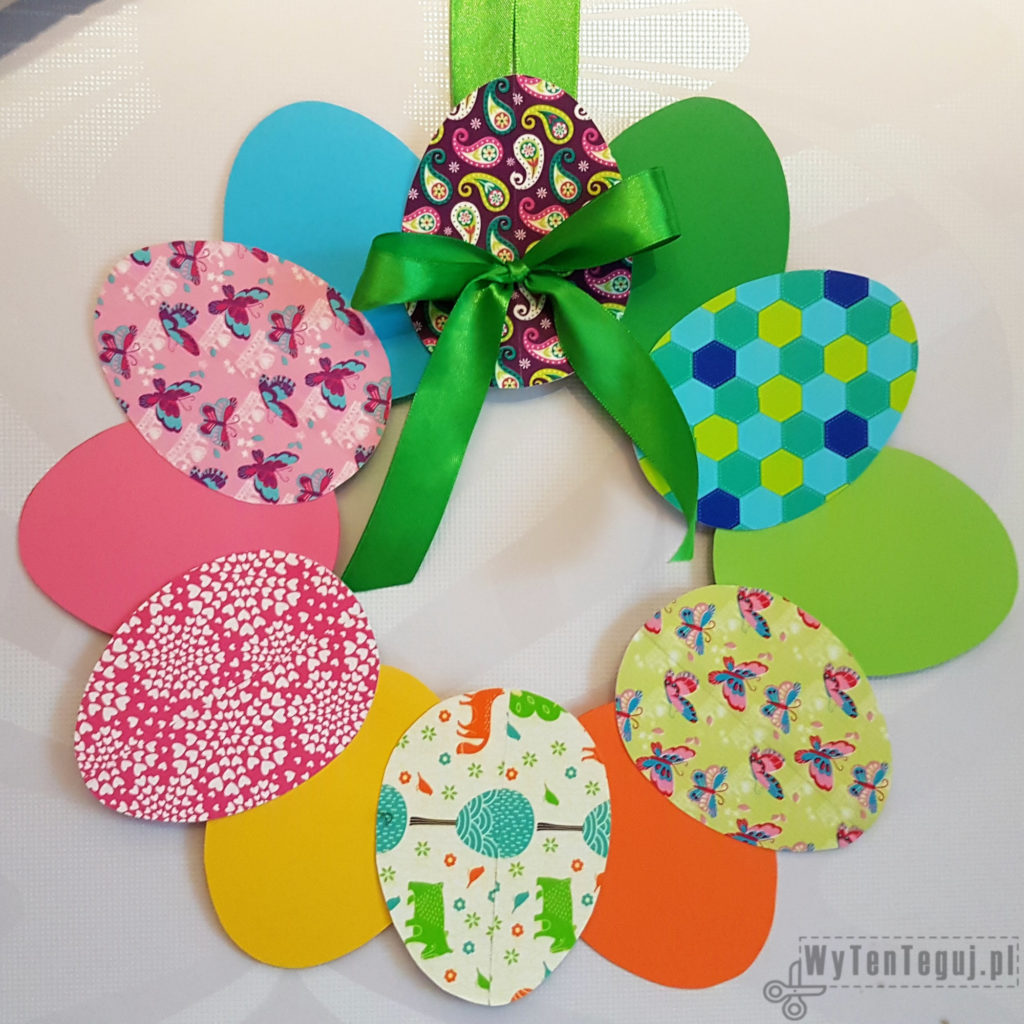
12 eggs are needed for the wreath. I decided to have 6 plain and 6 pattern so that they would be alternating. I cut the plain eggs from a multi-color cardboard paper. Patterned eggs can be made of many materials such as wrapping paper, colorful pages from magazines or washi/duct tape (my choice). Regardless of which option you choose, you need to stiffen the egg. To do this, stick paper / tape on the white cardboard, copy the template on the other side and cut out.

Preparation of base ring
The last preparatory step is to cut the base of the wreath. You can use a paper plate for this purpose and cut out the center. Alternatively, you can draw a plate and cut out. My base has about 10 inch in diameter.
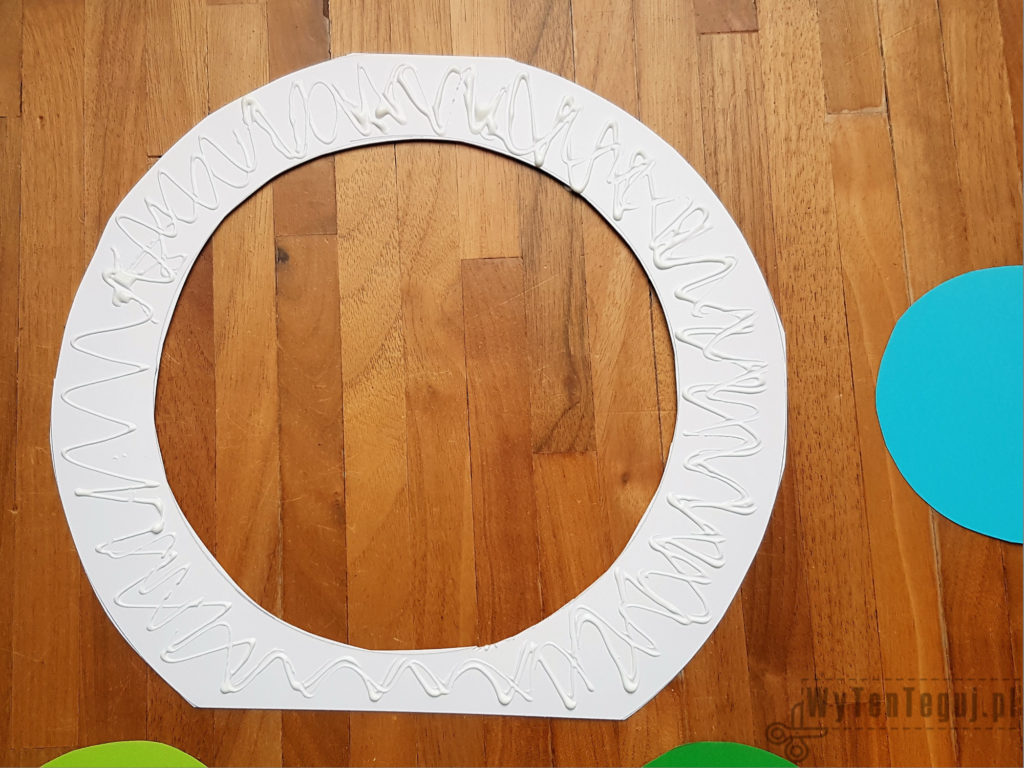
Making the Easter paper wreath
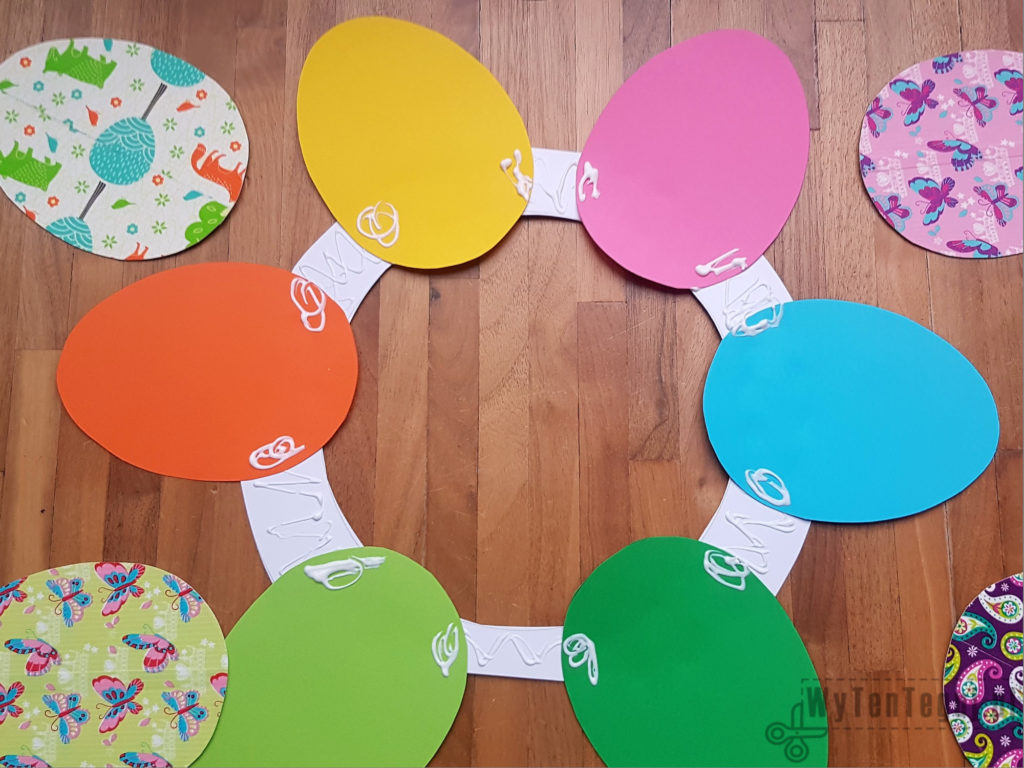
Completing the wreath is just a pleasure. At the beginning, you should think about the order in which the eggs are to be placed. It’s best to do a few dry tests to choose the optimal composition. The rule is that underneath there are plain eggs, and on the top these are patterns, because they are more eye catching. Once you get to the order you want, you can start gluing all parts together.
- Apply glue to the base
- Stick plain eggs
- Add some glue on the edges of plain eggs
- Stick patterned eggs
- Press with a heavy book
- Leave to dry
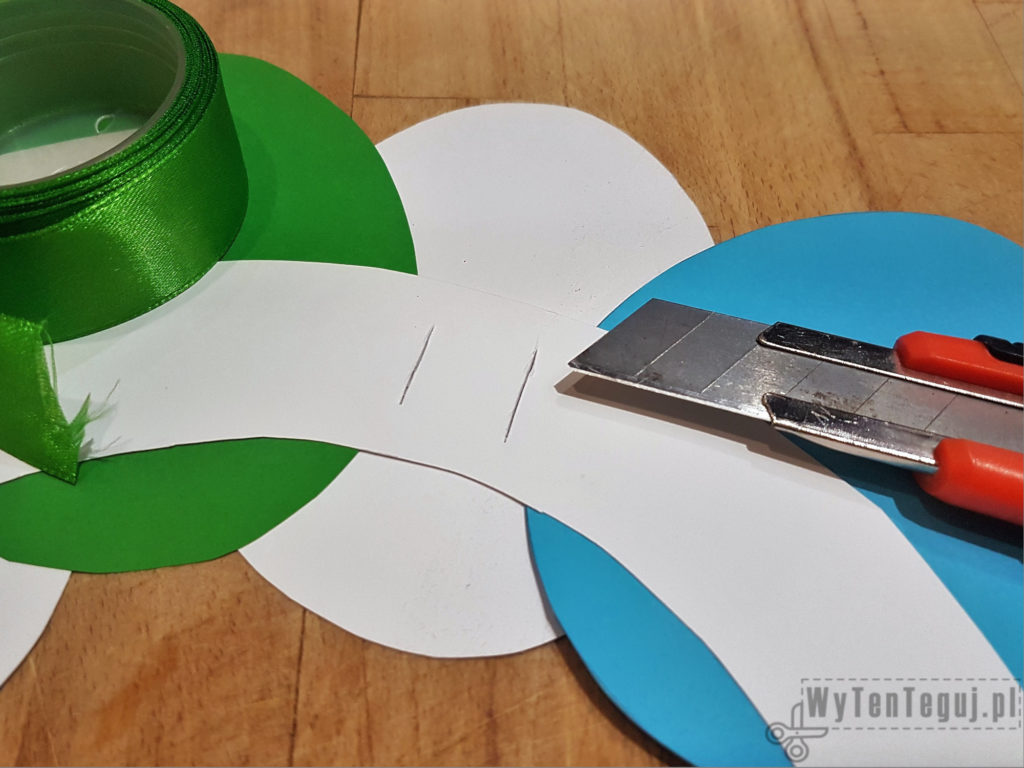
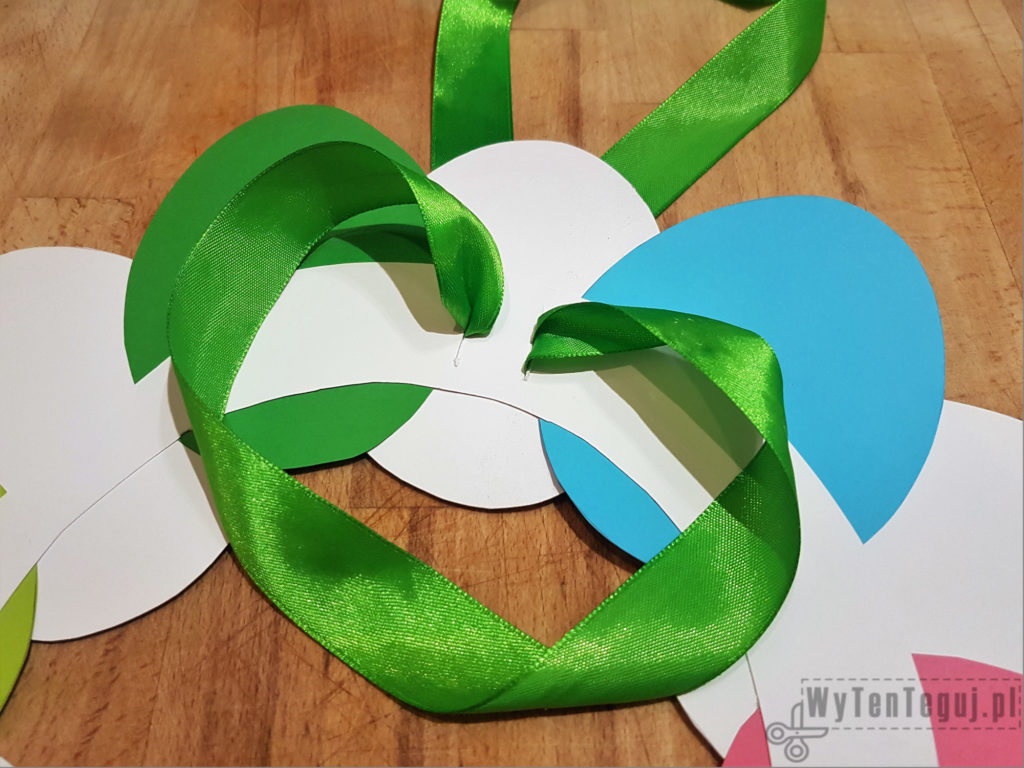
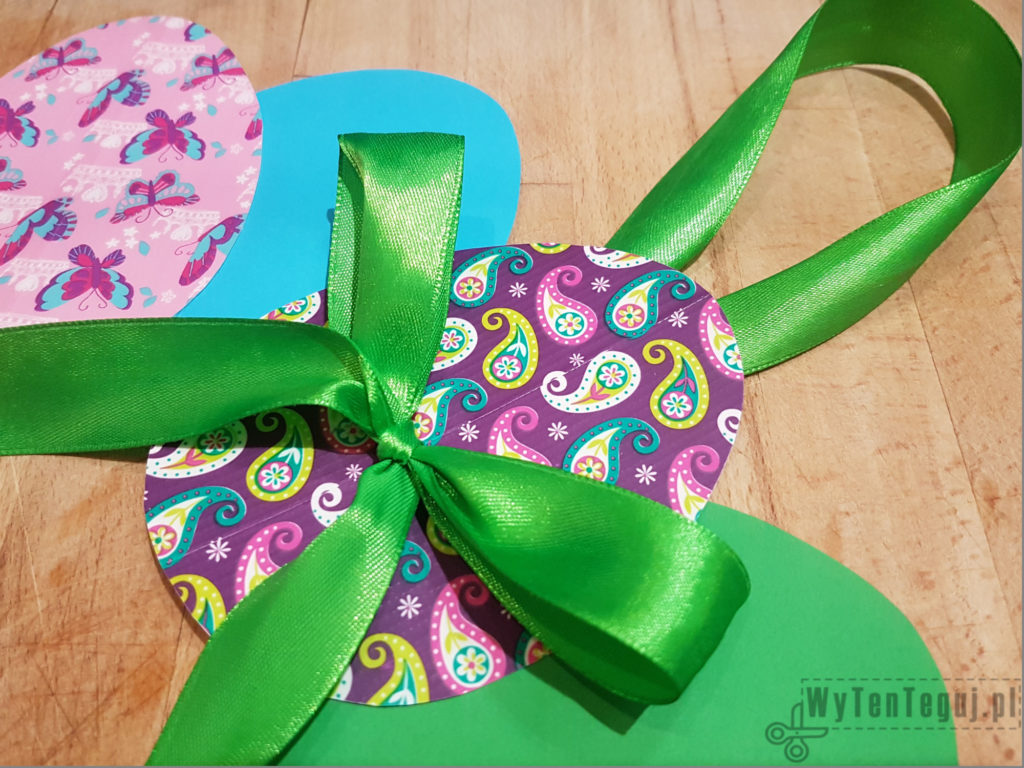
The last step is to fix the ribbon. To do this, make the small cut (about 0,5 inch long) in the middle of one egg and pull the ribbon from the bottom so that the bow will be tied on top of the wreath.
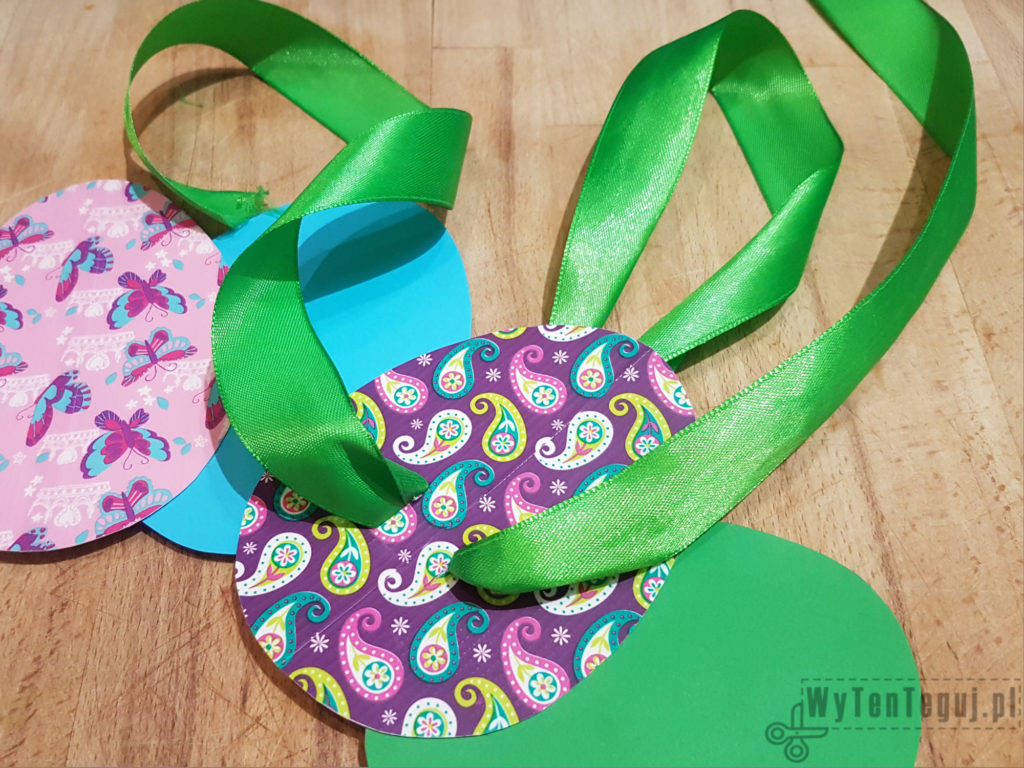
Easter paper wreath is ready, congratulations!
Inspiration found on Pinterest.
Nothing gives more satisfaction than doing something yourself. I haven’t even thought about DIY as my hobby, I’ve just done different “projects” when it was needed. Sometimes it’s a disguise for the Masquerade Party in kindergarten. Another time, cutting out the pumpkin and baking the witch’s fingers for Haloween. Or simply organizing holiday souvenirs. Now I decided to share my realizations with you. Let’s go it together!

2 thoughts on “Easter paper wreath”