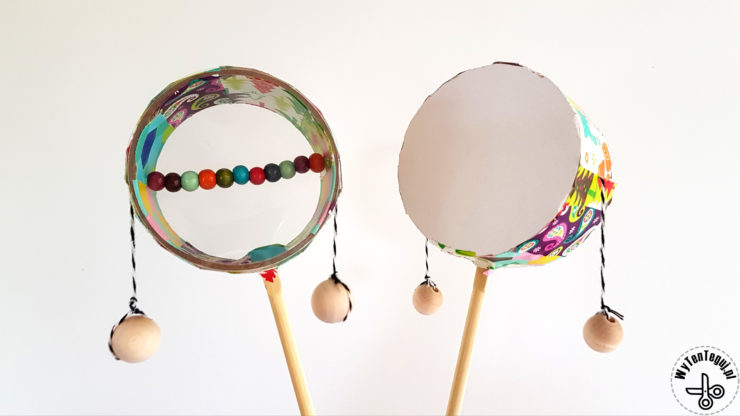
When I told my kids that today we were doing the drum they were full of enthusiasm. However, when I took out the tape roll and chopsticks, they began to look at me suspiciously. I did not reveal the details of the plan, hence they tried to guess how they would play our drum. The effect surprised them and the rattle drum DIY quickly went into motion. It soon turned out that we needed one more rattle drum, that is why we also made the version with a transparent membrane.
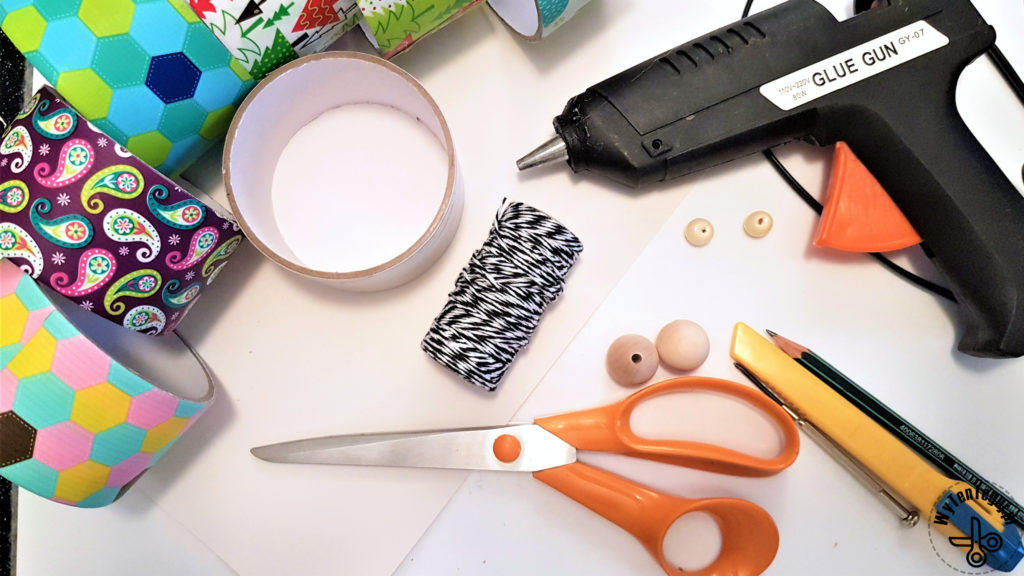
Supplies
- Roll after packing tape
- Chopsticks
- Wooden balls
- Wooden beads for decorations
- Twine
- Carton or thin plexiglass (e.g. window from a box)
- Color duct tapes or washi tapes for decoration
- Hot glue
- Penknife
- Scissors
- Screwdriver
- Pencil
How to make Rattle drum DIY
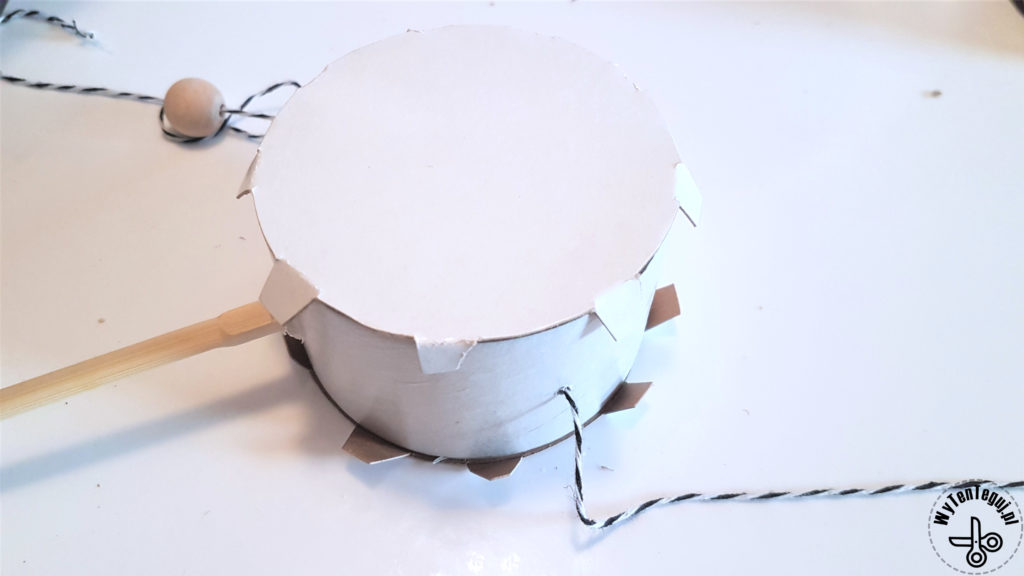
It is best to start work by making holes in the roll. You need a hole for the chopstick that will serve as a drum handle. The next two holes on the sides are for strings with balls.
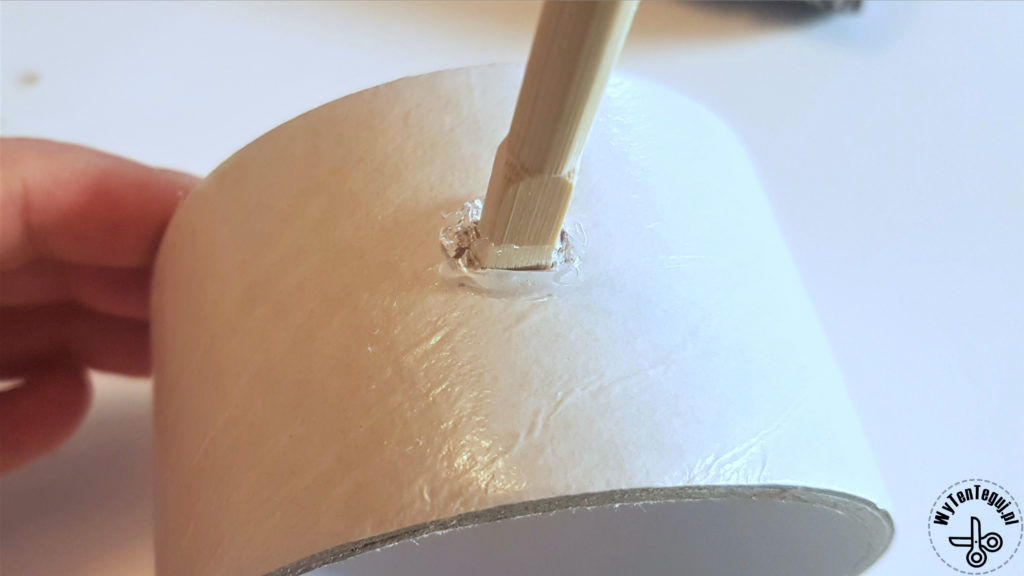
I cut the hole for the chopstick with a construction knife. Be careful that it is not too big and the chopstick barely enters it. Then insert the stick and additionally glue with hot glue.
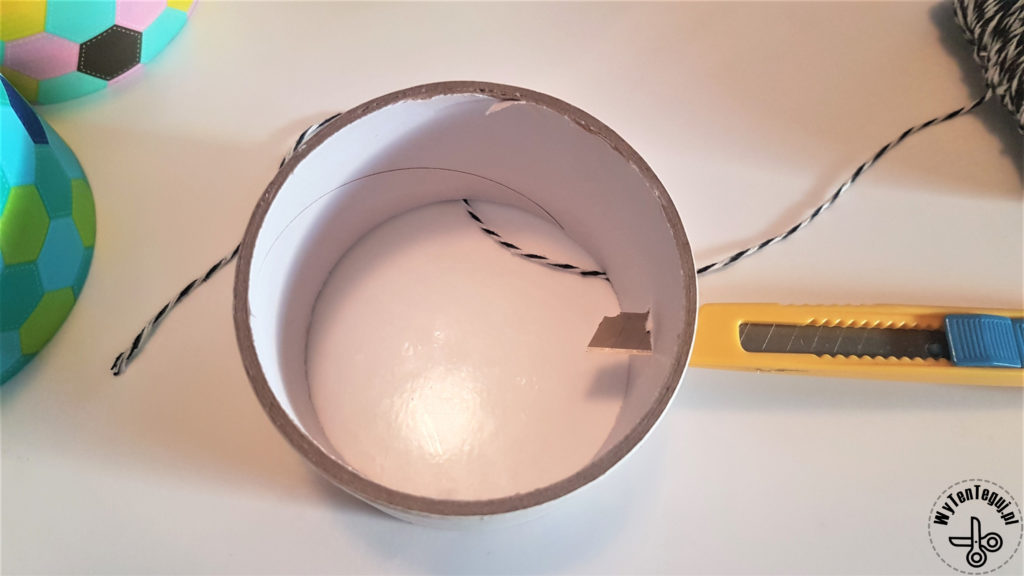
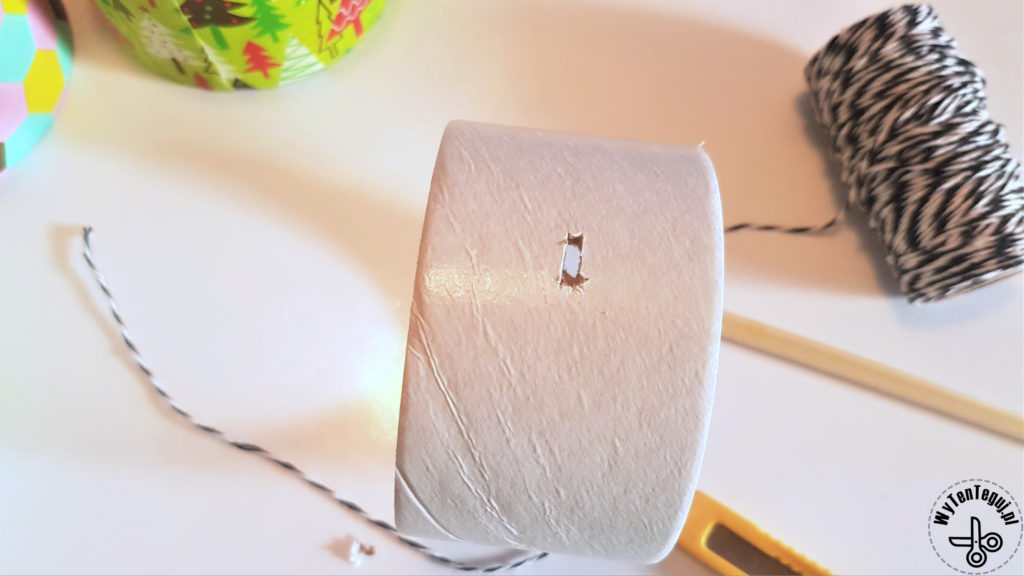
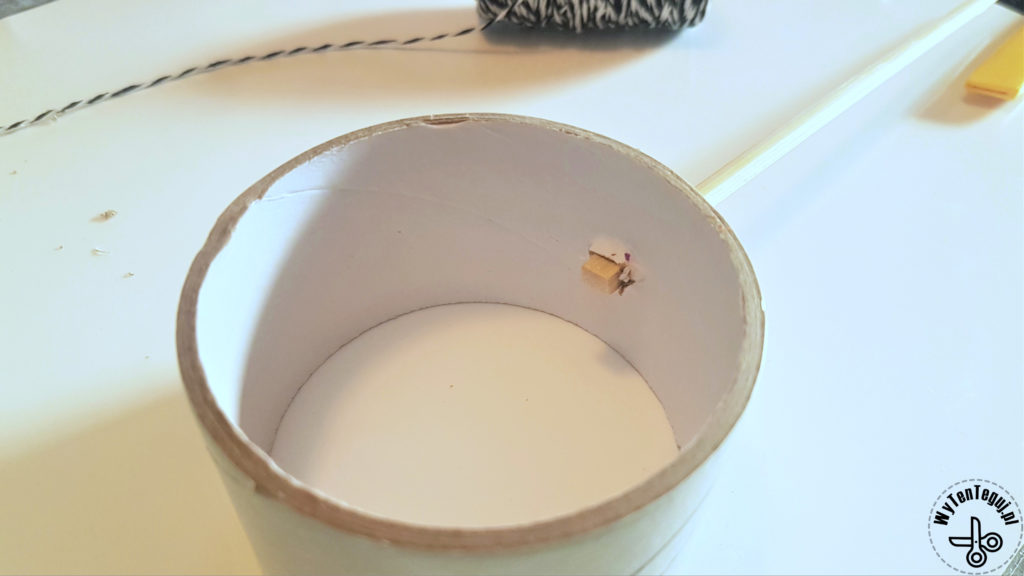
I made holes for the string with a small screwdriver. It’s not easy to break through the thick roll.
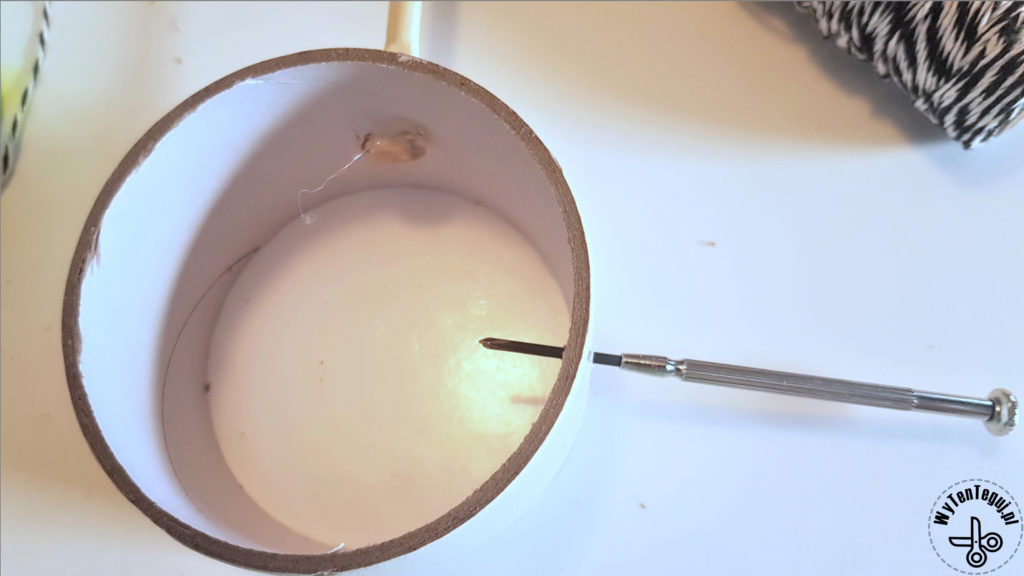
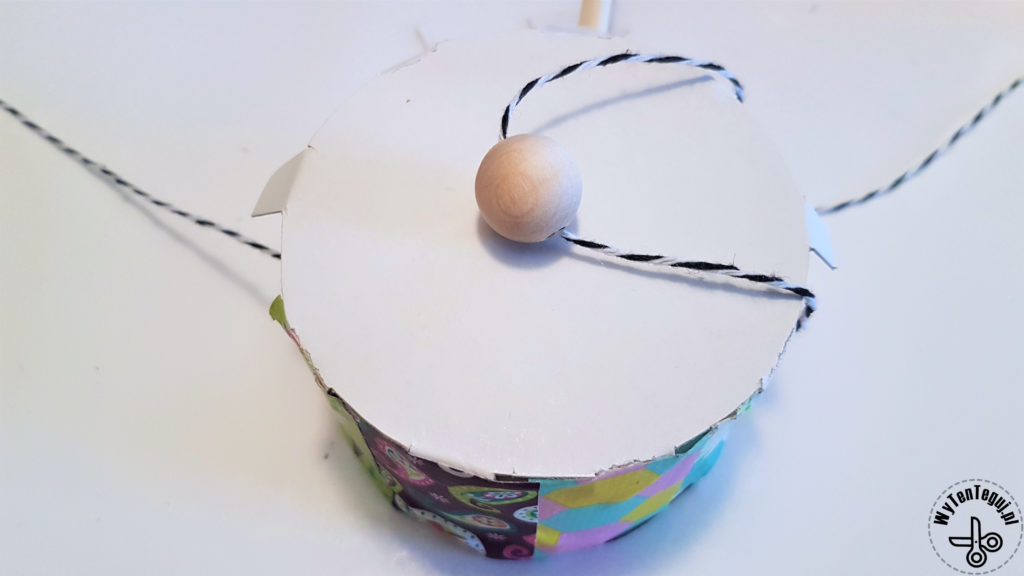
I put the strings on both sides of the roll and attached a small bead from the inside. You can also make a large knot.
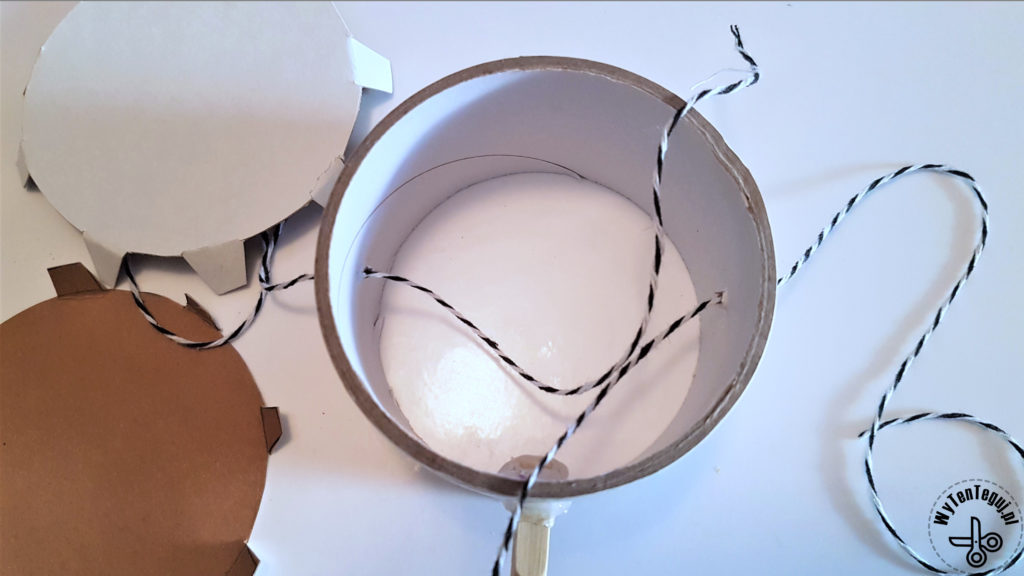
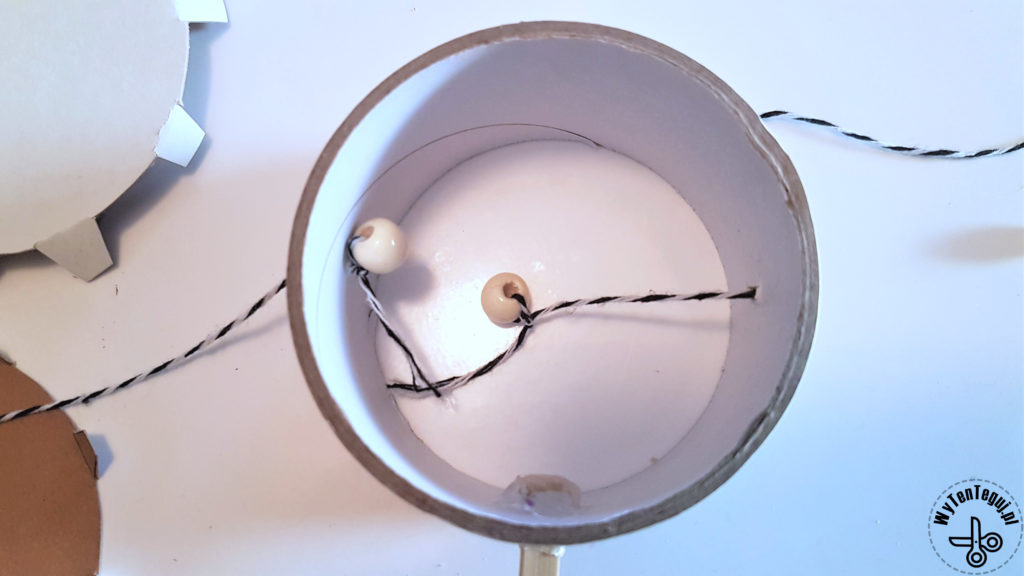
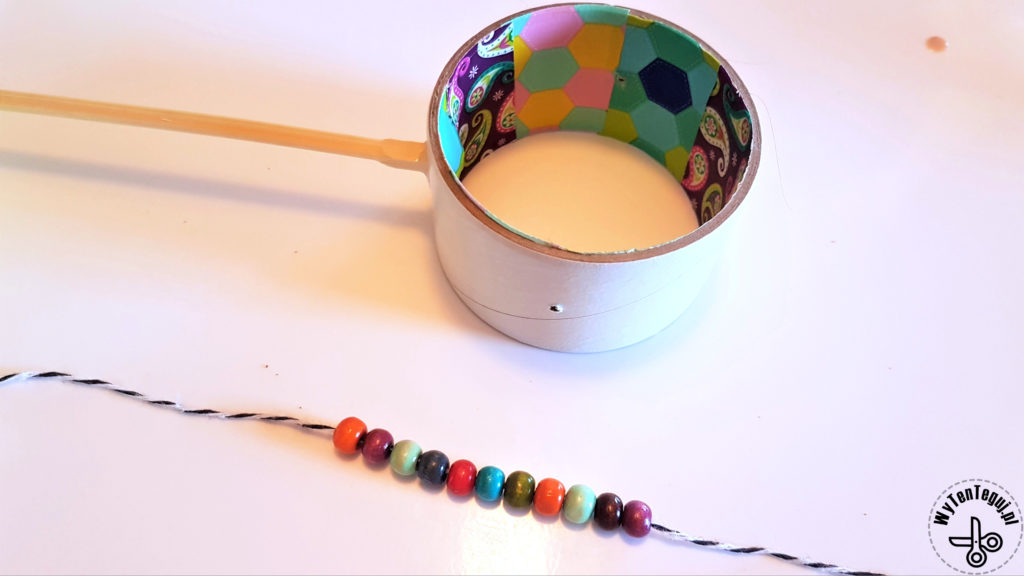
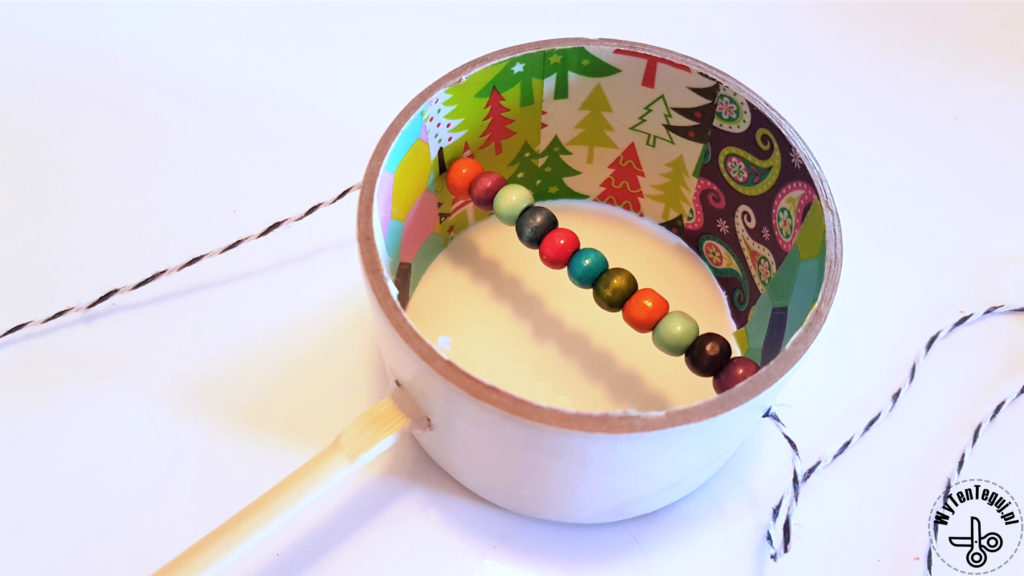
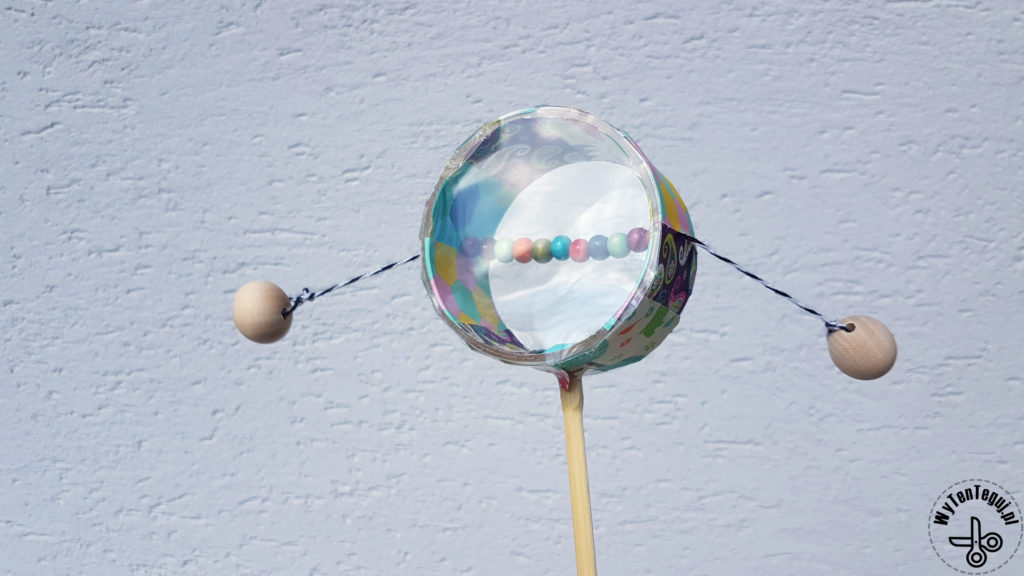
I used one string for the transparent rattle drum and threaded colorful beads over it to make it even more attractive. From the outside I fastened the string with knots.
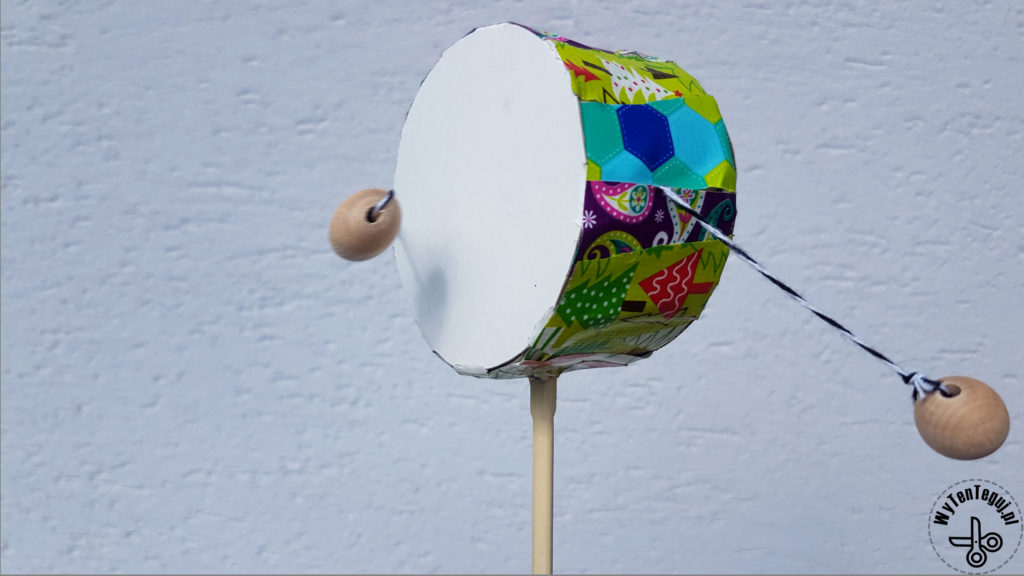
The next step is to prepare the sides of the rattle drum, i.e. the membrane. It can be made of cardboard or a piece of thin plexiglas. I used a transparent piece of a box with window.
Draw a roll on the cardboard, draw on the pleats and cut out.
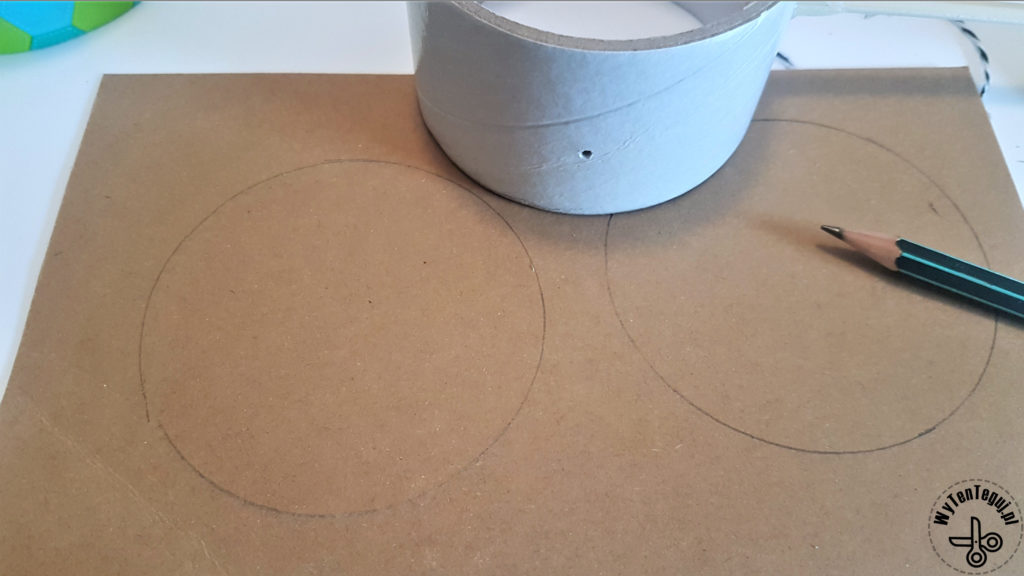
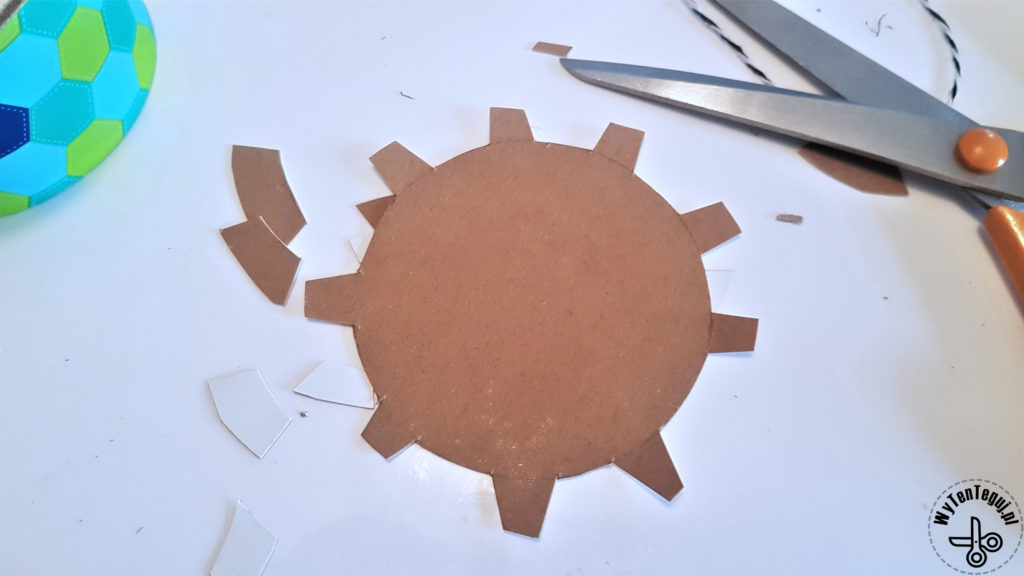
Put cardboard circles on the sides of the roll and glue the tabs to the roll. It does not have to be very nice, because in the next step we will decorate the sides of the rattle drum.
Outside tie wooden balls. Measure the length of the string so that the bead reaches inside the drum. It is also important that the strings on both sides have the same length, so that the rattle drum is easier to set in harmonic motion.
The last phase is the coolest and most attractive for kids, it’s of course about decorating the rattle drum. We used color duct tape and put stripes ob the drum side.

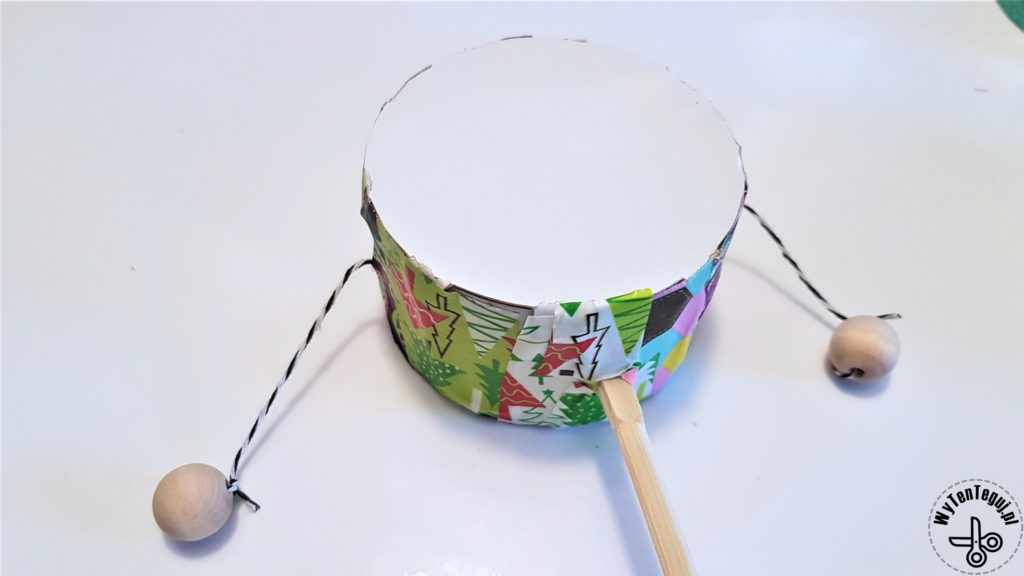
Rattle drum DIY is ready, now you just set the balls in motion and there will be a huge noise 🙂
Check out our ideas
If you are looking for more ideas for playing with children, then you will find them in the DIY with children section.
Follow us in social media
If you want to be up-to-date with our newest posts, like our Facebook fanpage, follow us on Instagram and Pinterest.
Nothing gives more satisfaction than doing something yourself. I haven’t even thought about DIY as my hobby, I’ve just done different “projects” when it was needed. Sometimes it’s a disguise for the Masquerade Party in kindergarten. Another time, cutting out the pumpkin and baking the witch’s fingers for Haloween. Or simply organizing holiday souvenirs. Now I decided to share my realizations with you. Let’s go it together!
