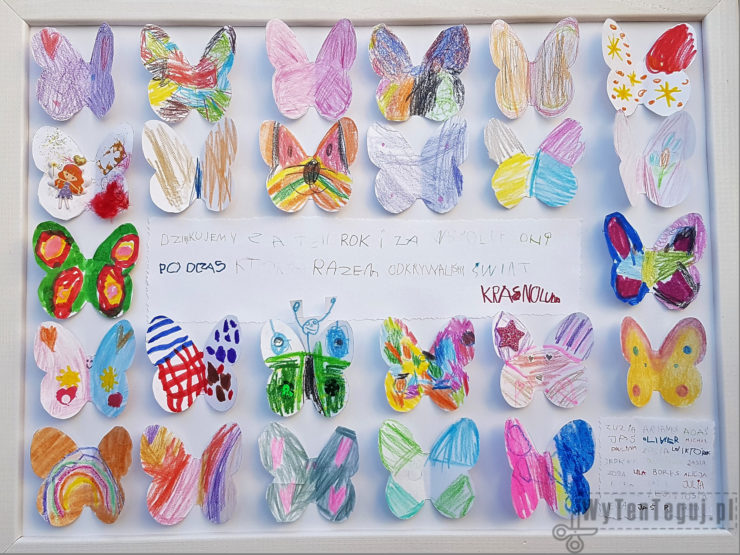
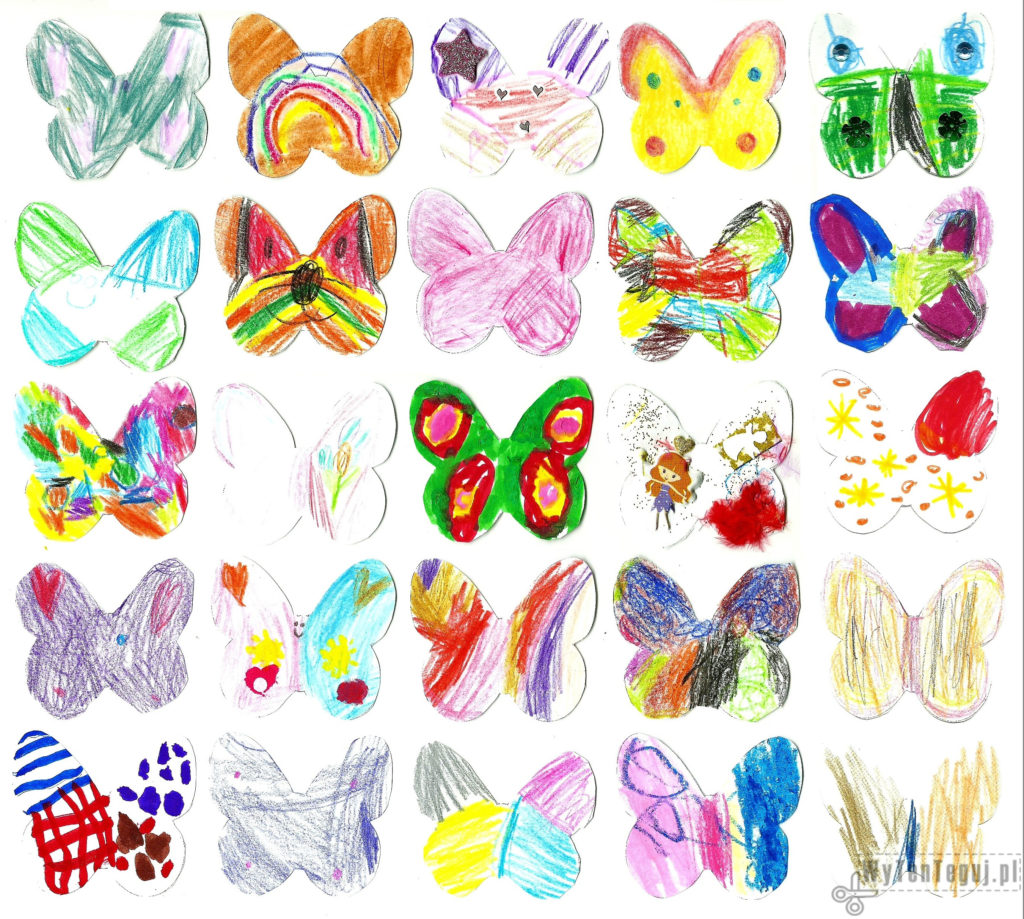
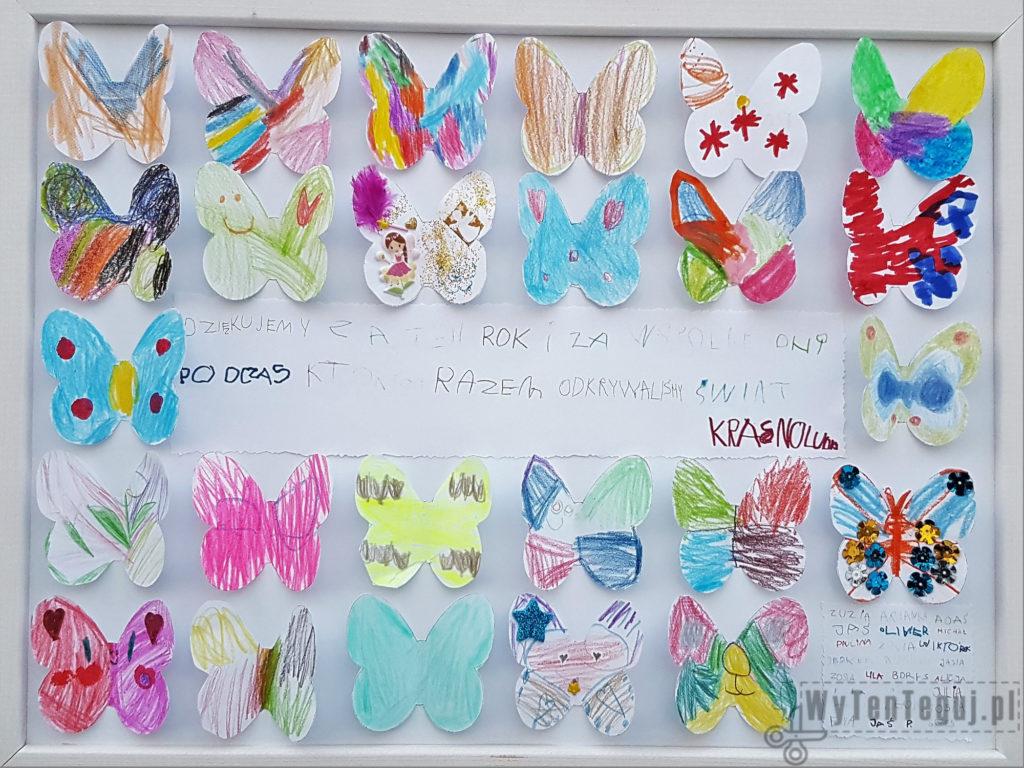
We are in the hot period of the end of the school year and thanking teachers for their work with our kids during the year. I would like to present you an idea for an original gift that every child participates in. That is the frame with butterflies. Each child has his or her own butterfly, a word from the wishes and the name signature.
2022 Update 🙂
Butterflies can also be used to create a butterfly wreath. You can find all the details in this post: Wreath with butterflies.
2023 Update 🙂
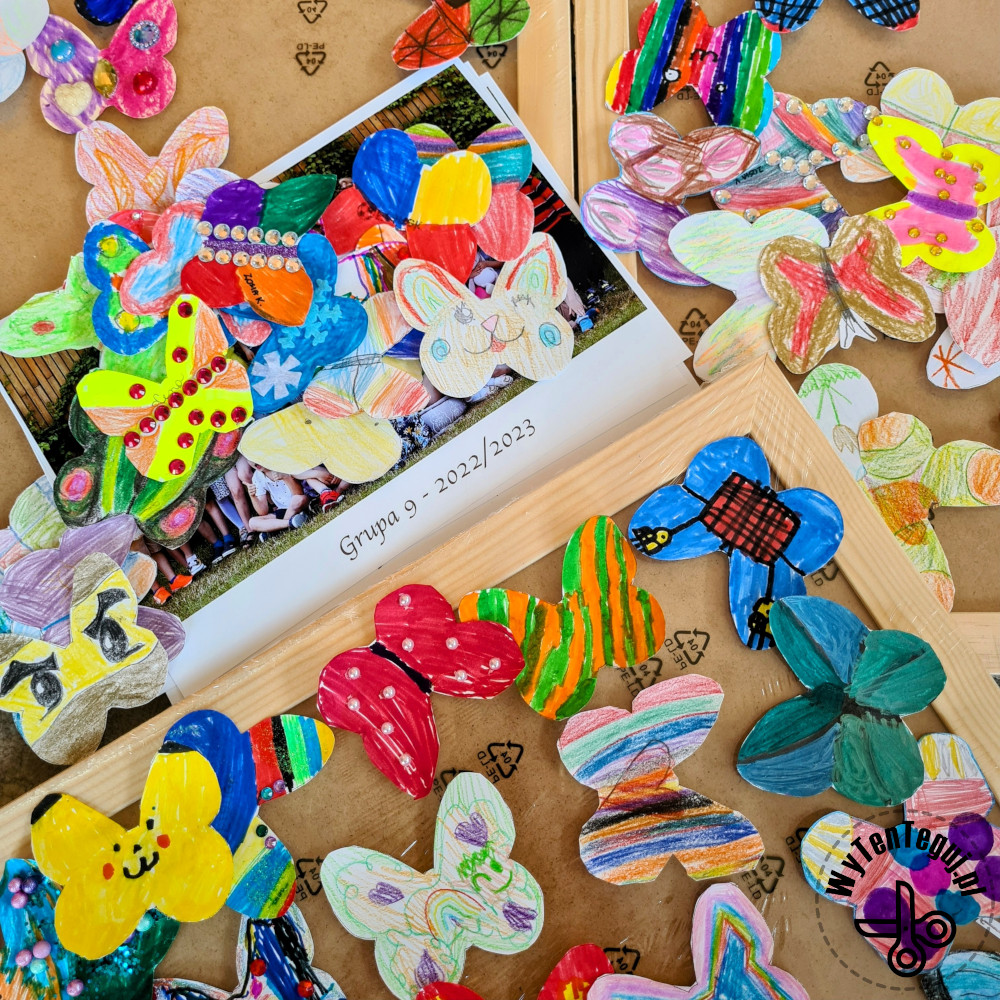
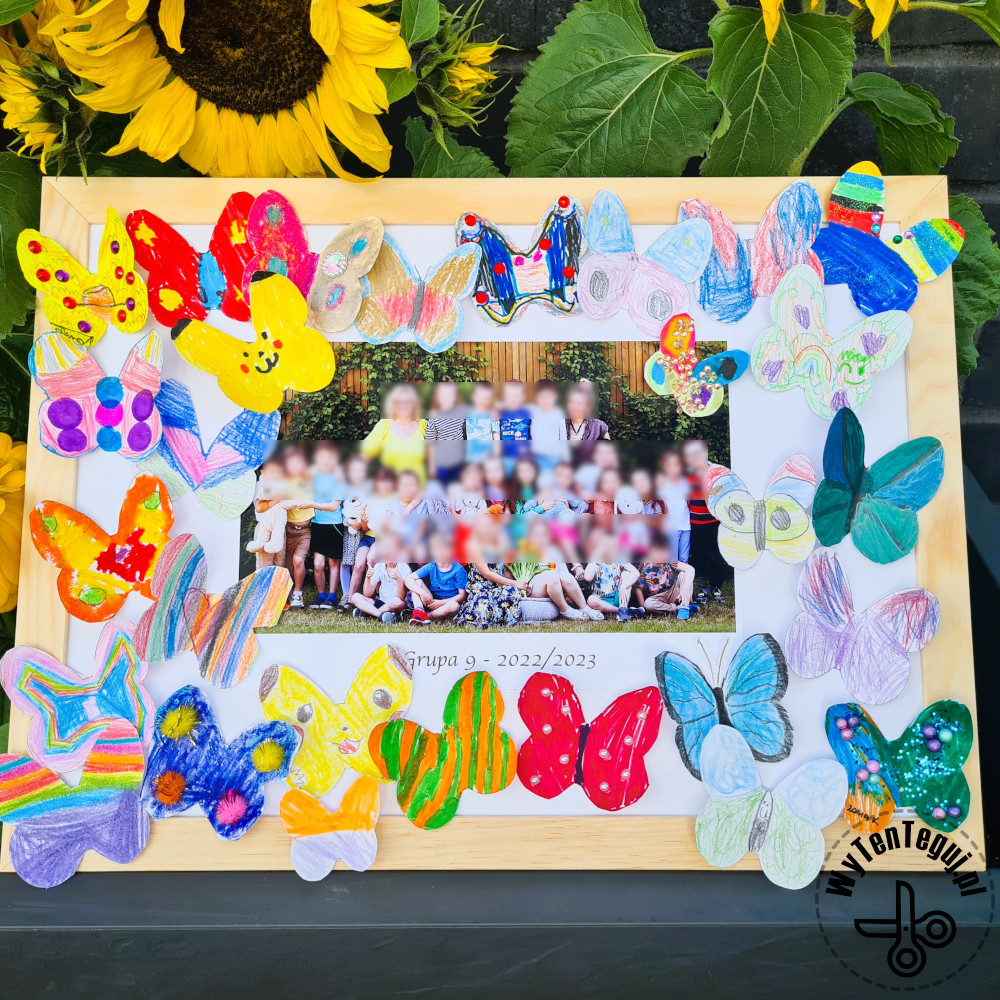
This year, at my younger daughter’s kindergarten, we made frames with butterflies with a group photo. Once again, they turned out very nice thanks to the mobilization of the entire group 🙂 Here are the results <3

Supplies
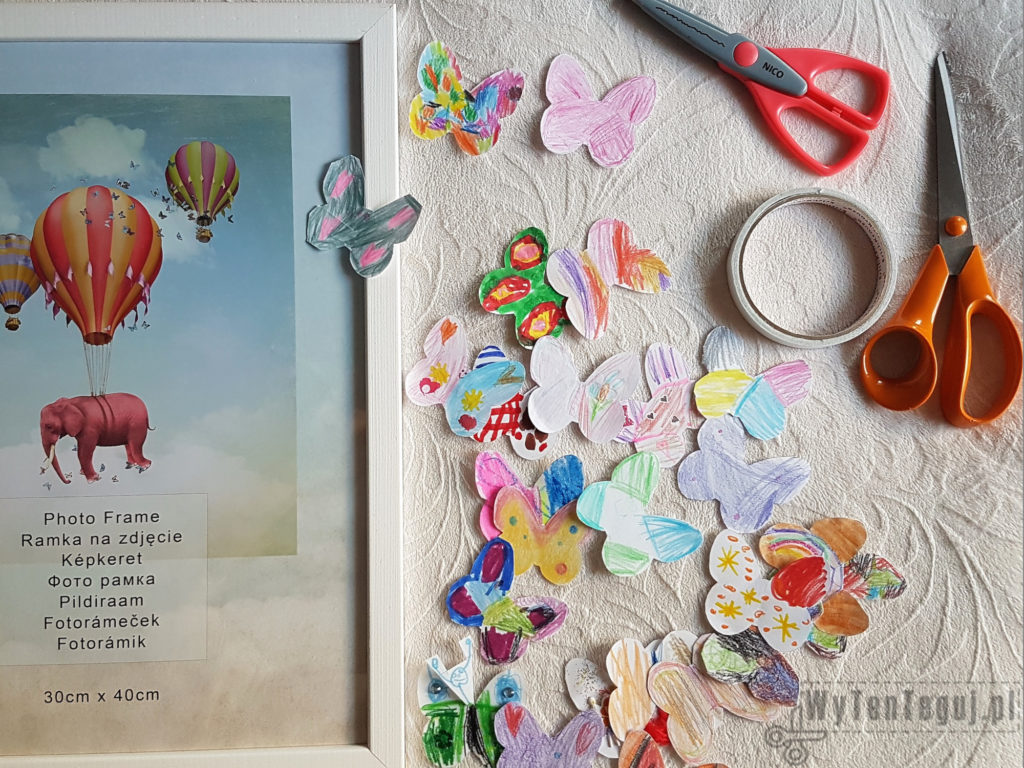
- White paper
- Frame – size depending on the number of butterflies, I used 30×40 cm frames.
- Double-sided tape or glue
- Scissors
- Butterfly template (you can download below)
How to make frame with butterflies
Preparation of butterflies
Print the butterflies template and give it to all children.
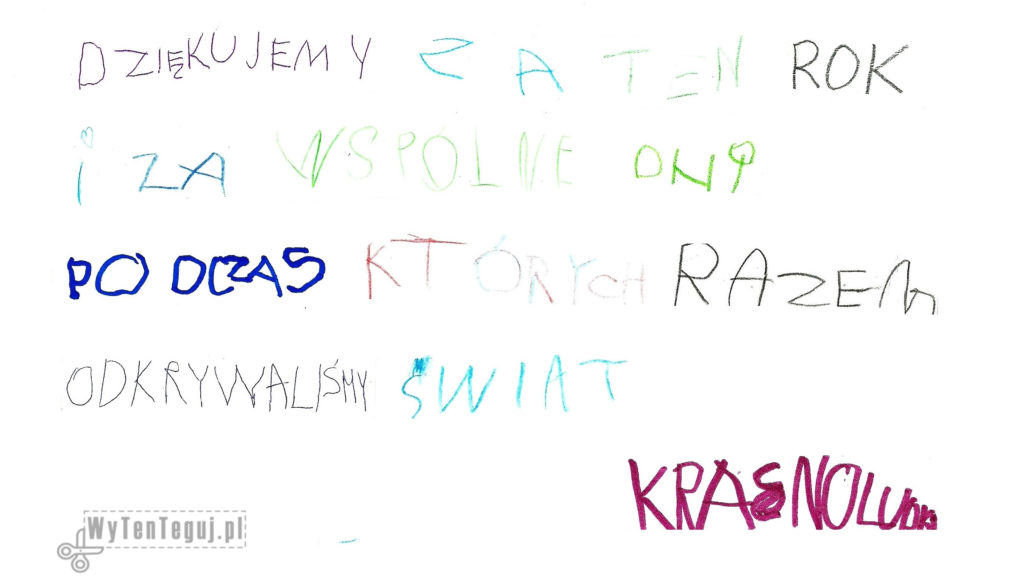
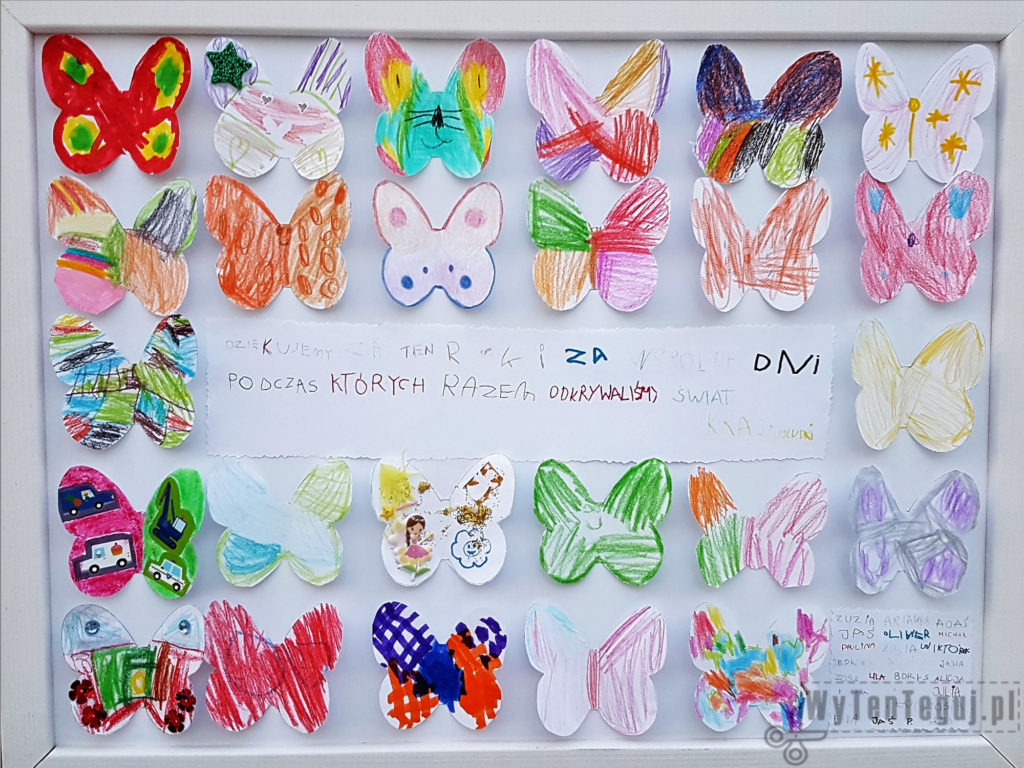
In my case, except for butterflies, each child was given one word to write from wishes sentence “Thank you for this year and for the common days during which we explored the world together” and name signature.
Collect butterflies from children and parents. This is a bit tricky task and can cause some problems, but I have succeeded so will you 🙂
Preparation of wishes and signatures (optional)
You can focus on the butterflies themselves. However, if you want to make wishes and signatures, there are 2 solutions. The first is sticking the words of wishes and signatures you received from kids. The second option, the one chosen by me, is to scan all words. Tuning it a bit in Paint – super simple graphic program and printing the whole sentence and bunch of name signatures.
Frame with butterflies
The last step crowning the work is to stick the butterflies on the frame.
First, arrange the placement of the butterflies on the frame. A lot depends on the number of butterflies. I had 25, which made my symmetrical arrangement difficult. After many tricks, I decided on a version with an empty right bottom corner, in which I finally placed the kids’ signatures.

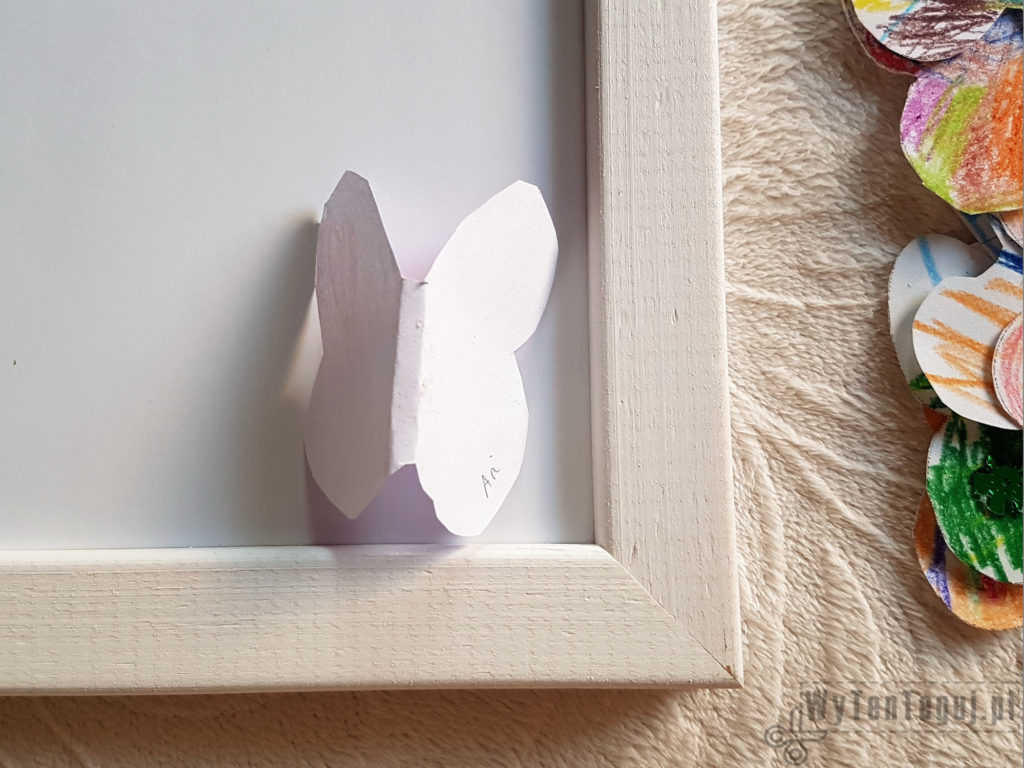
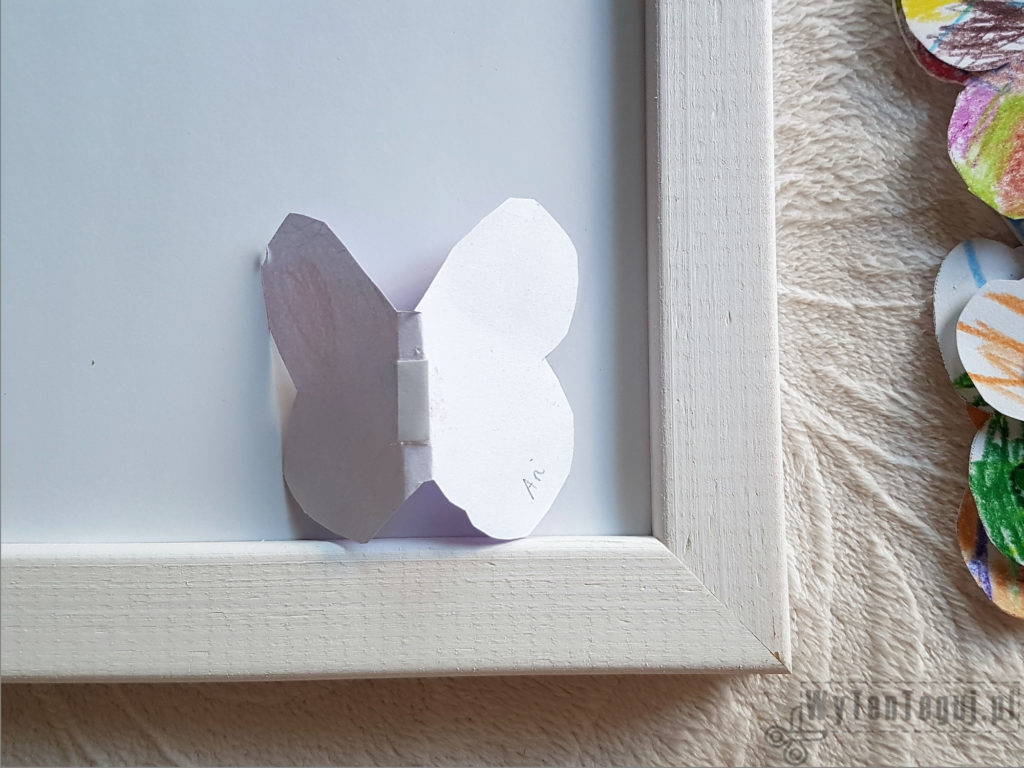
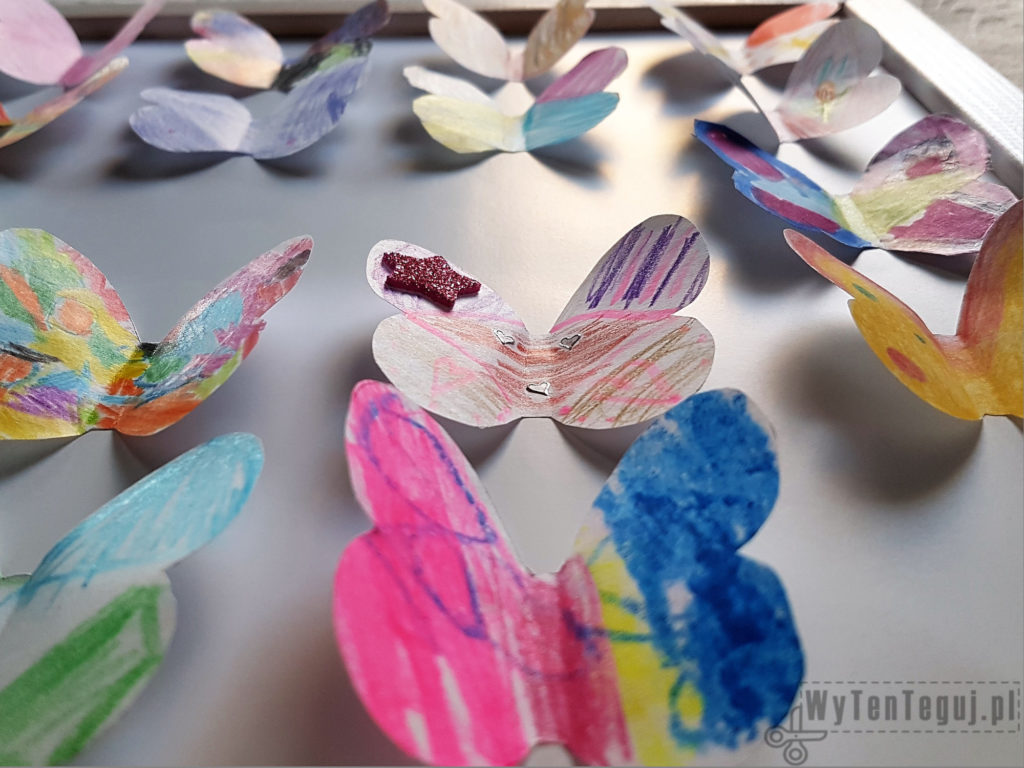
Once you’ve developed the layout, go to sticking the butterflies. Again you have 2 options: 2D and 3D frame. In the 3D option there is an additional step in which the butterfly wings should be bent along the torso and the double-sided tape should be put on the torso.
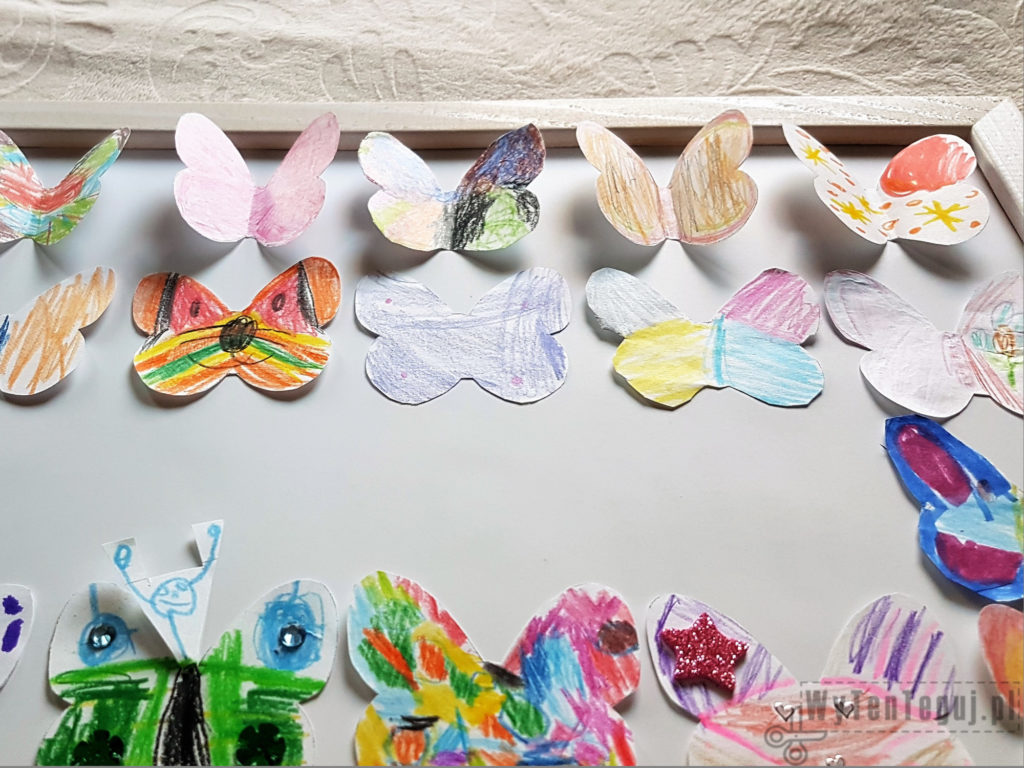
Then attach the butterflies and, if necessary, wishes and signatures.
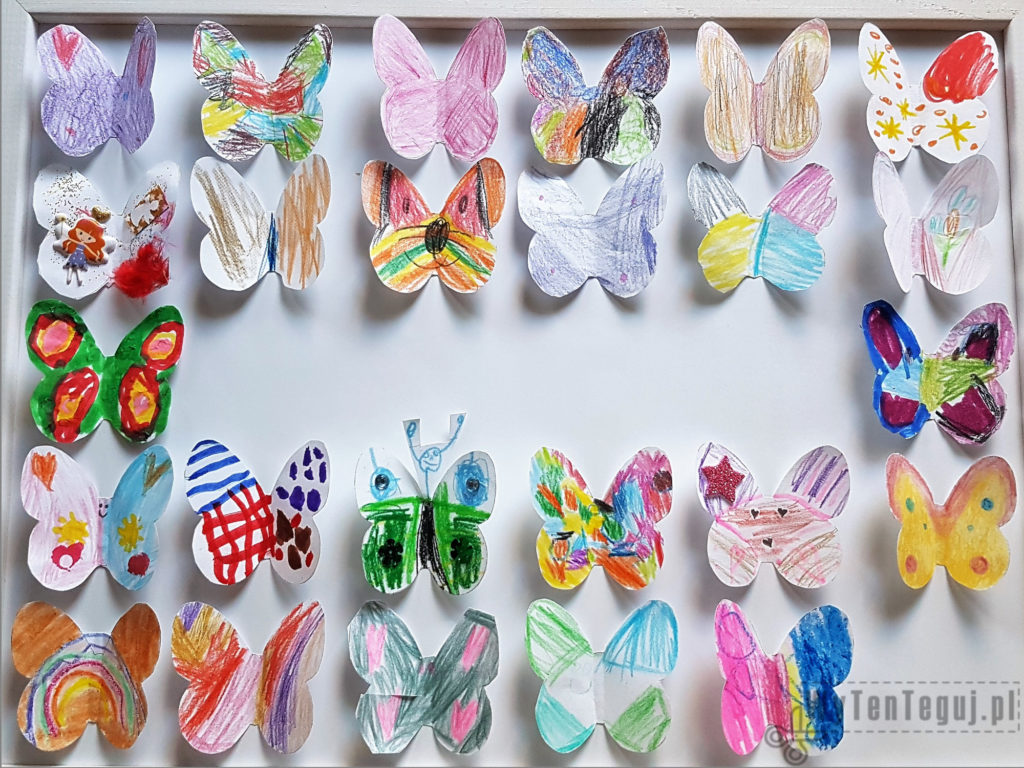
The frame is ready 🙂
If you need more frames, follow the same instruction for the others. I prepared 3 frames.

Inspiration found on Pinterest.
Check out our ideas
If you are looking for more gift ideas for a teacher, go to the Teacher’s section.
If you are looking for more ideas for playing with children, then you will find them in the DIY with children section.
Follow us in social media
If you want to be up-to-date with our newest posts, like our Facebook fanpage, follow us on Instagram, Pinterest and YouTube.
Nothing gives more satisfaction than doing something yourself. I haven’t even thought about DIY as my hobby, I’ve just done different “projects” when it was needed. Sometimes it’s a disguise for the Masquerade Party in kindergarten. Another time, cutting out the pumpkin and baking the witch’s fingers for Haloween. Or simply organizing holiday souvenirs. Now I decided to share my realizations with you. Let’s go it together!

3 thoughts on “Frame with butterflies for the teacher”